Circuit
GPT 5.6 Luna Pro · full
Reviews & generation details
Reviews
No human review yet. Unreviewed does not mean unsuccessful.
Generation context
Imported historical artifact. Its exact original instructions and lineage are not known.
Generation prompt · exact text unavailable
See the current prompt for reference. It may differ from the instructions used to generate this artifact.
Inspect original source 20,136 bytes · SHA-256 5b27a0c909d6
<!doctype html>
<html lang="en">
<head>
<meta charset="utf-8">
<meta name="viewport" content="width=device-width, initial-scale=1">
<title>Bench Notes · Stereo LM386 Amplifier</title>
<style>
:root{--bg:#09111f;--panel:#101c2e;--panel2:#14243a;--ink:#e7f0ff;--muted:#9fb0c8;--cyan:#5de4ff;--amber:#ffc857;--pink:#ff7a9c;--line:#28415e;--green:#72e0a2;--shadow:0 18px 50px #0005}*{box-sizing:border-box}html{scroll-behavior:smooth}body{margin:0;background:radial-gradient(circle at 15% 0,#163455 0,transparent 36rem),var(--bg);color:var(--ink);font:15px/1.65 Inter,ui-sans-serif,system-ui,-apple-system,Segoe UI,sans-serif}body:before{content:"";position:fixed;inset:0;pointer-events:none;opacity:.16;background-image:linear-gradient(#7cc9ff11 1px,transparent 1px),linear-gradient(90deg,#7cc9ff11 1px,transparent 1px);background-size:32px 32px}.wrap{max-width:1180px;margin:auto;padding:0 25px}header{padding:76px 0 58px;border-bottom:1px solid var(--line)}.kicker{color:var(--cyan);font-weight:800;letter-spacing:.16em;text-transform:uppercase;font-size:.76rem}.hero{display:grid;grid-template-columns:1.2fr .8fr;gap:48px;align-items:center}h1{font-size:clamp(2.5rem,7vw,5.7rem);line-height:.98;letter-spacing:-.07em;margin:17px 0 24px;max-width:750px}h2{font-size:2rem;letter-spacing:-.035em;margin:0 0 18px}h3{color:var(--cyan);margin:25px 0 8px}p{color:var(--muted);max-width:78ch}.lead{font-size:1.17rem;line-height:1.7}.badge{display:inline-flex;gap:9px;align-items:center;color:#07111e;background:var(--cyan);border-radius:99px;padding:7px 14px;font-weight:800;font-size:.82rem}.hero-card,.card{background:linear-gradient(145deg,#14263d,#0e192a);border:1px solid var(--line);border-radius:18px;box-shadow:var(--shadow)}.hero-card{padding:24px}.hero-card svg{width:100%;height:auto}.chips{display:flex;flex-wrap:wrap;gap:10px;margin-top:22px}.chip{border:1px solid #315271;border-radius:7px;padding:6px 10px;color:#c3d4e9;font-size:.82rem}main{padding:58px 0}section{margin-bottom:72px}.section-head{display:flex;gap:16px;align-items:baseline;border-bottom:1px solid var(--line);padding-bottom:12px;margin-bottom:25px}.num{font:800 1rem ui-monospace;color:var(--amber)}.grid{display:grid;grid-template-columns:repeat(2,1fr);gap:20px}.card{padding:25px}.card p{margin-top:5px}.callout{border-left:3px solid var(--amber);background:#2b271b;padding:15px 18px;color:#e3d7b0;border-radius:0 9px 9px 0;margin:20px 0}.danger{border-left-color:var(--pink);background:#2a1b29;color:#f0c2cb}.good{border-left-color:var(--green);background:#132a26;color:#bae8cf}ul,ol{padding-left:23px;color:var(--muted)}li{padding:5px 0}strong{color:var(--ink)}table{width:100%;border-collapse:collapse;background:var(--panel);border:1px solid var(--line);border-radius:14px;overflow:hidden;display:table}th{text-align:left;color:var(--cyan);background:#172a43;font-size:.78rem;text-transform:uppercase;letter-spacing:.08em}td,th{padding:14px 16px;border-bottom:1px solid var(--line);vertical-align:top}tr:last-child td{border:0}td:nth-child(2){color:var(--amber);font-weight:800;white-space:nowrap}.diagram{background:#07101d;border:1px solid #294562;border-radius:14px;padding:10px;overflow:auto}.diagram svg{display:block;width:100%;min-width:700px;height:auto}.caption{font-size:.83rem;color:var(--muted);margin:10px 3px 0}.pin-grid{display:grid;grid-template-columns:repeat(2,1fr);gap:12px}.pin{padding:13px;background:#0c1726;border:1px solid var(--line);border-radius:10px}.pin b{color:var(--amber);font-family:ui-monospace}.steps{counter-reset:step;display:grid;gap:13px}.step{display:grid;grid-template-columns:44px 1fr;gap:16px;align-items:start}.step:before{counter-increment:step;content:counter(step,decimal-leading-zero);color:#07111e;background:var(--amber);font-weight:900;border-radius:10px;padding:8px 5px;text-align:center}.step h3{margin:0;color:var(--ink)}code,pre{font-family:ui-monospace,SFMono-Regular,Menlo,monospace}pre{background:#060d17;border:1px solid var(--line);color:#c7edff;padding:18px;border-radius:11px;overflow:auto;font-size:.86rem}footer{border-top:1px solid var(--line);padding:28px 0 50px;color:var(--muted);font-size:.86rem}.legend{display:flex;gap:17px;flex-wrap:wrap;color:var(--muted);font-size:.8rem}.dot{display:inline-block;width:11px;height:11px;border-radius:50%;margin-right:5px}.red{background:#ff697c}.black{background:#7891ad}.blue{background:#62d8ff}.yellow{background:#ffc857}@media(max-width:800px){.hero,.grid{grid-template-columns:1fr}.hero{gap:25px}h1{font-size:3.5rem}.pin-grid{grid-template-columns:1fr}table{font-size:.86rem}td,th{padding:10px 9px}}
</style>
</head>
<body>
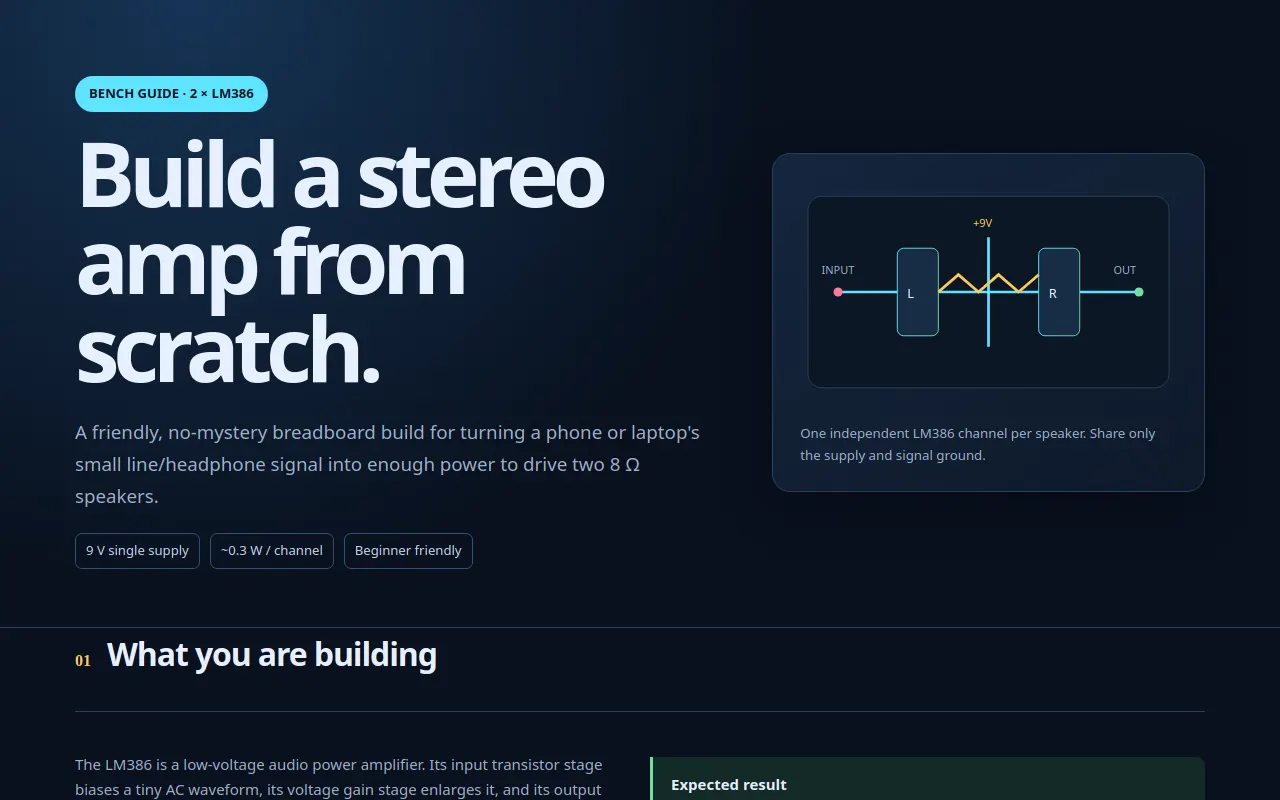
<header><div class="wrap hero"><div><span class="badge">BENCH GUIDE · 2 × LM386</span><h1>Build a stereo amp from scratch.</h1><p class="lead">A friendly, no-mystery breadboard build for turning a phone or laptop's small line/headphone signal into enough power to drive two 8 Ω speakers.</p><div class="chips"><span class="chip">9 V single supply</span><span class="chip">~0.3 W / channel</span><span class="chip">Beginner friendly</span></div></div><div class="hero-card"><svg viewBox="0 0 420 250" role="img" aria-label="two channel amplifier concept"><defs><linearGradient id="g" x1="0" x2="1"><stop stop-color="#5de4ff"/><stop offset="1" stop-color="#72e0a2"/></linearGradient></defs><rect x="12" y="20" width="396" height="210" rx="15" fill="#0b1625" stroke="#28415e"/><path d="M45 125h65m200 0h65M155 125h110M210 65v120" stroke="#5de4ff" stroke-width="3" fill="none"/><rect x="110" y="77" width="45" height="96" rx="7" fill="#172c45" stroke="url(#g)"/><rect x="265" y="77" width="45" height="96" rx="7" fill="#172c45" stroke="url(#g)"/><path d="M155 125l22-19 22 19 22-19 22 19 22-19" stroke="#ffc857" fill="none" stroke-width="3"/><circle cx="45" cy="125" r="5" fill="#ff7a9c"/><circle cx="375" cy="125" r="5" fill="#72e0a2"/><text x="121" y="132" fill="#e7f0ff" font-size="14">L</text><text x="276" y="132" fill="#e7f0ff" font-size="14">R</text><text x="27" y="105" fill="#9fb0c8" font-size="12">INPUT</text><text x="347" y="105" fill="#9fb0c8" font-size="12">OUT</text><text x="193" y="54" fill="#ffc857" font-size="12">+9V</text></svg><div class="caption">One independent LM386 channel per speaker. Share only the supply and signal ground.</div></div></div></header>
<main class="wrap">
<section id="intro"><div class="section-head"><span class="num">01</span><h2>What you are building</h2></div><div class="grid"><div><p>The LM386 is a low-voltage audio power amplifier. Its input transistor stage biases a tiny AC waveform, its voltage gain stage enlarges it, and its output stage supplies current to a speaker. The output is AC-coupled so the speaker does not receive the chip's DC bias.</p><p>There is no “stereo LM386” in this build: <strong>stereo means two mono amplifiers</strong>. The left and right channels have separate inputs, output capacitors, and speakers; they share the 9 V rails.</p></div><div class="callout good"><strong>Expected result</strong><br>Clean speech and music at comfortable tabletop volume. This is a learning amplifier, not a hi-fi power stage: keep the source moderate and use 8 Ω speakers rated for at least 0.5 W.</div></div></section>
<section id="safety"><div class="section-head"><span class="num">02</span><h2>Safety & prerequisites</h2></div><div class="grid"><div class="card"><h3>Before you touch power</h3><ul><li>Use only a regulated or fresh <strong>9 V DC</strong> source; never connect mains voltage to a breadboard.</li><li>Power off while moving wires. Confirm polarity and continuity with a multimeter first.</li><li>Electrolytic capacitors are polarized: the stripe marks negative. A reversed part can heat, vent, or burst.</li><li>Keep volume low when testing. Do not short the LM386 output or connect headphones directly.</li></ul></div><div class="card"><h3>Workbench kit</h3><ul><li>Solderless breadboard and insulated jumper wires; wire cutters/strippers.</li><li>Digital multimeter (DC volts and continuity). Soldering iron is optional.</li><li>Phone, laptop, or audio generator with a 3.5 mm cable/splitter.</li><li>Eye protection and a clear, well-lit, static-safe work area.</li></ul><p>Know the difference between <strong>polarity</strong> (+/−), a <strong>node</strong> (electrically common holes), and a <strong>rail</strong> (long power bus). Breadboard center channels are not connected across the gap.</p></div></div></section>
<section id="parts"><div class="section-head"><span class="num">03</span><h2>Complete parts list</h2></div><table><thead><tr><th>Component / part number</th><th>Qty.</th><th>Purpose / role</th></tr></thead><tbody><tr><td>LM386N-1 (or LM386-compatible, DIP-8)</td><td>2</td><td>One low-voltage power amplifier IC for left and right.</td></tr><tr><td>10 µF electrolytic, 16 V or higher</td><td>2</td><td>Input coupling; blocks source DC (CIN-L / CIN-R).</td></tr><tr><td>220 µF electrolytic, 16 V or higher</td><td>2</td><td>Output coupling; blocks IC output DC (COUT-L / COUT-R).</td></tr><tr><td>100 nF ceramic + 220 µF electrolytic</td><td>1 each</td><td>Supply bypass: fast noise shunt plus bulk smoothing.</td></tr><tr><td>10 kΩ audio/log potentiometer, dual-gang</td><td>1</td><td>One shaft controls left and right volume. Two single 10 kΩ pots also work.</td></tr><tr><td>8 Ω, ≥0.5 W speaker</td><td>2</td><td>Left/right loads; observe the output capacitor connection.</td></tr><tr><td>9 V battery + snap, or regulated 9 V DC supply</td><td>1</td><td>Single-ended power. Battery is safest for first test.</td></tr><tr><td>Full-size solderless breadboard + jumper wire kit</td><td>1 + 1</td><td>Interconnects the circuit and keeps both channels serviceable.</td></tr><tr><td>3.5 mm stereo plug/breakout (or two RCA inputs)</td><td>1</td><td>Provides L, R, and common signal ground.</td></tr></tbody></table></section>
<section id="diagrams"><div class="section-head"><span class="num">04</span><h2>Circuit diagrams</h2></div><div class="diagram"><svg viewBox="0 0 1000 430" role="img" aria-label="schematic for two LM386 channels"><defs><marker id="arrow" markerWidth="8" markerHeight="8" refX="7" refY="4" orient="auto"><path d="M0 0L8 4L0 8z" fill="#5de4ff"/></marker></defs><rect width="1000" height="430" fill="#07101d"/><g font-family="ui-monospace,monospace" font-size="15" fill="#e7f0ff" stroke-linecap="round"><text x="35" y="30" fill="#ffc857" font-weight="bold">SCHEMATIC · LEFT AND RIGHT ARE IDENTICAL</text><path d="M70 105h70m-35 0v70m-25 0h50M105 175v46" stroke="#7891ad" stroke-width="3"/><text x="54" y="88" fill="#5de4ff">L IN</text><text x="75" y="245" fill="#9fb0c8">GND</text><path d="M140 105l20-13m-20 13l20 13" stroke="#ffc857" stroke-width="3"/><text x="137" y="77" fill="#ffc857">10µF</text><path d="M180 105h85" stroke="#5de4ff" stroke-width="3"/><path d="M220 105v-25m-10 0h20m-20 8h20M220 105v25m-10 0h20" stroke="#ffc857" stroke-width="3"/><text x="232" y="82" fill="#ffc857">10k VOL</text><path d="M265 105h55" stroke="#5de4ff" stroke-width="3"/><path d="M320 105l40-22v44z" fill="#142b43" stroke="#5de4ff" stroke-width="3"/><text x="340" y="108">U1</text><text x="328" y="76" fill="#9fb0c8" font-size="12">3</text><text x="328" y="145" fill="#9fb0c8" font-size="12">2→GND</text><path d="M360 105h75" stroke="#5de4ff" stroke-width="3"/><path d="M400 105v-55m-10 0h20" stroke="#ff697c" stroke-width="3"/><text x="380" y="39" fill="#ff697c">+9V</text><path d="M435 105l28-15m-28 15l28 15" stroke="#ffc857" stroke-width="3"/><text x="437" y="145" fill="#ffc857">+ 220µF −</text><path d="M491 105h85" stroke="#72e0a2" stroke-width="3"/><path d="M576 105q18-25 36 0t36 0t36 0" fill="none" stroke="#72e0a2" stroke-width="3"/><text x="615" y="78" fill="#72e0a2">8Ω L</text><path d="M660 105v60m-25 0h50m-25 0v45" stroke="#7891ad" stroke-width="3"/><text x="646" y="245" fill="#9fb0c8">GND</text><path d="M70 310h70m-35 0v70m-25 0h50M105 380v25" stroke="#7891ad" stroke-width="3"/><text x="53" y="293" fill="#5de4ff">R IN</text><path d="M140 310l20-13m-20 13l20 13M180 310h85M265 310h55M320 310l40-22v44zM360 310h75M400 310v-55m-10 0h20M435 310l28-15m-28 15l28 15M491 310h85M576 310q18-25 36 0t36 0t36 0M660 310v60m-25 0h50m-25 0v35" fill="none" stroke="#5de4ff" stroke-width="3"/><path d="M140 310l20-13m-20 13l20 13M435 310l28-15m-28 15l28 15" stroke="#ffc857" stroke-width="3"/><path d="M400 255h0"/><text x="137" y="282" fill="#ffc857">10µF</text><text x="437" y="350" fill="#ffc857">+ 220µF −</text><text x="615" y="283" fill="#72e0a2">8Ω R</text><text x="40" y="425" fill="#9fb0c8" font-size="13">LM386: pin 1/8 open (gain 20) · pin 4 GND · pin 6 +9V · pin 5 OUT · pin 2 GND</text></g></svg><div class="caption">For each channel, the capacitor “+” faces the LM386 output. Grounds, including both speaker returns and source sleeve, join the negative rail.</div></div>
<div style="height:20px"></div><div class="diagram"><svg viewBox="0 0 1000 350" role="img" aria-label="breadboard wiring guide"><rect width="1000" height="350" fill="#07101d"/><g font-family="ui-monospace,monospace"><text x="28" y="29" fill="#ffc857" font-size="15" font-weight="bold">BREADBOARD MAP · MIRROR THE TWO CHANNELS</text><rect x="45" y="57" width="910" height="240" rx="9" fill="#d8dde2"/><rect x="475" y="57" width="50" height="240" fill="#9ca8b2"/><path d="M63 78h390M547 78h390M63 278h390M547 278h390" stroke="#d34a55" stroke-width="5"/><path d="M63 91h390M547 91h390M63 265h390M547 265h390" stroke="#364451" stroke-width="5"/><text x="67" y="73" fill="#a92736">+9V RED RAIL</text><text x="67" y="292" fill="#263744">0V BLACK/BLUE RAIL</text><rect x="185" y="119" width="125" height="100" rx="7" fill="#172b43" stroke="#5de4ff" stroke-width="3"/><rect x="690" y="119" width="125" height="100" rx="7" fill="#172b43" stroke="#5de4ff" stroke-width="3"/><text x="211" y="174" fill="#e7f0ff" font-size="18">U1 · LM386</text><text x="716" y="174" fill="#e7f0ff" font-size="18">U2 · LM386</text><g stroke-width="4" fill="none"><path d="M220 119V91M280 119V91M220 219v46M280 219v46M725 119V91M785 119V91M725 219v46M785 219v46" stroke="#ff697c"/><path d="M200 119V91M300 119V91M200 219v46M300 219v46M705 119V91M805 119V91M705 219v46M805 219v46" stroke="#7891ad"/><path d="M145 169h40M310 169h70M650 169h40M815 169h70" stroke="#5de4ff"/></g><circle cx="130" cy="169" r="14" fill="#ffc857"/><circle cx="870" cy="169" r="14" fill="#ffc857"/><text x="101" y="145" fill="#ffc857" font-size="13">L IN</text><text x="850" y="145" fill="#ffc857" font-size="13">R IN</text><path d="M380 169h42m-7-8 10 8-10 8M610 169h42m-7-8 10 8-10 8" stroke="#72e0a2" stroke-width="3" fill="none"/><text x="420" y="151" fill="#72e0a2" font-size="12">COUT→speaker</text><text x="550" y="151" fill="#72e0a2" font-size="12">COUT→speaker</text><text x="395" y="323" fill="#9fb0c8" font-size="13">Power both ICs from the same rails; all bottom-rail grounds are common.</text></g></svg><div class="legend"><span><i class="dot red"></i>+9 V</span><span><i class="dot black"></i>ground / return</span><span><i class="dot blue"></i>signal</span><span><i class="dot yellow"></i>pot or connector</span></div></div></section>
<section id="pins"><div class="section-head"><span class="num">05</span><h2>Pin map & assembly</h2></div><div class="pin-grid"><div class="pin"><b>LM386 DIP-8, notch up</b><br>1 = Gain · 2 = IN− · 3 = IN+ · 4 = GND<br>5 = OUT · 6 = VS · 7 = bypass · 8 = Gain</div><div class="pin"><b>Potentiometer</b><br>Outer lug 1 → source ground; outer lug 3 → source L/R; center wiper → 10 µF input capacitor → pin 3. Reverse outer lugs if clockwise rotation feels backward.</div></div><div class="steps"><div class="step"><div><h3>Place both ICs</h3><p>With each DIP notch or dot facing the same direction, straddle the breadboard center gap. Leave a few columns between U1 and U2. Do not trust the diagram's scale; count the DIP pins from the notch.</p></div></div><div class="step"><div><h3>Create rails and ground</h3><p>Connect the battery red lead to the red rail and black lead to the blue/black rail. Link split rail sections with jumpers if your breadboard breaks them in the middle. Connect pin 4 of both ICs to ground and pin 6 of both to +9 V.</p></div></div><div class="step"><div><h3>Bypass the supply</h3><p>Put the 100 nF ceramic directly between +9 V and ground near the ICs. Add the 220 µF bulk capacitor across the same rails: positive to +9 V, stripe/negative to ground. Keep these wires short.</p></div></div><div class="step"><div><h3>Wire volume and inputs</h3><p>Connect the stereo jack sleeve to ground. Feed its L and R tips to the two matching potentiometer outer lugs. Ground the other outer lug of each section. Route each wiper through its own 10 µF capacitor to that channel's pin 3; capacitor positive toward pin 3. Tie each pin 2 to ground. Leave pins 1 and 8 open for default gain 20.</p></div></div><div class="step"><div><h3>Add the output stage</h3><p>For each channel, connect pin 5 to the <strong>positive</strong> side of a 220 µF capacitor. Connect its negative side to the speaker positive terminal. Connect speaker negative to the ground rail. Never omit the output capacitor on this single-supply circuit.</p></div></div><div class="step"><div><h3>Final inspection</h3><p>Trace every wire against the pin map, check for adjacent-rail jumpers, and make sure no bare speaker wires touch. Set volume fully down, plug in the source, then connect the 9 V battery last.</p></div></div></div></section>
<section id="test"><div class="section-head"><span class="num">06</span><h2>Testing & troubleshooting</h2></div><div class="grid"><div class="card"><h3>Safe first power-up</h3><ol><li>With battery disconnected, use continuity mode to confirm ground is common and +9 V is not shorted to ground.</li><li>With no audio connected, power up and measure pin 6 to ground: expect about 9 V. Measure pin 5: it may sit near mid-supply; this is normal.</li><li>Measure after each output capacitor: DC should be close to 0 V. If not, disconnect power and recheck polarity/pin numbering.</li><li>Connect speakers and source, start at minimum volume, and increase slowly.</li></ol></div><div class="card"><h3>Symptom → likely fix</h3><ul><li><strong>No sound:</strong> verify IC orientation, pin 3 signal, pin 4 ground, pin 6 supply, and that the source sleeve is grounded.</li><li><strong>One channel only:</strong> swap inputs/speakers to isolate the fault; inspect the corresponding pot wiper and output capacitor.</li><li><strong>Hum:</strong> shorten ground/power wires, use the battery, and keep input wires away from output wires.</li><li><strong>Whine or squeal:</strong> output is feeding input; separate wires, use the 100 nF bypass, and avoid speaker-to-pot wiring loops.</li><li><strong>Hot IC or bulging capacitor:</strong> power off immediately; suspect reversed electrolytic, shorted output, wrong rail, or a miscounted pin.</li><li><strong>Distortion:</strong> lower source/volume, confirm 8 Ω load, and remember a 9 V LM386 is a small speaker amp.</li></ul></div></div><div class="callout danger"><strong>Stop condition:</strong> any burning smell, rapidly warming IC, leaking capacitor, or unexpected battery drain means disconnect power immediately. Find the short before trying again.</div><pre aria-label="quick wiring checklist">U1: 2→GND 3←CIN-L←L wiper 4→GND 5→(+ COUT-L −)→SPK-L+ 6→+9V
U2: 2→GND 3←CIN-R←R wiper 4→GND 5→(+ COUT-R −)→SPK-R+ 6→+9V
Both: pin 1/8 open · speaker negatives, jack sleeve, and supply − → common GND</pre></section>
</main><footer><div class="wrap">BENCH NOTES / AUDIO 01 · Verify the exact LM386 datasheet for your manufacturer and package before wiring. Components and speaker ratings vary.</div></footer>
</body></html>
<!-- agent-meta {"model":"openai/gpt-5.6-luna-pro","provider":"openrouter","persona":"full","sessionId":"965f67d9-7cc4-4d7b-b515-002c0b780d4f","tokensIn":134405,"tokensOut":9547,"tokensTotal":143952,"turns":4,"toolCalls":4,"failedToolCalls":0,"timestamp":"2026-07-31T00:05:15.604Z"} -->