Circuit
GPT 5.6 terra Pro · full
Reviews & generation details
Reviews
No human review yet. Unreviewed does not mean unsuccessful.
Generation context
Imported historical artifact. Its exact original instructions and lineage are not known.
Generation prompt · exact text unavailable
See the current prompt for reference. It may differ from the instructions used to generate this artifact.
Inspect original source 23,061 bytes · SHA-256 90e284b0858b
<!doctype html>
<html lang="en">
<head>
<meta charset="utf-8"><meta name="viewport" content="width=device-width,initial-scale=1">
<title>Breadboard Stereo Amplifier — LM386 Build Guide</title>
<style>
:root{--bg:#081018;--panel:#0e1b27;--panel2:#122536;--line:#244055;--ink:#e8f3f8;--muted:#9cb4c4;--cyan:#32d6d1;--blue:#5ba9ff;--gold:#ffc85a;--red:#ff6b73;--green:#85e6ac;--shadow:0 14px 35px #0007}*{box-sizing:border-box}html{scroll-behavior:smooth}body{margin:0;background:radial-gradient(ellipse at 15% 0%,#12324a 0%,transparent 30%),var(--bg);color:var(--ink);font:16px/1.6 Inter,ui-sans-serif,system-ui,-apple-system,"Segoe UI",sans-serif}a{color:var(--cyan)}.shell{max-width:1160px;margin:auto;padding:0 24px}header{padding:75px 0 48px;border-bottom:1px solid var(--line);position:relative;overflow:hidden}.grid-bg{position:absolute;inset:0;opacity:.24;background-image:linear-gradient(#2d5c7035 1px,transparent 1px),linear-gradient(90deg,#2d5c7035 1px,transparent 1px);background-size:36px 36px;mask-image:linear-gradient(to bottom,#000,transparent)}.eyebrow{position:relative;color:var(--cyan);letter-spacing:.16em;text-transform:uppercase;font-size:.75rem;font-weight:800}.title{position:relative;max-width:850px;font-size:clamp(2.45rem,6vw,5.4rem);line-height:1.02;letter-spacing:-.06em;margin:13px 0 22px}.title span{color:var(--cyan)}.lede{position:relative;max-width:760px;font-size:1.14rem;color:#c3d4df}.chips{position:relative;display:flex;flex-wrap:wrap;gap:10px;margin-top:25px}.chip{padding:6px 11px;border:1px solid #356078;border-radius:99px;background:#0b1d2a;color:#b9d6e5;font:700 .76rem ui-monospace,monospace}nav{position:sticky;top:0;z-index:10;background:#081018eF;backdrop-filter:blur(12px);border-bottom:1px solid var(--line)}nav .shell{display:flex;overflow:auto;gap:3px}nav a{padding:13px 12px;text-decoration:none;color:var(--muted);font-size:.8rem;white-space:nowrap}nav a:hover{color:var(--cyan)}main{padding:40px 0 70px}section{margin:0 0 62px;scroll-margin-top:55px}.section-kicker{color:var(--cyan);font:800 .73rem ui-monospace,monospace;letter-spacing:.13em}.section-title{font-size:clamp(1.65rem,3vw,2.4rem);letter-spacing:-.035em;line-height:1.15;margin:7px 0 22px}.section-intro{color:var(--muted);max-width:850px;margin:-9px 0 25px}.card{background:linear-gradient(145deg,#102332,#0b1722);border:1px solid var(--line);border-radius:14px;box-shadow:var(--shadow)}.callout{border-left:4px solid var(--gold);padding:18px 20px;margin:20px 0;background:#2d251312;border-radius:0 10px 10px 0}.callout strong{color:var(--gold)}.warning{border-left-color:var(--red);background:#35141a29}.warning strong{color:#ff9da1}.two-col{display:grid;grid-template-columns:1fr 1fr;gap:18px}.card h3{font-size:1rem;margin:0;padding:16px 18px;border-bottom:1px solid var(--line);color:#d8eaf4}.card ul{margin:13px 16px 18px;padding-left:19px;color:var(--muted)}.checklist li{margin:7px 0}.checklist li::marker{color:var(--cyan)}table{width:100%;border-collapse:separate;border-spacing:0;overflow:hidden;border:1px solid var(--line);border-radius:12px;background:var(--panel);font-size:.92rem}th{text-align:left;background:#132b3d;color:var(--cyan);font-size:.74rem;text-transform:uppercase;letter-spacing:.1em;padding:13px 15px}td{padding:13px 15px;border-top:1px solid #203a4d;color:#bdd0db;vertical-align:top}td:first-child{color:var(--ink);font-weight:650}td:nth-child(2){color:var(--gold);font-family:ui-monospace,monospace;text-align:center;white-space:nowrap}.part-note{margin-top:13px;color:var(--muted);font-size:.9rem}code,.pin{font-family:ui-monospace,SFMono-Regular,Consolas,monospace;color:#9eece9;background:#0a1a25;border:1px solid #244355;border-radius:4px;padding:1px 5px;font-size:.88em}.diagram{padding:16px;margin:16px 0 24px;overflow:auto}.diagram figcaption{color:var(--muted);font-size:.88rem;margin:9px 4px 1px}.svgwrap{min-width:760px}.legend{display:flex;gap:15px;flex-wrap:wrap;padding:4px;color:var(--muted);font-size:.78rem}.dot{width:10px;height:10px;border-radius:50%;display:inline-block;margin-right:5px}.steps{counter-reset:steps;display:grid;gap:13px;padding:0;margin:0;list-style:none}.steps li{position:relative;counter-increment:steps;padding:17px 19px 17px 62px;background:linear-gradient(90deg,#102534,#0c1924);border:1px solid var(--line);border-radius:11px;color:#bcd0db}.steps li:before{content:counter(steps,decimal-leading-zero);position:absolute;left:16px;top:17px;font:800 .78rem ui-monospace,monospace;color:var(--cyan);border-right:1px solid var(--line);padding:5px 10px 5px 0}.steps strong{color:var(--ink)}.connection{margin-top:9px;padding:10px 12px;background:#08141d;border-radius:7px;border:1px solid #20394a;font: .8rem/1.6 ui-monospace,monospace;color:#a8dfe2}.test-grid{display:grid;grid-template-columns:1.05fr .95fr;gap:20px}.trouble{overflow:hidden}.trouble div{padding:13px 17px;border-bottom:1px solid var(--line)}.trouble div:last-child{border:0}.trouble b{display:block;color:#ffd0d2;font-size:.92rem}.trouble span{color:var(--muted);font-size:.88rem}footer{border-top:1px solid var(--line);padding:24px 0 45px;color:#7891a0;font-size:.82rem}.mono{font-family:ui-monospace,monospace;color:var(--cyan)}@media(max-width:700px){.shell{padding:0 16px}header{padding:54px 0 34px}.two-col,.test-grid{grid-template-columns:1fr}table{font-size:.8rem}th,td{padding:10px 8px}.svgwrap{min-width:720px}.title{letter-spacing:-.045em}}
</style>
</head>
<body>
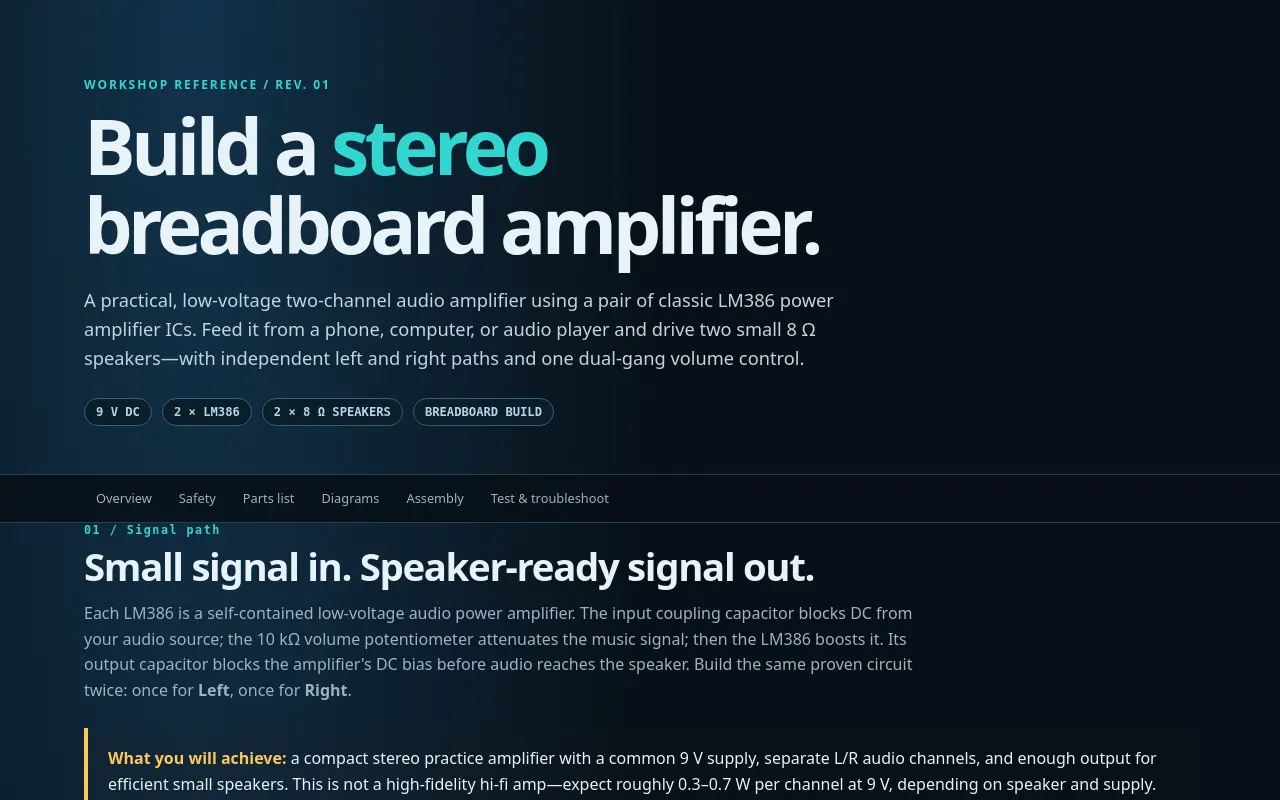
<header><div class="grid-bg"></div><div class="shell"><div class="eyebrow">Workshop reference / Rev. 01</div><h1 class="title">Build a <span>stereo</span><br>breadboard amplifier.</h1><p class="lede">A practical, low-voltage two-channel audio amplifier using a pair of classic LM386 power amplifier ICs. Feed it from a phone, computer, or audio player and drive two small 8 Ω speakers—with independent left and right paths and one dual-gang volume control.</p><div class="chips"><span class="chip">9 V DC</span><span class="chip">2 × LM386</span><span class="chip">2 × 8 Ω SPEAKERS</span><span class="chip">BREADBOARD BUILD</span></div></div></header>
<nav><div class="shell"><a href="#overview">Overview</a><a href="#safety">Safety</a><a href="#parts">Parts list</a><a href="#diagrams">Diagrams</a><a href="#assembly">Assembly</a><a href="#test">Test & troubleshoot</a></div></nav>
<main class="shell">
<section id="overview"><div class="section-kicker">01 / Signal path</div><h2 class="section-title">Small signal in. Speaker-ready signal out.</h2><p class="section-intro">Each LM386 is a self-contained low-voltage audio power amplifier. The input coupling capacitor blocks DC from your audio source; the 10 kΩ volume potentiometer attenuates the music signal; then the LM386 boosts it. Its output capacitor blocks the amplifier's DC bias before audio reaches the speaker. Build the same proven circuit twice: once for <b>Left</b>, once for <b>Right</b>.</p><div class="callout"><strong>What you will achieve:</strong> a compact stereo practice amplifier with a common 9 V supply, separate L/R audio channels, and enough output for efficient small speakers. This is not a high-fidelity hi-fi amp—expect roughly 0.3–0.7 W per channel at 9 V, depending on speaker and supply.</div></section>
<section id="safety"><div class="section-kicker">02 / Before power</div><h2 class="section-title">Safety & prerequisites</h2><div class="two-col"><article class="card"><h3>Bench discipline</h3><ul class="checklist"><li>Disconnect power whenever moving jumpers or inserting ICs.</li><li>Use only a regulated <b>9 V DC</b> source; never connect mains voltage.</li><li>Observe electrolytic capacitor polarity. A reversed capacitor can overheat or vent.</li><li>Start with volume at minimum; protect your hearing and speakers.</li><li>Keep bare leads short; inspect for rail-to-rail shorts before power-on.</li><li>Optional soldering happens only after the breadboard version is proven.</li></ul></article><article class="card"><h3>Tools & knowledge</h3><ul class="checklist"><li>Solderless breadboard and solid-core jumper wire; wire cutters/strippers.</li><li>Digital multimeter (continuity and DC volts).</li><li>9 V battery clip or regulated bench supply; audio source with 3.5 mm cable/jack.</li><li>Two 8 Ω speakers (0.5 W or greater recommended).</li><li>Know the breadboard's connected rows and split power rails; know capacitor <code>+</code>/<code>−</code> markings.</li></ul></article></div><div class="callout warning"><strong>Important:</strong> the LM386 notch/dot defines pin 1. With the notch facing up, pins count counter-clockwise: 1–4 down the left side and 5–8 up the right. Do not trust an IC's orientation by text alone.</div></section>
<section id="parts"><div class="section-kicker">03 / Bill of materials</div><h2 class="section-title">Complete parts list</h2><table><thead><tr><th>Component / part number</th><th>Qty.</th><th>Purpose in circuit</th></tr></thead><tbody><tr><td>LM386N-1 low-voltage audio power amplifier, DIP-8</td><td>2</td><td>One power amplifier IC for each stereo channel.</td></tr><tr><td>10 kΩ dual-gang audio (logarithmic) potentiometer</td><td>1</td><td>One shaft controls Left and Right volume together. Two separate 10 kΩ pots also work.</td></tr><tr><td>10 µF electrolytic capacitor, ≥16 V</td><td>4</td><td>Two input coupling capacitors and two pin 7 bypass capacitors. Observe polarity.</td></tr><tr><td>220 µF electrolytic capacitor, ≥16 V</td><td>2</td><td>Output coupling: blocks DC from each speaker.</td></tr><tr><td>100 nF ceramic capacitor</td><td>2</td><td>Local supply decoupling; suppresses high-frequency instability at each IC.</td></tr><tr><td>100 µF electrolytic capacitor, ≥16 V</td><td>1</td><td>Bulk decoupling across the 9 V rail near the ICs.</td></tr><tr><td>3.5 mm stereo TRS jack / breakout</td><td>1</td><td>Audio input: tip = Left, ring = Right, sleeve = ground.</td></tr><tr><td>8 Ω speakers, ≥0.5 W</td><td>2</td><td>Left and Right audio transducers.</td></tr><tr><td>9 V battery + clip or regulated 6–9 V DC supply</td><td>1</td><td>Common power source. A bench supply with current limit is ideal.</td></tr><tr><td>Solderless breadboard & solid-core jumpers</td><td>1 set</td><td>Prototype platform and all interconnections.</td></tr></tbody></table><p class="part-note">Optional refinement: add a <span class="pin">10 Ω + 47 nF series network</span> from each LM386 output pin 5 to ground (Zobel network) if long speaker leads cause instability. For this beginner build, keep the gain pins 1 and 8 unconnected (internal gain = 20).</p></section>
<section id="diagrams"><div class="section-kicker">04 / Reference drawings</div><h2 class="section-title">Wire one channel twice</h2><p class="section-intro">The schematic at left is the electrical truth. The breadboard map is a placement guide—actual row labels vary by board. Duplicate every cyan Left-channel connection for the amber Right channel.</p>
<figure class="diagram card"><div class="svgwrap"><svg viewBox="0 0 1000 455" width="100%" role="img" aria-label="Stereo LM386 schematic"><style>.s{stroke:#a9c8d7;stroke-width:2.4;fill:none}.wire{stroke:#32d6d1;stroke-width:3;fill:none}.rwire{stroke:#ffc85a;stroke-width:3;fill:none}.g{stroke:#6f91a2;stroke-width:2;fill:none}.txt{fill:#dcebf1;font:14px system-ui}.small{fill:#9cb4c4;font:12px system-ui}.lab{fill:#32d6d1;font:bold 13px system-ui}.rlab{fill:#ffc85a;font:bold 13px system-ui}.ic{fill:#142d3d;stroke:#5ba9ff;stroke-width:2}</style><path class="s" d="M55 48H950M55 414H950"/><text class="lab" x="58" y="35">+9 V</text><text class="small" x="58" y="438">0 V / GND (common)</text><text class="txt" x="60" y="90">3.5 mm TRS INPUT</text><path class="s" d="M90 115v48m25-48v48m25-48v48M78 163h74"/><text class="small" x="77" y="184">T=L R=R S=GND</text><path class="wire" d="M90 115h75m0 0v12h18v50h32"/><path class="rwire" d="M115 115h165v12h18v50h32"/><path class="g" d="M140 163v251"/><rect x="215" y="158" width="58" height="72" rx="5" class="ic"/><text class="lab" x="223" y="181">10k</text><text class="small" x="222" y="201">L VOL</text><path class="wire" d="M215 185h-28m58 35v47h-20v40h54"/><path class="wire" d="M273 195h35"/><path class="s" d="M308 195l13-12 13 24 13-24 13 24 13-24 13 12"/><text class="small" x="317" y="174">10µF (+ toward IC)</text><path class="wire" d="M373 195h47"/><rect x="420" y="135" width="150" height="190" rx="10" class="ic"/><text class="txt" x="457" y="174">LM386</text><text class="lab" x="462" y="194">LEFT</text><text class="small" x="433" y="217">3 IN+ 6 +V</text><text class="small" x="433" y="239">2 GND 5 OUT</text><text class="small" x="433" y="261">4 GND 7 BYP</text><path class="wire" d="M420 195h-23"/><path class="wire" d="M570 195h65"/><path class="s" d="M635 195l13-12 13 24 13-24 13 24 13-24 13 12"/><path class="wire" d="M687 195h50"/><circle cx="767" cy="195" r="30" class="s"/><path class="s" d="M752 182l25 26m0-26l-25 26"/><text class="txt" x="735" y="244">L 8Ω</text><text class="small" x="605" y="172">220µF (+ toward IC)</text><path class="wire" d="M530 135V48M450 325v89m30-89v89"/><path class="wire" d="M540 275h35v55h-20v84"/><text class="small" x="582" y="322">10µF</text><text class="small" x="585" y="338">+ at pin 7</text><path class="rwire" d="M310 127v-8h18v49h32"/><rect x="215" y="266" width="58" height="72" rx="5" class="ic"/><text class="rlab" x="223" y="289">10k</text><text class="small" x="222" y="309">R VOL</text><path class="rwire" d="M273 303h35"/><path class="s" d="M308 303l13-12 13 24 13-24 13 24 13-24 13 12"/><path class="rwire" d="M373 303h47"/><rect x="790" y="135" width="150" height="190" rx="10" class="ic"/><text class="txt" x="825" y="174">LM386</text><text class="rlab" x="829" y="194">RIGHT</text><text class="small" x="803" y="217">3 IN+ 6 +V</text><text class="small" x="803" y="239">2 GND 5 OUT</text><text class="small" x="803" y="261">4 GND 7 BYP</text><path class="rwire" d="M790 303H670v-108h120"/><path class="rwire" d="M900 135V48M820 325v89m30-89v89"/><text class="small" x="318" y="282">10µF (+ toward IC)</text><text class="small" x="625" y="74">Place 100nF ceramic + 100µF bulk directly across +9V and GND</text></svg></div><figcaption><b>Schematic:</b> pins 2 and 4 of each IC go to ground; pin 6 goes to +9 V; pin 3 is input; pin 5 drives the output capacitor and speaker; pin 7 is bypassed to ground. Pins 1 and 8 stay open.</figcaption></figure>
<figure class="diagram card"><div class="svgwrap"><svg viewBox="0 0 1000 400" width="100%" role="img" aria-label="Breadboard wiring map"><style>.b{fill:#e7d8b5;stroke:#aa9978;stroke-width:2}.hole{fill:#735f4b}.railp{stroke:#ff6873;stroke-width:4}.railg{stroke:#5b9ac2;stroke-width:4}.j{stroke:#32d6d1;stroke-width:4;fill:none}.a{stroke:#ffc85a;stroke-width:4;fill:none}.x{fill:#122b3b;stroke:#70b5d0;stroke-width:2}.t{fill:#e8f3f8;font:14px system-ui}.sm{fill:#8ea9b8;font:12px system-ui}.pin{fill:#dfeaf0;font:11px monospace}</style><rect x="80" y="45" width="820" height="285" rx="12" class="b"/><path class="railp" d="M104 75h772M104 96h772"/><path class="railg" d="M104 302h772M104 281h772"/><text class="t" x="45" y="80">+9V</text><text class="t" x="48" y="307">GND</text><path d="M110 120h760M110 250h760" stroke="#baaa89" stroke-width="1" stroke-dasharray="4 4"/>
<g class="hole"><circle cx="160" cy="145" r="4"/><circle cx="190" cy="145" r="4"/><circle cx="220" cy="145" r="4"/><circle cx="250" cy="145" r="4"/><circle cx="160" cy="220" r="4"/><circle cx="190" cy="220" r="4"/><circle cx="220" cy="220" r="4"/><circle cx="250" cy="220" r="4"/><circle cx="730" cy="145" r="4"/><circle cx="760" cy="145" r="4"/><circle cx="790" cy="145" r="4"/><circle cx="820" cy="145" r="4"/><circle cx="730" cy="220" r="4"/><circle cx="760" cy="220" r="4"/><circle cx="790" cy="220" r="4"/><circle cx="820" cy="220" r="4"/></g>
<rect x="305" y="116" width="128" height="138" rx="7" class="x"/><path d="M369 116v138" stroke="#d9e8ec" stroke-width="3"/><text class="t" x="326" y="145">LM386</text><text class="sm" x="325" y="165">LEFT · notch ↑</text><text class="pin" x="315" y="187">1 2 3 4</text><text class="pin" x="377" y="187">8 7 6 5</text><rect x="570" y="116" width="128" height="138" rx="7" class="x"/><path d="M634 116v138" stroke="#d9e8ec" stroke-width="3"/><text class="t" x="587" y="145">LM386</text><text class="sm" x="586" y="165">RIGHT · notch ↑</text><text class="pin" x="580" y="187">1 2 3 4</text><text class="pin" x="642" y="187">8 7 6 5</text>
<path class="j" d="M405 176v-80H405V75M390 200v81H390V302M420 200v81H420V302M433 200h65"/><path class="j" d="M330 200h-70v-45H185"/><path class="j" d="M433 214h55v63H485"/><path class="a" d="M670 176V96H670V75M655 200v81H655V302M685 200v81H685V302M698 200h100"/><path class="a" d="M595 200h-58v-45H475"/><path class="a" d="M698 214h70v63H765"/>
<rect x="145" y="345" width="125" height="36" rx="6" class="x"/><text class="sm" x="157" y="368">TRS → dual 10k pot</text><rect x="735" y="345" width="120" height="36" rx="6" class="x"/><text class="sm" x="751" y="368">220µF → speakers</text><text class="sm" x="302" y="45">Keep ICs straddling the center trench. Put 100nF capacitors from each pin 6 row to GND.</text></svg></div><figcaption><b>Breadboard map:</b> use the colored traces as connectivity, not fixed coordinates. The center gap isolates the IC pin rows; join rails across a split breadboard with jumpers.</figcaption></figure><div class="legend"><span><i class="dot" style="background:#32d6d1"></i>Left-channel wiring</span><span><i class="dot" style="background:#ffc85a"></i>Right-channel wiring</span><span><i class="dot" style="background:#ff6873"></i>+9 V rail</span><span><i class="dot" style="background:#5b9ac2"></i>Ground rail</span></div></section>
<section id="assembly"><div class="section-kicker">05 / Build sequence</div><h2 class="section-title">Assembly, one deliberate connection at a time</h2><ol class="steps"><li><strong>Prepare the rails.</strong> With power disconnected, designate one breadboard rail <code>+9V</code> and one <code>GND</code>. If each rail is split in the middle, bridge its two halves with jumpers. Connect the battery clip or supply leads only after step 9.</li><li><strong>Place both LM386s.</strong> Insert each DIP-8 across the center trench, notch facing the same direction. Leave room around every pin. Treat the first IC as Left and the second as Right. Do not connect pins <code>1</code> or <code>8</code>.</li><li><strong>Wire power and ground.</strong> For <em>each</em> LM386, connect pin <code>6 → +9V</code>. Connect pins <code>2 → GND</code> and <code>4 → GND</code>. These three connections are required before anything else.</li><li><strong>Decouple the supply locally.</strong> Place one 100 nF ceramic capacitor from each IC's pin 6 row to GND, with very short leads. Add the 100 µF bulk capacitor across +9 V and GND near the ICs: its <code>+</code> goes to +9 V and <code>−</code> to GND.</li><li><strong>Bypass the LM386 reference.</strong> Connect a 10 µF electrolytic from pin <code>7</code> of each IC to GND. The capacitor <code>+</code> lead goes to pin 7; its <code>−</code> stripe goes to GND. This reduces hum and noise.</li><li><strong>Install the dual-gang volume control.</strong> Connect the TRS jack sleeve to GND. Connect tip (Left) to the outer input lug of the L potentiometer section; ring (Right) to the equivalent R lug. Connect the opposite outer lug of both sections to GND. The two center wipers are your adjustable L/R outputs.</li><li><strong>Couple each input.</strong> Run each potentiometer wiper through a 10 µF capacitor to its corresponding LM386 pin <code>3</code>. Point each capacitor's positive lead toward pin 3. The audio source and amplifier must share the same GND rail.</li><li><strong>Add the speaker outputs.</strong> From each pin <code>5</code>, connect the <code>+</code> lead of a 220 µF capacitor. Connect its <code>−</code> lead to that channel's speaker positive terminal. Connect each speaker negative terminal to GND. Keep Left and Right speaker signal wires separate.</li><li><strong>Inspect, then energize.</strong> Turn the pot fully down. Check every electrolytic polarity and verify with a meter that +9 V and GND are not shorted. Power from a current-limited supply if available (start at 100–200 mA limit). Then play a low-volume stereo test track and slowly raise the volume.</li></ol></section>
<section id="test"><div class="section-kicker">06 / Commissioning</div><h2 class="section-title">Test method & troubleshooting</h2><div class="test-grid"><article class="card"><h3>Safe first-power test</h3><ol class="checklist" style="padding:4px 28px 16px"><li>With no audio connected, measure from pin 6 to GND: expect roughly 9 V.</li><li>Measure pin 5 to GND: it will sit around half the supply (often 4–5 V). This is normal <b>before</b> the output capacitor.</li><li>Measure on the speaker side of each 220 µF cap: it should be near 0 V DC. If not, power down and inspect polarity/wiring.</li><li>Connect source at minimum volume; start low. Confirm Left and Right by playing a channel-identification track.</li><li>If an IC becomes hot, disconnect power immediately—there is likely a wiring error or short.</li></ol></article><article class="card trouble"><h3>Symptom → likely correction</h3><div><b>No sound</b><span>Verify TRS sleeve is common GND, pot wiper reaches pin 3 through 10 µF, and pin 6 has +9 V.</span></div><div><b>Hum or buzz</b><span>Shorten input wires, ensure all grounds meet at the ground rail, add/check pin 7 and supply bypass capacitors.</span></div><div><b>One channel missing</b><span>Swap speakers first. Then compare that IC's pin 3, 5, 6, 2/4 connections to the working channel.</span></div><div><b>Distortion / squeal</b><span>Lower input level, use a stronger supply, keep speaker leads away from input wires, and confirm 100 nF decouplers are close to pin 6.</span></div><div><b>Hot IC or dead battery</b><span>Immediately remove power. Check for reversed electrolytics, pin 5 shorted to GND, or +9 V/GND rails accidentally bridged.</span></div></article></div><div class="callout"><strong>Final diagnostic rule:</strong> build and verify one channel first if you are new to breadboards. Once it plays cleanly, duplicate its wiring for the second channel. A working channel is the best possible reference.</div></section>
</main><footer><div class="shell"><span class="mono">LM386 STEREO / BREADBOARD NOTES</span> · For educational low-voltage audio projects. Always consult the specific LM386 datasheet for your manufacturer and package.</div></footer>
</body></html>
<!-- agent-meta {"model":"openai/gpt-5.6-terra-pro","provider":"openrouter","persona":"full","sessionId":"5f34d5d5-cdc1-49b2-a2c3-73501c343690","tokensIn":143683,"tokensOut":25435,"tokensTotal":169118,"cost":0.2295495,"turns":3,"toolCalls":2,"failedToolCalls":0,"timestamp":"2026-08-01T05:39:38.929Z"} -->