Circuit
Qwen 3.6 27b MTP · composer
Reviews & generation details
Reviews
No human review yet. Unreviewed does not mean unsuccessful.
Generation context
Imported historical artifact. Its exact original instructions and lineage are not known.
Generation prompt · exact text unavailable
See the current prompt for reference. It may differ from the instructions used to generate this artifact.
Inspect original source 65,138 bytes · SHA-256 e8e625f058a3
<!doctype html>
<html lang="en">
<head>
<meta charset="utf-8">
<meta name="viewport" content="width=device-width, initial-scale=1">
<title>DIY Stereo Audio Amplifier — Breadboard Build Guide</title>
<style>
/* ── css: base ── */
*, *::before, *::after { box-sizing: border-box; margin: 0; padding: 0; }
:root {
--bg-primary: #0d1117;
--bg-secondary: #161b22;
--bg-tertiary: #21262d;
--bg-card: #1c2333;
--border-color: #30363d;
--text-primary: #e6edf3;
--text-secondary: #8b949e;
--text-muted: #6e7681;
--accent-blue: #58a6ff;
--accent-green: #3fb950;
--accent-orange: #d29922;
--accent-red: #f85149;
--accent-purple: #bc8cff;
--accent-cyan: #39d2c0;
--accent-pink: #f778ba;
--glow-blue: rgba(88, 166, 255, 0.15);
--glow-green: rgba(63, 185, 80, 0.15);
}
html { scroll-behavior: smooth; font-size: 16px; }
body {
background: var(--bg-primary);
color: var(--text-primary);
font-family: 'Segoe UI', system-ui, -apple-system, BlinkMacSystemFont, sans-serif;
line-height: 1.7;
min-height: 100vh;
}
::selection { background: var(--accent-blue); color: #fff; }
::-webkit-scrollbar { width: 8px; }
::-webkit-scrollbar-track { background: var(--bg-primary); }
::-webkit-scrollbar-thumb { background: var(--bg-tertiary); border-radius: 4px; }
::-webkit-scrollbar-thumb:hover { background: var(--border-color); }
a { color: var(--accent-blue); text-decoration: none; transition: color 0.2s; }
a:hover { color: var(--accent-cyan); text-decoration: underline; }
/* ── css: layout ── */
.container {
max-width: 960px;
margin: 0 auto;
padding: 0 24px;
}
.hero {
background: linear-gradient(135deg, #0d1117 0%, #1a1e2e 50%, #0d1117 100%);
border-bottom: 1px solid var(--border-color);
padding: 64px 24px;
text-align: center;
position: relative;
overflow: hidden;
}
.hero::before {
content: '';
position: absolute;
top: -50%;
left: -50%;
width: 200%;
height: 200%;
background: radial-gradient(ellipse at center, var(--glow-blue) 0%, transparent 70%);
animation: heroPulse 8s ease-in-out infinite;
}
@keyframes heroPulse {
0%, 100% { opacity: 0.3; transform: scale(1); }
50% { opacity: 0.6; transform: scale(1.05); }
}
.hero-content { position: relative; z-index: 1; max-width: 800px; margin: 0 auto; }
.hero h1 {
font-size: clamp(2rem, 5vw, 3.2rem);
font-weight: 800;
letter-spacing: -0.02em;
background: linear-gradient(135deg, var(--accent-blue), var(--accent-cyan));
-webkit-background-clip: text;
-webkit-text-fill-color: transparent;
background-clip: text;
margin-bottom: 16px;
}
.hero .subtitle {
font-size: 1.2rem;
color: var(--text-secondary);
max-width: 600px;
margin: 0 auto 24px;
}
.badge-row { display: flex; gap: 8px; justify-content: center; flex-wrap: wrap; }
.badge {
display: inline-flex; align-items: center; gap: 6px;
padding: 6px 14px; border-radius: 20px; font-size: 0.8rem;
font-weight: 600; letter-spacing: 0.03em; text-transform: uppercase;
}
.badge.difficulty { background: rgba(210, 153, 34, 0.15); color: var(--accent-orange); border: 1px solid rgba(210, 153, 34, 0.3); }
.badge.time { background: rgba(88, 166, 255, 0.15); color: var(--accent-blue); border: 1px solid rgba(88, 166, 255, 0.3); }
.badge.cost { background: rgba(63, 185, 80, 0.15); color: var(--accent-green); border: 1px solid rgba(63, 185, 80, 0.3); }
section { padding: 48px 0; border-bottom: 1px solid var(--border-color); }
section:last-child { border-bottom: none; }
.section-header { margin-bottom: 32px; }
.section-header h2 {
font-size: 1.8rem;
font-weight: 700;
color: var(--text-primary);
display: flex; align-items: center; gap: 12px;
}
.section-header h2 .icon {
width: 36px; height: 36px; border-radius: 8px;
display: flex; align-items: center; justify-content: center;
font-size: 1.2rem; flex-shrink: 0;
}
.section-header p { color: var(--text-secondary); margin-top: 8px; font-size: 1.05rem; }
.card {
background: var(--bg-card);
border: 1px solid var(--border-color);
border-radius: 12px;
padding: 24px;
margin-bottom: 20px;
}
.card h3 { font-size: 1.15rem; color: var(--accent-blue); margin-bottom: 12px; }
/* ── css: components ── */
/* Tables */
.table-wrap { overflow-x: auto; margin: 16px 0; border-radius: 8px; border: 1px solid var(--border-color); }
table { width: 100%; border-collapse: collapse; font-size: 0.92rem; }
thead th {
background: var(--bg-tertiary);
color: var(--accent-blue);
font-weight: 600;
text-align: left;
padding: 14px 16px;
border-bottom: 2px solid var(--border-color);
white-space: nowrap;
}
tbody td {
padding: 12px 16px;
border-bottom: 1px solid var(--border-color);
vertical-align: top;
}
tbody tr:last-child td { border-bottom: none; }
tbody tr:hover { background: rgba(88, 166, 255, 0.04); }
td.part-name { font-weight: 600; color: var(--text-primary); white-space: nowrap; }
td.qty { text-align: center; color: var(--accent-cyan); font-weight: 700; width: 60px; }
td.purpose { color: var(--text-secondary); }
/* Steps */
.step-list { counter-reset: step-counter; list-style: none; padding: 0; }
.step-item {
position: relative;
padding-left: 72px;
margin-bottom: 32px;
}
.step-number {
position: absolute; left: 0; top: 0;
width: 48px; height: 48px; border-radius: 50%;
background: linear-gradient(135deg, var(--accent-blue), var(--accent-cyan));
color: #fff; font-weight: 800; font-size: 1.2rem;
display: flex; align-items: center; justify-content: center;
box-shadow: 0 0 20px rgba(88, 166, 255, 0.3);
}
.step-item h4 {
font-size: 1.1rem; color: var(--text-primary); margin-bottom: 8px;
}
.step-item p { color: var(--text-secondary); }
/* Warning / Info boxes */
.callout {
border-radius: 8px; padding: 16px 20px; margin: 16px 0;
display: flex; gap: 12px; align-items: flex-start;
}
.callout-icon { font-size: 1.3rem; flex-shrink: 0; margin-top: 2px; }
.callout.warning { background: rgba(248, 81, 73, 0.08); border-left: 3px solid var(--accent-red); }
.callout.info { background: rgba(88, 166, 255, 0.08); border-left: 3px solid var(--accent-blue); }
.callout.success { background: rgba(63, 185, 80, 0.08); border-left: 3px solid var(--accent-green); }
.callout p { color: var(--text-secondary); font-size: 0.92rem; margin: 0; }
.callout strong { color: var(--text-primary); }
/* SVG diagram containers */
.diagram-container {
background: var(--bg-secondary);
border: 1px solid var(--border-color);
border-radius: 12px;
padding: 24px;
margin: 20px 0;
overflow-x: auto;
}
.diagram-container svg { display: block; margin: 0 auto; }
.diagram-label {
text-align: center; color: var(--text-muted); font-size: 0.85rem;
margin-top: 12px; font-style: italic;
}
/* Troubleshooting grid */
.trouble-grid { display: grid; gap: 16px; }
@media (min-width: 700px) { .trouble-grid { grid-template-columns: 1fr 1fr; } }
.trouble-card {
background: var(--bg-secondary); border: 1px solid var(--border-color);
border-radius: 8px; padding: 20px;
}
.trouble-card h4 { color: var(--accent-orange); margin-bottom: 8px; font-size: 1rem; }
.trouble-card p { color: var(--text-secondary); font-size: 0.9rem; }
/* TOC */
.toc { background: var(--bg-secondary); border: 1px solid var(--border-color); border-radius: 8px; padding: 20px 24px; margin-bottom: 32px; }
.toc h3 { color: var(--accent-blue); font-size: 1rem; margin-bottom: 12px; text-transform: uppercase; letter-spacing: 0.05em; }
.toc ol { padding-left: 20px; }
.toc li { margin-bottom: 6px; }
.toc a { color: var(--text-secondary); font-size: 0.95rem; }
.toc a:hover { color: var(--accent-blue); text-decoration: none; }
/* Footer */
.footer {
text-align: center; padding: 40px 24px; color: var(--text-muted);
font-size: 0.85rem; border-top: 1px solid var(--border-color);
}
/* Responsive */
@media (max-width: 600px) {
.hero { padding: 40px 16px; }
section { padding: 32px 0; }
.step-item { padding-left: 56px; }
.step-number { width: 40px; height: 40px; font-size: 1rem; }
}
</style>
</head>
<body>
<header class="hero">
<div class="hero-content">
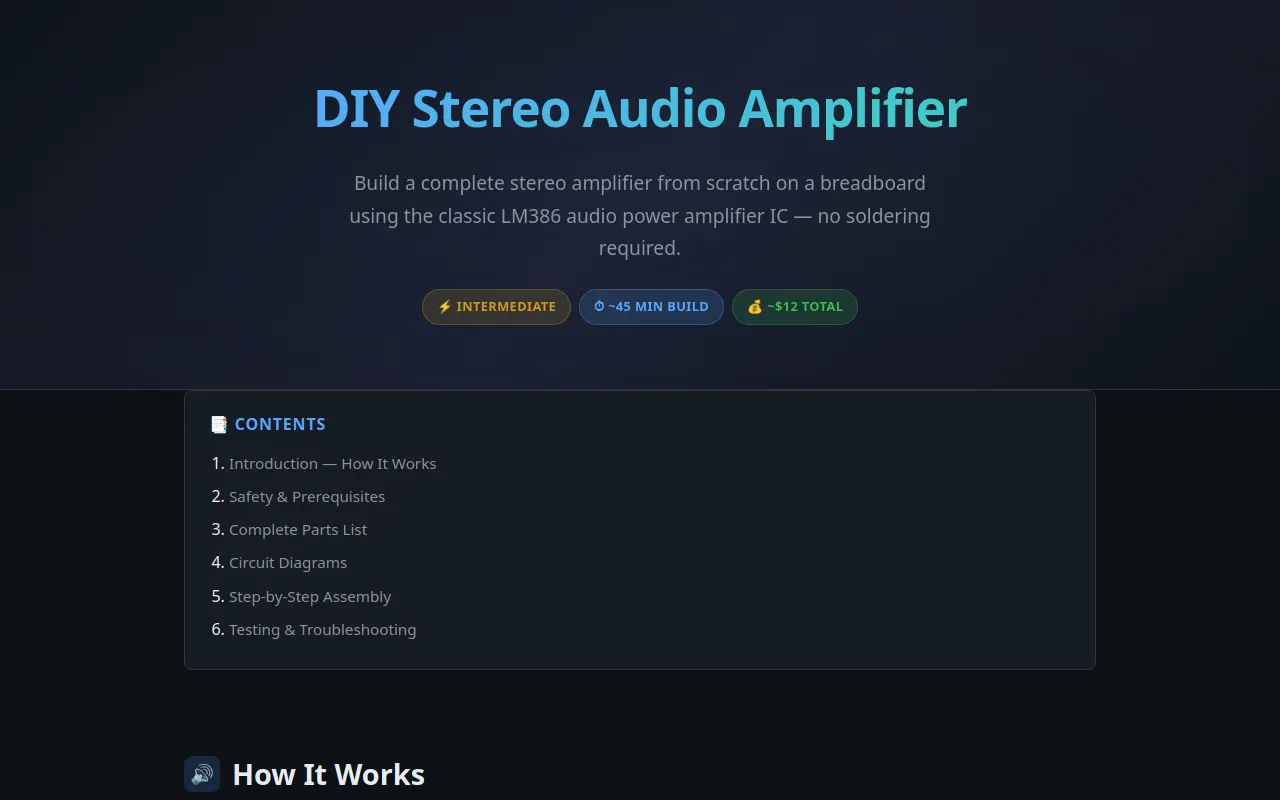
<h1>DIY Stereo Audio Amplifier</h1>
<p class="subtitle">Build a complete stereo amplifier from scratch on a breadboard using the classic LM386 audio power amplifier IC — no soldering required.</p>
<div class="badge-row">
<span class="badge difficulty">⚡ Intermediate</span>
<span class="badge time">⏱ ~45 min build</span>
<span class="badge cost">💰 ~$12 total</span>
</div>
</div>
</header>
<main class="container">
<nav class="toc" id="toc">
<h3>📑 Contents</h3>
<ol>
<li><a href="#intro">Introduction — How It Works</a></li>
<li><a href="#safety">Safety & Prerequisites</a></li>
<li><a href="#parts">Complete Parts List</a></li>
<li><a href="#diagrams">Circuit Diagrams</a></li>
<li><a href="#assembly">Step-by-Step Assembly</a></li>
<li><a href="#testing">Testing & Troubleshooting</a></li>
</ol>
</nav>
<!-- SECTION 1: Introduction -->
<section id="intro">
<div class="section-header">
<h2><span class="icon" style="background:rgba(88,166,255,0.15);color:var(--accent-blue)">🔊</span> How It Works</h2>
<p>A beginner-friendly explanation of the stereo amplifier circuit.</p>
</div>
<div class="card">
<h3>The LM386 Audio Power Amplifier</h3>
<p style="color:var(--text-secondary)">The <strong style="color:var(--accent-cyan)">LM386</strong> is a low-voltage audio power amplifier IC designed by National Semiconductor (now TI). It's the workhorse of hobbyist audio circuits — capable of delivering up to <strong>325 mW</strong> of output power at just 5V, with a gain that can be set from 20× to 200× using external components.</p>
<br>
<p style="color:var(--text-secondary)">In this guide, we'll use <strong>two LM386 chips</strong> — one for the left channel and one for the right — creating a full stereo amplifier. Each chip amplifies its respective audio input signal and drives an 8Ω speaker.</p>
</div>
<div class="card">
<h3>Signal Flow Overview</h3>
<svg viewBox="0 0 720 140" xmlns="http://www.w3.org/2000/svg" style="width:100%;max-width:720px;margin:16px auto;display:block">
<defs><marker id="arrowBlue" markerWidth="8" markerHeight="6" refX="8" refY="3" orient="auto"><path d="M0,0 L8,3 L0,6 Z" fill="#58a6ff"></path></marker></defs>
<rect x="10" y="45" width="120" height="50" rx="8" fill="#1c2333" stroke="#58a6ff" stroke-width="1.5"></rect>
<text x="70" y="75" text-anchor="middle" fill="#e6edf3" font-size="12" font-weight="600">Audio Source</text>
<text x="70" y="90" text-anchor="middle" fill="#8b949e" font-size="9">(Phone / PC)</text>
<line x1="135" y1="70" x2="185" y2="70" stroke="#58a6ff" stroke-width="2" marker-end="url(#arrowBlue)"></line>
<text x="160" y="62" text-anchor="middle" fill="#58a6ff" font-size="9">L/R</text>
<rect x="190" y="45" width="120" height="50" rx="8" fill="#1c2333" stroke="#bc8cff" stroke-width="1.5"></rect>
<text x="250" y="75" text-anchor="middle" fill="#e6edf3" font-size="12" font-weight="600">Volume Pot</text>
<text x="250" y="90" text-anchor="middle" fill="#8b949e" font-size="9">(10kΩ)</text>
<line x1="315" y1="70" x2="365" y2="70" stroke="#bc8cff" stroke-width="2" marker-end="url(#arrowBlue)"></line>
<text x="340" y="62" text-anchor="middle" fill="#bc8cff" font-size="9">signal</text>
<rect x="370" y="45" width="120" height="50" rx="8" fill="#1c2333" stroke="#3fb950" stroke-width="1.5"></rect>
<text x="430" y="65" text-anchor="middle" fill="#e6edf3" font-size="12" font-weight="600">LM386 × 2</text>
<text x="430" y="82" text-anchor="middle" fill="#8b949e" font-size="9">Stereo Amp ICs</text>
<line x1="495" y1="70" x2="545" y2="70" stroke="#3fb950" stroke-width="2" marker-end="url(#arrowBlue)"></line>
<text x="520" y="62" text-anchor="middle" fill="#3fb950" font-size="9">amplified</text>
<rect x="550" y="45" width="120" height="50" rx="8" fill="#1c2333" stroke="#d29922" stroke-width="1.5"></rect>
<text x="610" y="75" text-anchor="middle" fill="#e6edf3" font-size="12" font-weight="600">Speakers</text>
<text x="610" y="90" text-anchor="middle" fill="#8b949e" font-size="9">(8Ω Stereo)</text>
<rect x="370" y="105" width="120" height="25" rx="6" fill="rgba(210,153,34,0.1)" stroke="#d29922" stroke-width="1"></rect>
<text x="430" y="122" text-anchor="middle" fill="#d29922" font-size="10">⚡ 9V DC Power</text>
</svg>
<p class="diagram-label">Figure 1: High-level signal flow from audio source to speakers.</p>
</div>
<div class="callout info">
<span class="callout-icon">💡</span>
<p><strong>Why breadboard?</strong> This entire circuit is built on a standard solderless breadboard, meaning every connection is reversible. If something goes wrong, you can rewire it instantly — no desoldering needed.</p>
</div>
</section>
<!-- SECTION 2: Safety & Prerequisites -->
<section id="safety">
<div class="section-header">
<h2><span class="icon" style="background:rgba(248,81,73,0.15);color:var(--accent-red)">🛡️</span> Safety & Prerequisites</h2>
<p>Essential knowledge and tools before you begin.</p>
</div>
<div class="card">
<h3>⚠️ Workbench Safety Rules</h3>
<ul style="color:var(--text-secondary);padding-left:20px;display:grid;gap:8px;">
<li><strong style="color:var(--accent-red)">Never connect speakers to a powered circuit.</strong> Always wire the speakers last, and disconnect power before making any changes.</li>
<li><strong style="color:var(--accent-orange)">Watch polarity on capacitors.</strong> Electrolytic capacitors are polarized — reversing them can cause them to leak or burst. The longer lead is positive (+).</li>
<li><strong style="color:var(--accent-blue)">Double-check your wiring before applying power.</strong> A short circuit between V+ and ground will drain your battery rapidly and could damage the ICs.</li>
<li><strong style="color:var(--text-primary)">Keep voltage within spec.</strong> The LM386 operates from 4V to 12V. Do not exceed 15V or you risk permanent damage.</li>
</ul>
</div>
<div class="card">
<h3>🧰 Tools You'll Need</h3>
<div style="display:grid;gap:8px;margin-top:12px;">
<div style="display:flex;align-items:center;gap:10px;color:var(--text-secondary);"><span style="color:var(--accent-green)">✓</span> Standard solderless breadboard (830+ tie points recommended)</div>
<div style="display:flex;align-items:center;gap:10px;color:var(--text-secondary);"><span style="color:var(--accent-green)">✓</span> Jumper wires (assorted colors — male-to-male)</div>
<div style="display:flex;align-items:center;gap:10px;color:var(--text-secondary);"><span style="color:var(--accent-green)">✓</span> Digital multimeter (for testing continuity and voltage)</div>
<div style="display:flex;align-items:center;gap:10px;color:var(--text-secondary);"><span style="color:var(--accent-green)">✓</span> Wire cutters / strippers</div>
<div style="display:flex;align-items:center;gap:10px;color:var(--text-secondary);"><span style="color:var(--accent-green)">✓</span> Audio source with 3.5mm stereo jack (phone, PC, MP3 player)</div>
<div style="display:flex;align-items:center;gap:10px;color:var(--text-secondary);"><span style="color:var(--accent-green)">✓</span> Stereo speakers or headphones (8Ω recommended)</div>
</div>
</div>
<div class="card">
<h3>📚 Basic Knowledge Assumed</h3>
<p style="color:var(--text-secondary)">This guide assumes you understand:</p>
<ul style="color:var(--text-secondary);padding-left:20px;margin-top:8px;display:grid;gap:6px;">
<li>How a breadboard works (power rails, tie points, row connections)</li>
<li>Basic component identification (resistors by color code, capacitor markings)</li>
<li>The difference between AC signals (audio) and DC power</li>
<li>What "ground" means in a circuit (common reference point, not earth ground)</li>
</ul>
</div>
<div class="callout warning">
<span class="callout-icon">🔥</span>
<p><strong>Soldering iron is NOT required.</strong> This build uses a solderless breadboard. If you later want to make it permanent, you can transfer the circuit to a perfboard or PCB — but that's an advanced step beyond this guide.</p>
</div>
</section>
<!-- SECTION 3: Parts List -->
<section id="parts">
<div class="section-header">
<h2><span class="icon" style="background:rgba(63,185,80,0.15);color:var(--accent-green)">📦</span> Complete Parts List</h2>
<p>Everything you need to build the stereo amplifier.</p>
</div>
<div class="table-wrap">
<table>
<thead><tr><th>#</th><th>Component / Part Number</th><th style="text-align:center">Qty</th><th>Description & Role in Circuit</th></tr></thead>
<tbody>
<tr><td>1</td><td class="part-name">LM386N-1</td><td class="qty">2</td><td class="purpose"><strong style="color:var(--accent-cyan)">Low Voltage Audio Power Amplifier IC</strong> — The heart of each channel. One for left, one for right. DIP-8 package.</td></tr>
<tr><td>2</td><td class="part-name">10 µF / 16V Electrolytic Capacitor</td><td class="qty">4</td><td class="purpose"><strong style="color:var(--accent-purple)">Gain-setting & output coupling.</strong> Two connect pins 1–8 on each LM386 for maximum gain (200×). Two serve as DC-blocking capacitors at the speaker outputs.</td></tr>
<tr><td>3</td><td class="part-name">220 µF / 16V Electrolytic Capacitor</td><td class="qty">2</td><td class="purpose"><strong style="color:var(--accent-purple)">Power supply decoupling.</strong> One per channel, placed between V+ and ground near each IC to smooth the power rail and prevent oscillation.</td></tr>
<tr><td>4</td><td class="part-name">0.1 µF (100nF) Ceramic Capacitor</td><td class="qty">2</td><td class="purpose"><strong style="color:var(--accent-purple)">Bypass capacitors.</strong> Connected to pin 6 of each LM386 to suppress high-frequency noise on the supply rail.</td></tr>
<tr><td>5</td><td class="part-name">10 kΩ Linear Potentiometer</td><td class="qty">2</td><td class="purpose"><strong style="color:var(--accent-orange)">Volume control.</strong> One per channel. Use linear taper for smooth volume adjustment on the input signal.</td></tr>
<tr><td>6</td><td class="part-name">1 kΩ Resistor (brown-black-red)</td><td class="qty">2</td><td class="purpose"><strong style="color:var(--accent-orange)">Input bias resistors.</strong> Pull the non-inverting input of each LM386 to ground when no signal is present, preventing floating inputs and noise.</td></tr>
<tr><td>7</td><td class="part-name">10 µF / 16V Electrolytic (input coupling)</td><td class="qty">2</td><td class="purpose"><strong style="color:var(--accent-purple)">Input DC-blocking capacitors.</strong> Placed between the audio source and each LM386 input to block any DC offset from the source.</td></tr>
<tr><td>8</td><td class="part-name">Stereo 3.5mm Audio Jack (TRS)</td><td class="qty">1</td><td class="purpose"><strong style="color:var(--accent-blue)">Audio input connector.</strong> Accepts a standard stereo headphone cable from your phone or PC.</td></tr>
<tr><td>9</td><td class="part-name">8 Ω / 3W Stereo Speakers</td><td class="qty">2</td><td class="purpose"><strong style="color:var(--accent-blue)">Output transducers.</strong> One left, one right. Small full-range speakers work well for this project.</td></tr>
<tr><td>10</td><td class="part-name">9V Battery + Snap Connector</td><td class="qty">1</td><td class="purpose"><strong style="color:var(--accent-orange)">DC power supply.</strong> Provides the 9V operating voltage. A wall adapter (7–12V DC) also works.</td></tr>
<tr><td>11</td><td class="part-name">Jumper Wires (assorted)</td><td class="qty">~30</td><td class="purpose"><strong style="color:var(--accent-blue)">Interconnections.</strong> Male-to-male breadboard jumper wires in various colors for organized wiring.</td></tr>
<tr><td>12</td><td class="part-name">Breadboard (830+ tie points)</td><td class="qty">1</td><td class="purpose"><strong style="color:var(--accent-blue)">Solderless prototyping board.</strong> The foundation of the build. A half-size or full-size breadboard works.</td></tr>
</tbody>
</table>
</div>
<div class="callout info">
<span class="callout-icon">📝</span>
<p><strong>Total estimated cost:</strong> ~$10–$15 depending on where you source parts. Digi-Key, Mouser, Adafruit, and Amazon all carry these components.</p>
</div>
</section>
<!-- SECTION 4: Circuit Diagrams -->
<section id="diagrams">
<div class="section-header">
<h2><span class="icon" style="background:rgba(188,140,255,0.15);color:var(--accent-purple)">📐</span> Circuit Diagrams</h2>
<p>Schematic and breadboard wiring views for the complete stereo amplifier.</p>
</div>
<!-- Schematic SVG -->
<div class="diagram-container">
<svg viewBox="0 0 860 520" xmlns="http://www.w3.org/2000/svg" style="width:100%;max-width:860px;">
<text x="430" y="22" text-anchor="middle" fill="#e6edf3" font-size="15" font-weight="700">Stereo LM386 Amplifier — Schematic</text>
<line x1="430" y1="32" x2="430" y2="500" stroke="#30363d" stroke-width="1" stroke-dasharray="4,4"></line>
<text x="215" y="38" text-anchor="middle" fill="#58a6ff" font-size="12" font-weight="700">LEFT CHANNEL</text>
<text x="645" y="38" text-anchor="middle" fill="#f778ba" font-size="12" font-weight="700">RIGHT CHANNEL</text>
<!-- LEFT: Audio Input Jack -->
<rect x="30" y="55" width="60" height="40" rx="4" fill="none" stroke="#58a6ff" stroke-width="1.5"></rect>
<text x="60" y="72" text-anchor="middle" fill="#58a6ff" font-size="9">3.5mm</text>
<text x="60" y="84" text-anchor="middle" fill="#58a6ff" font-size="9">Jack L</text>
<!-- Left input coupling cap -->
<line x1="90" y1="75" x2="130" y2="75" stroke="#bc8cff" stroke-width="1.5"></line>
<line x1="130" y1="65" x2="130" y2="85" stroke="#bc8cff" stroke-width="2"></line>
<line x1="134" y1="65" x2="134" y2="85" stroke="#bc8cff" stroke-width="2"></line>
<text x="132" y="60" text-anchor="middle" fill="#bc8cff" font-size="8">C1</text>
<text x="132" y="97" text-anchor="middle" fill="#bc8cff" font-size="7">10µF</text>
<!-- Left Potentiometer -->
<line x1="140" y1="75" x2="170" y2="75" stroke="#d29922" stroke-width="1.5"></line>
<rect x="170" y="63" width="40" height="24" rx="3" fill="none" stroke="#d29922" stroke-width="1.5"></rect>
<line x1="180" y1="87" x2="180" y2="95" stroke="#d29922" stroke-width="1.5"></line>
<polygon points="176,93 184,93 180,99" fill="#d29922"></polygon>
<text x="190" y="60" text-anchor="middle" fill="#d29922" font-size="8">VR1</text>
<text x="190" y="107" text-anchor="middle" fill="#d29922" font-size="7">10kΩ</text>
<!-- Left input bias resistor -->
<line x1="180" y1="63" x2="180" y2="45" stroke="#d29922" stroke-width="1.5"></line>
<rect x="174" y="30" width="12" height="15" rx="1" fill="none" stroke="#d29922" stroke-width="1.5"></rect>
<text x="180" y="26" text-anchor="middle" fill="#d29922" font-size="7">R1</text>
<text x="180" y="53" text-anchor="middle" fill="#d29922" font-size="7">1kΩ</text>
<!-- Left LM386 IC -->
<rect x="240" y="45" width="100" height="120" rx="6" fill="#1c2333" stroke="#3fb950" stroke-width="2"></rect>
<text x="290" y="72" text-anchor="middle" fill="#3fb950" font-size="11" font-weight="700">LM386</text>
<text x="290" y="86" text-anchor="middle" fill="#8b949e" font-size="8">(Left)</text>
<!-- Left IC pins (left side) -->
<line x1="240" y1="57" x2="230" y2="57" stroke="#3fb950" stroke-width="1.5"></line>
<text x="226" y="60" text-anchor="end" fill="#e6edf3" font-size="8">Pin 1</text>
<line x1="240" y1="79" x2="230" y2="79" stroke="#3fb950" stroke-width="1.5"></line>
<text x="226" y="82" text-anchor="end" fill="#e6edf3" font-size="8">Pin 2 (−)</text>
<line x1="240" y1="101" x2="230" y2="101" stroke="#3fb950" stroke-width="1.5"></line>
<text x="226" y="104" text-anchor="end" fill="#e6edf3" font-size="8">Pin 3 (+)</text>
<line x1="240" y1="123" x2="230" y2="123" stroke="#3fb950" stroke-width="1.5"></line>
<text x="226" y="126" text-anchor="end" fill="#e6edf3" font-size="8">Pin 4 (GND)</text>
<!-- Left IC pins (right side) -->
<line x1="340" y1="57" x2="350" y2="57" stroke="#3fb950" stroke-width="1.5"></line>
<text x="354" y="60" fill="#e6edf3" font-size="8">Pin 5 (OUT)</text>
<line x1="340" y1="79" x2="350" y2="79" stroke="#3fb950" stroke-width="1.5"></line>
<text x="354" y="82" fill="#e6edf3" font-size="8">Pin 6 (BYP)</text>
<line x1="340" y1="101" x2="350" y2="101" stroke="#3fb950" stroke-width="1.5"></line>
<text x="354" y="104" fill="#e6edf3" font-size="8">Pin 7 (V+)</text>
<line x1="340" y1="123" x2="350" y2="123" stroke="#3fb950" stroke-width="1.5"></line>
<text x="354" y="126" fill="#e6edf3" font-size="8">Pin 8</text>
<!-- Gain cap pins 1-8 -->
<line x1="230" y1="57" x2="210" y2="57" stroke="#bc8cff" stroke-width="1.5"></line>
<line x1="210" y1="57" x2="210" y2="140" stroke="#bc8cff" stroke-width="1.5"></line>
<line x1="350" y1="123" x2="370" y2="123" stroke="#bc8cff" stroke-width="1.5"></line>
<line x1="370" y1="123" x2="370" y2="140" stroke="#bc8cff" stroke-width="1.5"></line>
<line x1="210" y1="140" x2="370" y2="140" stroke="#bc8cff" stroke-width="1.5"></line>
<line x1="286" y1="132" x2="286" y2="148" stroke="#bc8cff" stroke-width="2"></line>
<line x1="294" y1="132" x2="294" y2="148" stroke="#bc8cff" stroke-width="2"></line>
<text x="290" y="156" text-anchor="middle" fill="#bc8cff" font-size="7">C2 10µF</text>
<!-- Pin 3 (+) to input -->
<line x1="230" y1="101" x2="190" y2="101" stroke="#58a6ff" stroke-width="1.5"></line>
<line x1="190" y1="101" x2="190" y2="75" stroke="#58a6ff" stroke-width="1.5"></line>
<!-- Pin 4 to ground -->
<line x1="230" y1="123" x2="230" y2="175" stroke="#f85149" stroke-width="1.5"></line>
<text x="230" y="185" text-anchor="middle" fill="#f85149" font-size="8">GND</text>
<!-- Pin 6 bypass cap -->
<line x1="350" y1="79" x2="390" y2="79" stroke="#bc8cff" stroke-width="1.5"></line>
<line x1="390" y1="79" x2="390" y2="60" stroke="#bc8cff" stroke-width="1.5"></line>
<line x1="384" y1="52" x2="396" y2="52" stroke="#e6edf3" stroke-width="1.5"></line>
<path d="M380,58 Q390,48 400,58" fill="none" stroke="#bc8cff" stroke-width="1.5"></path>
<text x="390" y="46" text-anchor="middle" fill="#bc8cff" font-size="7">C3</text>
<text x="390" y="38" text-anchor="middle" fill="#bc8cff" font-size="7">0.1µF</text>
<!-- Pin 7 to V+ -->
<line x1="350" y1="101" x2="400" y2="101" stroke="#d29922" stroke-width="1.5"></line>
<text x="408" y="104" fill="#d29922" font-size="8">V+ (9V)</text>
<!-- Decoupling cap on V+ -->
<line x1="375" y1="101" x2="375" y2="165" stroke="#bc8cff" stroke-width="1.5"></line>
<line x1="369" y1="157" x2="381" y2="157" stroke="#bc8cff" stroke-width="2"></line>
<line x1="369" y1="165" x2="381" y2="165" stroke="#bc8cff" stroke-width="2"></line>
<text x="375" y="174" text-anchor="middle" fill="#bc8cff" font-size="7">C4 220µF</text>
<!-- Output coupling cap -->
<line x1="350" y1="57" x2="410" y2="57" stroke="#e6edf3" stroke-width="1.5"></line>
<line x1="410" y1="47" x2="410" y2="67" stroke="#bc8cff" stroke-width="2"></line>
<line x1="416" y1="47" x2="416" y2="67" stroke="#bc8cff" stroke-width="2"></line>
<text x="413" y="42" text-anchor="middle" fill="#bc8cff" font-size="7">C5</text>
<text x="413" y="79" text-anchor="middle" fill="#bc8cff" font-size="7">10µF</text>
<!-- Speaker -->
<line x1="420" y1="57" x2="460" y2="57" stroke="#e6edf3" stroke-width="1.5"></line>
<path d="M460,47 L468,37 L468,77 L460,67 Z" fill="none" stroke="#d29922" stroke-width="1.5"></path>
<line x1="468" y1="37" x2="468" y2="77" stroke="#d29922" stroke-width="1.5"></line>
<path d="M468,50 Q480,42 480,57 Q480,72 468,64" fill="none" stroke="#d29922" stroke-width="1.5"></path>
<text x="490" y="53" fill="#d29922" font-size="8">Speaker L</text>
<!-- RIGHT CHANNEL -->
<rect x="770" y="285" width="60" height="40" rx="4" fill="none" stroke="#f778ba" stroke-width="1.5"></rect>
<text x="800" y="302" text-anchor="middle" fill="#f778ba" font-size="9">3.5mm</text>
<text x="800" y="314" text-anchor="middle" fill="#f778ba" font-size="9">Jack R</text>
<!-- Right input coupling cap -->
<line x1="770" y1="305" x2="730" y2="305" stroke="#bc8cff" stroke-width="1.5"></line>
<line x1="730" y1="295" x2="730" y2="315" stroke="#bc8cff" stroke-width="2"></line>
<line x1="726" y1="295" x2="726" y2="315" stroke="#bc8cff" stroke-width="2"></line>
<text x="728" y="290" text-anchor="middle" fill="#bc8cff" font-size="8">C6</text>
<text x="728" y="327" text-anchor="middle" fill="#bc8cff" font-size="7">10µF</text>
<!-- Right Potentiometer -->
<line x1="720" y1="305" x2="690" y2="305" stroke="#d29922" stroke-width="1.5"></line>
<rect x="650" y="293" width="40" height="24" rx="3" fill="none" stroke="#d29922" stroke-width="1.5"></rect>
<line x1="670" y1="317" x2="670" y2="325" stroke="#d29922" stroke-width="1.5"></line>
<polygon points="666,323 674,323 670,329" fill="#d29922"></polygon>
<text x="670" y="288" text-anchor="middle" fill="#d29922" font-size="8">VR2</text>
<text x="670" y="341" text-anchor="middle" fill="#d29922" font-size="7">10kΩ</text>
<!-- Right input bias resistor -->
<line x1="670" y1="293" x2="670" y2="275" stroke="#d29922" stroke-width="1.5"></line>
<rect x="664" y="260" width="12" height="15" rx="1" fill="none" stroke="#d29922" stroke-width="1.5"></rect>
<text x="670" y="256" text-anchor="middle" fill="#d29922" font-size="7">R2</text>
<text x="670" y="283" text-anchor="middle" fill="#d29922" font-size="7">1kΩ</text>
<!-- Right LM386 IC -->
<rect x="520" y="275" width="100" height="120" rx="6" fill="#1c2333" stroke="#f778ba" stroke-width="2"></rect>
<text x="570" y="302" text-anchor="middle" fill="#f778ba" font-size="11" font-weight="700">LM386</text>
<text x="570" y="316" text-anchor="middle" fill="#8b949e" font-size="8">(Right)</text>
<!-- Right IC pins (left side) -->
<line x1="520" y1="287" x2="510" y2="287" stroke="#f778ba" stroke-width="1.5"></line>
<text x="506" y="290" text-anchor="end" fill="#e6edf3" font-size="8">Pin 1</text>
<line x1="520" y1="309" x2="510" y2="309" stroke="#f778ba" stroke-width="1.5"></line>
<text x="506" y="312" text-anchor="end" fill="#e6edf3" font-size="8">Pin 2 (−)</text>
<line x1="520" y1="331" x2="510" y2="331" stroke="#f778ba" stroke-width="1.5"></line>
<text x="506" y="334" text-anchor="end" fill="#e6edf3" font-size="8">Pin 3 (+)</text>
<line x1="520" y1="353" x2="510" y2="353" stroke="#f778ba" stroke-width="1.5"></line>
<text x="506" y="356" text-anchor="end" fill="#e6edf3" font-size="8">Pin 4 (GND)</text>
<!-- Right IC pins (right side) -->
<line x1="620" y1="287" x2="630" y2="287" stroke="#f778ba" stroke-width="1.5"></line>
<text x="634" y="290" fill="#e6edf3" font-size="8">Pin 5 (OUT)</text>
<line x1="620" y1="309" x2="630" y2="309" stroke="#f778ba" stroke-width="1.5"></line>
<text x="634" y="312" fill="#e6edf3" font-size="8">Pin 6 (BYP)</text>
<line x1="620" y1="331" x2="630" y2="331" stroke="#f778ba" stroke-width="1.5"></line>
<text x="634" y="334" fill="#e6edf3" font-size="8">Pin 7 (V+)</text>
<line x1="620" y1="353" x2="630" y2="353" stroke="#f778ba" stroke-width="1.5"></line>
<text x="634" y="356" fill="#e6edf3" font-size="8">Pin 8</text>
<!-- Right gain cap pins 1-8 -->
<line x1="510" y1="287" x2="490" y2="287" stroke="#bc8cff" stroke-width="1.5"></line>
<line x1="490" y1="287" x2="490" y2="370" stroke="#bc8cff" stroke-width="1.5"></line>
<line x1="630" y1="353" x2="650" y2="353" stroke="#bc8cff" stroke-width="1.5"></line>
<line x1="650" y1="353" x2="650" y2="370" stroke="#bc8cff" stroke-width="1.5"></line>
<line x1="490" y1="370" x2="650" y2="370" stroke="#bc8cff" stroke-width="1.5"></line>
<line x1="566" y1="362" x2="566" y2="378" stroke="#bc8cff" stroke-width="2"></line>
<line x1="574" y1="362" x2="574" y2="378" stroke="#bc8cff" stroke-width="2"></line>
<text x="570" y="386" text-anchor="middle" fill="#bc8cff" font-size="7">C7 10µF</text>
<!-- Right pin 3 to input -->
<line x1="510" y1="331" x2="490" y2="331" stroke="#f778ba" stroke-width="1.5"></line>
<line x1="490" y1="331" x2="650" y2="331" stroke="#f778ba" stroke-width="1.5"></line>
<!-- Right pin 4 to ground -->
<line x1="510" y1="353" x2="510" y2="405" stroke="#f85149" stroke-width="1.5"></line>
<text x="510" y="415" text-anchor="middle" fill="#f85149" font-size="8">GND</text>
<!-- Right pin 6 bypass -->
<line x1="630" y1="309" x2="670" y2="309" stroke="#bc8cff" stroke-width="1.5"></line>
<line x1="670" y1="309" x2="670" y2="290" stroke="#bc8cff" stroke-width="1.5"></line>
<line x1="664" y1="282" x2="676" y2="282" stroke="#e6edf3" stroke-width="1.5"></line>
<path d="M660,288 Q670,278 680,288" fill="none" stroke="#bc8cff" stroke-width="1.5"></path>
<text x="670" y="276" text-anchor="middle" fill="#bc8cff" font-size="7">C8</text>
<text x="670" y="268" text-anchor="middle" fill="#bc8cff" font-size="7">0.1µF</text>
<!-- Right pin 7 to V+ -->
<line x1="630" y1="331" x2="680" y2="331" stroke="#d29922" stroke-width="1.5"></line>
<text x="688" y="334" fill="#d29922" font-size="8">V+ (9V)</text>
<!-- Right decoupling cap -->
<line x1="655" y1="331" x2="655" y2="395" stroke="#bc8cff" stroke-width="1.5"></line>
<line x1="649" y1="387" x2="661" y2="387" stroke="#bc8cff" stroke-width="2"></line>
<line x1="649" y1="395" x2="661" y2="395" stroke="#bc8cff" stroke-width="2"></line>
<text x="655" y="404" text-anchor="middle" fill="#bc8cff" font-size="7">C9 220µF</text>
<!-- Right output coupling cap -->
<line x1="630" y1="287" x2="690" y2="287" stroke="#e6edf3" stroke-width="1.5"></line>
<line x1="690" y1="277" x2="690" y2="297" stroke="#bc8cff" stroke-width="2"></line>
<line x1="696" y1="277" x2="696" y2="297" stroke="#bc8cff" stroke-width="2"></line>
<text x="693" y="272" text-anchor="middle" fill="#bc8cff" font-size="7">C10</text>
<text x="693" y="309" text-anchor="middle" fill="#bc8cff" font-size="7">10µF</text>
<!-- Right speaker -->
<line x1="700" y1="287" x2="740" y2="287" stroke="#e6edf3" stroke-width="1.5"></line>
<path d="M740,277 L748,267 L748,307 L740,297 Z" fill="none" stroke="#d29922" stroke-width="1.5"></path>
<line x1="748" y1="267" x2="748" y2="307" stroke="#d29922" stroke-width="1.5"></line>
<path d="M748,280 Q760,272 760,287 Q760,302 748,294" fill="none" stroke="#d29922" stroke-width="1.5"></path>
<text x="768" y="283" fill="#d29922" font-size="8">Speaker R</text>
<!-- Shared ground rail -->
<line x1="100" y1="440" x2="760" y2="440" stroke="#f85149" stroke-width="2"></line>
<text x="430" y="455" text-anchor="middle" fill="#f85149" font-size="10" font-weight="600">GROUND RAIL (Common)</text>
<!-- Shared V+ rail -->
<line x1="100" y1="470" x2="760" y2="470" stroke="#d29922" stroke-width="2"></line>
<text x="430" y="485" text-anchor="middle" fill="#d29922" font-size="10" font-weight="600">V+ RAIL (9V DC)</text>
<!-- Battery symbol -->
<rect x="395" y="470" width="70" height="30" rx="4" fill="#1c2333" stroke="#d29922" stroke-width="1.5"></rect>
<text x="430" y="482" text-anchor="middle" fill="#d29922" font-size="9">🔋 9V Battery</text>
<!-- Legend -->
<rect x="10" y="498" width="840" height="20" rx="4" fill="rgba(30,36,46,0.8)"></rect>
<text x="20" y="512" fill="#bc8cff" font-size="8">■ Capacitors</text>
<text x="120" y="512" fill="#d29922" font-size="8">■ Resistors/Pots</text>
<text x="240" y="512" fill="#3fb950" font-size="8">■ LM386 (L)</text>
<text x="340" y="512" fill="#f778ba" font-size="8">■ LM386 (R)</text>
<text x="440" y="512" fill="#d29922" font-size="8">■ Speakers</text>
<text x="540" y="512" fill="#f85149" font-size="8">■ Ground</text>
</svg>
<p class="diagram-label">Figure 2: Complete stereo amplifier schematic. Blue = capacitors, orange = resistors/pots, green = left IC, pink = right IC.</p>
</div>
<!-- Breadboard wiring guide SVG -->
<div class="diagram-container" style="margin-top:32px;">
<svg viewBox="0 0 860 480" xmlns="http://www.w3.org/2000/svg" style="width:100%;max-width:860px;">
<text x="430" y="22" text-anchor="middle" fill="#e6edf3" font-size="15" font-weight="700">Breadboard Wiring Guide — Pin Connections</text>
<!-- Breadboard representation -->
<rect x="80" y="40" width="700" height="200" rx="8" fill="#1a3a1a" stroke="#3fb950" stroke-width="1.5"></rect>
<!-- Power rails (top) -->
<line x1="90" y1="60" x2="770" y2="60" stroke="#d29922" stroke-width="3"></line>
<text x="95" y="55" fill="#d29922" font-size="8">+ (V+)</text>
<line x1="90" y1="75" x2="770" y2="75" stroke="#f85149" stroke-width="3"></line>
<text x="95" y="70" fill="#f85149" font-size="8">− (GND)</text>
<!-- Power rails (bottom) -->
<line x1="90" y1="225" x2="770" y2="225" stroke="#d29922" stroke-width="3"></line>
<text x="95" y="240" fill="#d29922" font-size="8">+ (V+)</text>
<line x1="90" y1="240" x2="770" y2="240" stroke="#f85149" stroke-width="3"></line>
<text x="95" y="255" fill="#f85149" font-size="8">− (GND)</text>
<!-- Tie point rows -->
<g opacity="0.3">
<line x1="100" y1="90" x2="760" y2="90" stroke="#58a6ff" stroke-width="0.5"></line>
<line x1="100" y1="105" x2="760" y2="105" stroke="#58a6ff" stroke-width="0.5"></line>
<line x1="100" y1="120" x2="760" y2="120" stroke="#58a6ff" stroke-width="0.5"></line>
<line x1="100" y1="135" x2="760" y2="135" stroke="#58a6ff" stroke-width="0.5"></line>
<line x1="100" y1="150" x2="760" y2="150" stroke="#58a6ff" stroke-width="0.5"></line>
<line x1="100" y1="170" x2="760" y2="170" stroke="#58a6ff" stroke-width="0.5"></line>
<line x1="100" y1="185" x2="760" y2="185" stroke="#58a6ff" stroke-width="0.5"></line>
<line x1="100" y1="200" x2="760" y2="200" stroke="#58a6ff" stroke-width="0.5"></line>
</g>
<!-- Center gap line -->
<line x1="90" y1="160" x2="770" y2="160" stroke="#3fb950" stroke-width="1" stroke-dasharray="4,4"></line>
<!-- LEFT LM386 placement -->
<rect x="170" y="85" width="60" height="90" rx="4" fill="#1c2333" stroke="#3fb950" stroke-width="2"></rect>
<text x="200" y="100" text-anchor="middle" fill="#3fb950" font-size="8" font-weight="700">LM386-L</text>
<!-- Left IC pin labels -->
<circle cx="170" cy="95" r="3" fill="#e6edf3"></circle><text x="158" y="98" text-anchor="end" fill="#e6edf3" font-size="7">1</text>
<circle cx="170" cy="110" r="3" fill="#e6edf3"></circle><text x="158" y="113" text-anchor="end" fill="#e6edf3" font-size="7">2</text>
<circle cx="170" cy="125" r="3" fill="#e6edf3"></circle><text x="158" y="128" text-anchor="end" fill="#e6edf3" font-size="7">3</text>
<circle cx="170" cy="140" r="3" fill="#e6edf3"></circle><text x="158" y="143" text-anchor="end" fill="#e6edf3" font-size="7">4</text>
<circle cx="230" cy="95" r="3" fill="#e6edf3"></circle><text x="242" y="98" fill="#e6edf3" font-size="7">5</text>
<circle cx="230" cy="110" r="3" fill="#e6edf3"></circle><text x="242" y="113" fill="#e6edf3" font-size="7">6</text>
<circle cx="230" cy="125" r="3" fill="#e6edf3"></circle><text x="242" y="128" fill="#e6edf3" font-size="7">7</text>
<circle cx="230" cy="140" r="3" fill="#e6edf3"></circle><text x="242" y="143" fill="#e6edf3" font-size="7">8</text>
<!-- RIGHT LM386 placement -->
<rect x="470" y="85" width="60" height="90" rx="4" fill="#1c2333" stroke="#f778ba" stroke-width="2"></rect>
<text x="500" y="100" text-anchor="middle" fill="#f778ba" font-size="8" font-weight="700">LM386-R</text>
<!-- Right IC pin labels -->
<circle cx="470" cy="95" r="3" fill="#e6edf3"></circle><text x="458" y="98" text-anchor="end" fill="#e6edf3" font-size="7">1</text>
<circle cx="470" cy="110" r="3" fill="#e6edf3"></circle><text x="458" y="113" text-anchor="end" fill="#e6edf3" font-size="7">2</text>
<circle cx="470" cy="125" r="3" fill="#e6edf3"></circle><text x="458" y="128" text-anchor="end" fill="#e6edf3" font-size="7">3</text>
<circle cx="470" cy="140" r="3" fill="#e6edf3"></circle><text x="458" y="143" text-anchor="end" fill="#e6edf3" font-size="7">4</text>
<circle cx="530" cy="95" r="3" fill="#e6edf3"></circle><text x="542" y="98" fill="#e6edf3" font-size="7">5</text>
<circle cx="530" cy="110" r="3" fill="#e6edf3"></circle><text x="542" y="113" fill="#e6edf3" font-size="7">6</text>
<circle cx="530" cy="125" r="3" fill="#e6edf3"></circle><text x="542" y="128" fill="#e6edf3" font-size="7">7</text>
<circle cx="530" cy="140" r="3" fill="#e6edf3"></circle><text x="542" y="143" fill="#e6edf3" font-size="7">8</text>
<!-- Connection wires -->
<!-- Left: Pin 7 to V+ rail -->
<line x1="230" y1="125" x2="230" y2="60" stroke="#d29922" stroke-width="2"></line>
<!-- Right: Pin 7 to V+ rail -->
<line x1="530" y1="125" x2="530" y2="60" stroke="#d29922" stroke-width="2"></line>
<!-- Left: Pin 4 to GND rail -->
<line x1="170" y1="140" x2="170" y2="75" stroke="#f85149" stroke-width="2"></line>
<!-- Right: Pin 4 to GND rail -->
<line x1="470" y1="140" x2="470" y2="75" stroke="#f85149" stroke-width="2"></line>
<!-- Left: Gain cap pins 1-8 -->
<line x1="170" y1="95" x2="160" y2="95" stroke="#bc8cff" stroke-width="2"></line>
<line x1="160" y1="95" x2="160" y2="140" stroke="#bc8cff" stroke-width="2"></line>
<line x1="160" y1="140" x2="230" y2="140" stroke="#bc8cff" stroke-width="2"></line>
<!-- Right: Gain cap pins 1-8 -->
<line x1="470" y1="95" x2="460" y2="95" stroke="#bc8cff" stroke-width="2"></line>
<line x1="460" y1="95" x2="460" y2="140" stroke="#bc8cff" stroke-width="2"></line>
<line x1="460" y1="140" x2="530" y2="140" stroke="#bc8cff" stroke-width="2"></line>
<!-- Left: Pin 3 (+) input -->
<line x1="170" y1="125" x2="120" y2="125" stroke="#58a6ff" stroke-width="2"></line>
<text x="115" y="120" text-anchor="end" fill="#58a6ff" font-size="7">Audio L</text>
<!-- Right: Pin 3 (+) input -->
<line x1="470" y1="125" x2="420" y2="125" stroke="#f778ba" stroke-width="2"></line>
<text x="415" y="120" text-anchor="end" fill="#f778ba" font-size="7">Audio R</text>
<!-- Left: Pin 5 output -->
<line x1="230" y1="95" x2="280" y2="95" stroke="#e6edf3" stroke-width="2"></line>
<text x="285" y="98" fill="#e6edf3" font-size="7">→ Speaker L</text>
<!-- Right: Pin 5 output -->
<line x1="530" y1="95" x2="580" y2="95" stroke="#e6edf3" stroke-width="2"></line>
<text x="585" y="98" fill="#e6edf3" font-size="7">→ Speaker R</text>
<!-- Connection table below breadboard -->
<rect x="80" y="270" width="700" height="195" rx="8" fill="#161b22" stroke="#30363d" stroke-width="1"></rect>
<text x="430" y="290" text-anchor="middle" fill="#e6edf3" font-size="12" font-weight="700">Pin Connection Reference</text>
<!-- Left channel connections -->
<rect x="95" y="300" width="330" height="155" rx="4" fill="#1c2333" stroke="#3fb950" stroke-width="1"></rect>
<text x="260" y="318" text-anchor="middle" fill="#3fb950" font-size="10" font-weight="700">LEFT CHANNEL (LM386-L)</text>
<text x="105" y="340" fill="#e6edf3" font-size="9">Pin 1 → Pin 8</text><text x="260" y="340" fill="#bc8cff" font-size="9">via C2 (10µF) — gain set to 200×</text>
<text x="105" y="358" fill="#e6edf3" font-size="9">Pin 2</text><text x="260" y="358" fill="#8b949e" font-size="9">(−) input — leave unconnected or ground for single-ended</text>
<text x="105" y="376" fill="#e6edf3" font-size="9">Pin 3</text><text x="260" y="376" fill="#58a6ff" font-size="9">(+) input — audio signal via C1 (10µF) + VR1 pot</text>
<text x="105" y="394" fill="#e6edf3" font-size="9">Pin 4</text><text x="260" y="394" fill="#f85149" font-size="9">GND — connect to breadboard ground rail</text>
<text x="105" y="412" fill="#e6edf3" font-size="9">Pin 5</text><text x="260" y="412" fill="#d29922" font-size="9">OUTPUT — to speaker via C5 (10µF) coupling cap</text>
<text x="105" y="430" fill="#e6edf3" font-size="9">Pin 6</text><text x="260" y="430" fill="#bc8cff" font-size="9">BYPASS — C3 (0.1µF) to V+ rail</text>
<text x="105" y="448" fill="#e6edf3" font-size="9">Pin 7</text><text x="260" y="448" fill="#d29922" font-size="9">V+ — connect to breadboard + rail (9V)</text>
<!-- Right channel connections -->
<rect x="435" y="300" width="330" height="155" rx="4" fill="#1c2333" stroke="#f778ba" stroke-width="1"></rect>
<text x="600" y="318" text-anchor="middle" fill="#f778ba" font-size="10" font-weight="700">RIGHT CHANNEL (LM386-R)</text>
<text x="445" y="340" fill="#e6edf3" font-size="9">Pin 1 → Pin 8</text><text x="600" y="340" fill="#bc8cff" font-size="9">via C7 (10µF) — gain set to 200×</text>
<text x="445" y="358" fill="#e6edf3" font-size="9">Pin 2</text><text x="600" y="358" fill="#8b949e" font-size="9">(−) input — leave unconnected or ground</text>
<text x="445" y="376" fill="#e6edf3" font-size="9">Pin 3</text><text x="600" y="376" fill="#f778ba" font-size="9">(+) input — audio signal via C6 (10µF) + VR2 pot</text>
<text x="445" y="394" fill="#e6edf3" font-size="9">Pin 4</text><text x="600" y="394" fill="#f85149" font-size="9">GND — connect to breadboard ground rail</text>
<text x="445" y="412" fill="#e6edf3" font-size="9">Pin 5</text><text x="600" y="412" fill="#d29922" font-size="9">OUTPUT — to speaker via C10 (10µF) coupling cap</text>
<text x="445" y="430" fill="#e6edf3" font-size="9">Pin 6</text><text x="600" y="430" fill="#bc8cff" font-size="9">BYPASS — C8 (0.1µF) to V+ rail</text>
<text x="445" y="448" fill="#e6edf3" font-size="9">Pin 7</text><text x="600" y="448" fill="#d29922" font-size="9">V+ — connect to breadboard + rail (9V)</text>
<!-- Battery connection -->
<rect x="350" y="465" width="160" height="12" rx="3" fill="#d29922"></rect>
<text x="430" y="475" text-anchor="middle" fill="#0d1117" font-size="8" font-weight="700">🔋 9V BATTERY</text>
</svg>
<p class="diagram-label">Figure 3: Breadboard wiring guide showing IC placement and pin connections. Follow the color-coded wires.</p>
</div>
<!-- LM386 Pinout Detail -->
<div class="card" style="margin-top:24px;">
<h3>LM386 Pinout Quick Reference</h3>
<svg viewBox="0 0 500 180" xmlns="http://www.w3.org/2000/svg" style="width:100%;max-width:400px;margin:16px auto;display:block;">
<rect x="170" y="20" width="160" height="140" rx="8" fill="#1c2333" stroke="#3fb950" stroke-width="2"></rect>
<circle cx="200" cy="40" r="6" fill="none" stroke="#3fb950" stroke-width="1.5"></circle>
<text x="250" y="80" text-anchor="middle" fill="#e6edf3" font-size="14" font-weight="700">LM386</text>
<text x="250" y="98" text-anchor="middle" fill="#8b949e" font-size="9">DIP-8 Package</text>
<!-- Left pins -->
<rect x="155" y="38" width="20" height="8" rx="2" fill="#e6edf3"></rect><text x="148" y="46" text-anchor="end" fill="#e6edf3" font-size="9">1</text>
<rect x="155" y="60" width="20" height="8" rx="2" fill="#e6edf3"></rect><text x="148" y="68" text-anchor="end" fill="#e6edf3" font-size="9">2</text>
<rect x="155" y="82" width="20" height="8" rx="2" fill="#e6edf3"></rect><text x="148" y="90" text-anchor="end" fill="#e6edf3" font-size="9">3</text>
<rect x="155" y="104" width="20" height="8" rx="2" fill="#e6edf3"></rect><text x="148" y="112" text-anchor="end" fill="#e6edf3" font-size="9">4</text>
<!-- Right pins -->
<rect x="325" y="38" width="20" height="8" rx="2" fill="#e6edf3"></rect><text x="352" y="46" fill="#e6edf3" font-size="9">5</text>
<rect x="325" y="60" width="20" height="8" rx="2" fill="#e6edf3"></rect><text x="352" y="68" fill="#e6edf3" font-size="9">6</text>
<rect x="325" y="82" width="20" height="8" rx="2" fill="#e6edf3"></rect><text x="352" y="90" fill="#e6edf3" font-size="9">7</text>
<rect x="325" y="104" width="20" height="8" rx="2" fill="#e6edf3"></rect><text x="352" y="112" fill="#e6edf3" font-size="9">8</text>
<!-- Pin descriptions -->
<text x="148" y="140" text-anchor="end" fill="#bc8cff" font-size="8">Gain (−)</text>
<text x="148" y="152" text-anchor="end" fill="#f85149" font-size="8">Invert In</text>
<text x="148" y="164" text-anchor="end" fill="#58a6ff" font-size="8">Non-inv In</text>
<text x="148" y="176" text-anchor="end" fill="#f85149" font-size="8">GND</text>
<text x="352" y="140" fill="#d29922" font-size="8">Output</text>
<text x="352" y="152" fill="#bc8cff" font-size="8">Bypass/V+</text>
<text x="352" y="164" fill="#d29922" font-size="8">V+ Supply</text>
<text x="352" y="176" fill="#bc8cff" font-size="8">Gain (+)</text>
</svg>
</div>
</section>
<!-- SECTION 5: Assembly -->
<section id="assembly">
<div class="section-header">
<h2><span class="icon" style="background:rgba(63,185,80,0.15);color:var(--accent-green)">🔧</span> Step-by-Step Assembly</h2>
<p>Follow these steps in order. Take your time and double-check each connection.</p>
</div>
<ol class="step-list">
<li class="step-item">
<div class="step-number">1</div>
<h4>Place Both LM386 ICs on the Breadboard</h4>
<p>Insert each LM386 across the center gap of your breadboard. The notch (or dot) on the IC marks pin 1 — orient it toward the top-left corner. This places pins 1–4 on one side and pins 5–8 on the other, with each pin in its own row. Leave about 20 columns between the two chips for wiring clearance.</p>
</li>
<li class="step-item">
<div class="step-number">2</div>
<h4>Set Up Power Rails</h4>
<p>Connect the long red and blue lines on each side of your breadboard (the power rails). Use jumper wires to link all four rail sections together — two for V+ (red) and two for GND (blue/black). This ensures every row can access both rails. Connect your 9V battery snap: positive to the + rail, negative to the − rail.</p>
<div class="callout warning" style="margin-top:12px;">
<span class="callout-icon">⚠️</span>
<p><strong>Do not power on yet!</strong> We'll connect power at the very end after all components are placed.</p>
</div>
</li>
<li class="step-item">
<div class="step-number">3</div>
<h4>Connect IC Power Pins (Pin 7 → V+, Pin 4 → GND)</h4>
<p>For each LM386: use a red jumper wire from pin 7 to the + rail, and a black jumper wire from pin 4 to the − rail. Both chips share the same power rails. Verify with your multimeter in continuity mode that you have a connection — but no short between V+ and GND.</p>
</li>
<li class="step-item">
<div class="step-number">4</div>
<h4>Add Power Decoupling Capacitors (220µF)</h4>
<p>Place one 220µF electrolytic capacitor near each IC. The positive lead (+, longer leg) goes to the same row as pin 7 (V+). The negative lead (−, shorter leg / marked stripe on body) goes to the GND rail. These capacitors smooth out voltage spikes and prevent oscillation.</p>
</li>
<li class="step-item">
<div class="step-number">5</div>
<h4>Add Bypass Capacitors (0.1µF on Pin 6)</h4>
<p>Connect a 0.1µF ceramic capacitor from pin 6 of each LM386 to the V+ rail. Ceramic capacitors are non-polarized, so orientation doesn't matter. This suppresses high-frequency noise that could cause whistling or oscillation.</p>
</li>
<li class="step-item">
<div class="step-number">6</div>
<h4>Set Maximum Gain (10µF Between Pins 1 & 8)</h4>
<p>Connect a 10µF electrolytic capacitor between pin 1 and pin 8 of each LM386. This sets the internal gain to its maximum value of 200×. The positive lead goes toward pin 8 (which is at V+ potential). If you want lower volume/gain, replace this with a resistor: 1.2kΩ gives ~50× gain, 10kΩ gives ~30×.</p>
</li>
<li class="step-item">
<div class="step-number">7</div>
<h4>Install Volume Control Potentiometers (10kΩ)</h4>
<p>Mount each 10kΩ potentiometer on the breadboard. Connect the outer pins across a row — one to GND, the other receives the audio signal from your source. The center (wiper) pin feeds into the next stage. This creates a voltage divider that attenuates the input signal for volume control.</p>
</li>
<li class="step-item">
<div class="step-number">8</div>
<h4>Add Input Coupling Capacitors (10µF)</h4>
<p>Place a 10µF electrolytic capacitor between the wiper of each potentiometer and pin 3 (+ input) of its respective LM386. The positive lead faces toward the IC. This blocks any DC offset from your audio source while passing the AC audio signal through.</p>
</li>
<li class="step-item">
<div class="step-number">9</div>
<h4>Add Input Bias Resistors (1kΩ)</h4>
<p>Connect a 1kΩ resistor from pin 3 of each LM386 to ground. This provides a DC return path for the input and prevents the non-inverting input from floating, which would cause noise or unpredictable behavior.</p>
</li>
<li class="step-item">
<div class="step-number">10</div>
<h4>Wire the Stereo Audio Input Jack (3.5mm TRS)</h4>
<p>Solder or breadboard your stereo 3.5mm jack. The Tip connects to the left channel pot, the Ring connects to the right channel pot, and the Sleeve (ground) connects to the common GND rail. If using a pre-wired cable, strip the insulation carefully: typically green = tip (L), red = ring (R), black/bare = sleeve (GND).</p>
</li>
<li class="step-item">
<div class="step-number">11</div>
<h4>Add Output Coupling Capacitors (10µF)</h4>
<p>Connect a 10µF electrolytic capacitor from pin 5 (output) of each LM386 to the positive terminal of its speaker. The positive lead faces toward pin 5. This blocks the DC bias voltage (~half of V+) at the output while allowing the amplified AC audio signal to reach the speaker.</p>
</li>
<li class="step-item">
<div class="step-number">12</div>
<h4>Connect the Speakers (Last Step!)</h4>
<p>Connect one terminal of each 8Ω speaker to its output coupling capacitor. Connect the other speaker terminal to GND. The LM386 outputs a single-ended signal referenced to ground, so this completes the circuit.</p>
<div class="callout warning" style="margin-top:12px;">
<span class="callout-icon">🔊</span>
<p><strong>Speakers are connected LAST — after everything else is verified.</strong> This prevents accidental shorts or loud pops when you first power up. If your speakers have polarity markings, connect the positive terminal to the capacitor side and negative to ground for proper phase alignment.</p>
</div>
</li>
<li class="step-item">
<div class="step-number">13</div>
<h4>Final Inspection Before Power-On</h4>
<p>Before connecting your battery, perform a thorough visual inspection:</p>
<ul style="color:var(--text-secondary);padding-left:20px;margin-top:8px;display:grid;gap:6px;">
<li>All electrolytic capacitors oriented correctly (longer lead = positive)</li>
<li>No jumper wires bridging V+ and GND rails</li>
<li>Both ICs seated firmly with notch at top-left</li>
<li>All 16 pins of both ICs have connections as specified</li>
<li>Speaker terminals not touching each other or the breadboard metal strips</li>
</ul>
</li>
<li class="step-item">
<div class="step-number">14</div>
<h4>Power On & Test!</h4>
<p>Connect your 9V battery. Turn both volume pots fully counter-clockwise (minimum). Plug in your audio source and play a track at moderate volume. Slowly turn up each pot — you should hear clean, amplified stereo sound from both speakers.</p>
<div class="callout success" style="margin-top:12px;">
<span class="callout-icon">🎉</span>
<p><strong>Congratulations!</strong> You've built a working stereo audio amplifier. If you hear distortion, try reducing the gain by replacing the 10µF gain-setting capacitors with resistors (see Step 6).</p>
</div>
</li>
</ol>
</section>
<!-- SECTION 6: Testing & Troubleshooting -->
<section id="testing">
<div class="section-header">
<h2><span class="icon" style="background:rgba(210,153,34,0.15);color:var(--accent-orange)">🔍</span> Testing & Troubleshooting</h2>
<p>Common issues and how to resolve them.</p>
</div>
<div class="card">
<h3>Pre-Power Checklist (Use Your Multimeter)</h3>
<ul style="color:var(--text-secondary);padding-left:20px;display:grid;gap:8px;">
<li><strong style="color:var(--accent-green)">Continuity check:</strong> Set multimeter to continuity mode. Touch probes across V+ and GND rails — you should NOT hear a beep (that would indicate a short).</li>
<li><strong style="color:var(--accent-blue)">Voltage check:</strong> After connecting the battery, measure between V+ and GND rails. You should read ~9V DC.</li>
<li><strong style="color:var(--accent-purple)">Output DC offset:</strong> With no audio playing, measure DC voltage at pin 5 of each LM386 (relative to ground). It should be approximately V+/2 (~4.5V). If it reads near 0V or near 9V, the IC may be damaged.</li>
<li><strong style="color:var(--accent-orange)">AC signal check:</strong> Play audio and set multimeter to AC voltage mode. You should see a small AC voltage at pin 5 that increases with volume.</li>
</ul>
</div>
<h3 style="margin-bottom:16px;color:var(--accent-orange);">Common Problems & Fixes</h3>
<div class="trouble-grid">
<div class="trouble-card">
<h4>🔇 No Sound from Either Speaker</h4>
<p><strong>Cause:</strong> Most commonly a disconnected ground, dead battery, or IC not seated properly.<br><strong>Fix:</strong> Check that pin 4 of both ICs connects to GND. Verify the battery reads ~9V. Reseat both LM386 chips firmly.</p>
</div>
<div class="trouble-card">
<h4>🔊 Sound from Only One Channel</h4>
<p><strong>Cause:</strong> The silent channel likely has a bad connection at the input stage or power pins.<br><strong>Fix:</strong> Check that pin 7 (V+) and pin 3 (+input) of the dead IC are properly connected. Verify the audio jack ring contact is making good connection.</p>
</div>
<div class="trouble-card">
<h4>📢 Distortion / Clipping</h4>
<p><strong>Cause:</strong> Gain set too high (200×) for the input signal level, or source volume too loud.<br><strong>Fix:</strong> Lower your audio source volume. If still distorted, replace the 10µF gain cap with a 1kΩ resistor to reduce gain to ~50×.</p>
</div>
<div class="trouble-card">
<h4>🔊 Buzzing or Humming</h4>
<p><strong>Cause:</strong> Missing decoupling capacitors, ground loops, or poor breadboard connections.<br><strong>Fix:</strong> Ensure both 220µF and 0.1µF capacitors are installed per channel. Check that all ground connections are solid. Try a different power source.</p>
</div>
<div class="trouble-card">
<h4>🔥 IC Gets Hot</h4>
<p><strong>Cause:</strong> Output shorted to V+ or GND, or output DC coupling (missing output capacitor).<br><strong>Fix:</strong> Immediately disconnect power. Check that the 10µF output coupling capacitor is installed and correctly oriented between pin 5 and the speaker.</p>
</div>
<div class="trouble-card">
<h4>🔄 Feedback / Howling</h4>
<p><strong>Cause:</strong> Audio from speakers being picked up by a microphone or input, creating a loop.<br><strong>Fix:</strong> Reduce volume. Ensure the 0.1µF bypass capacitor is on pin 6. If using a mic as input, add a small resistor (47Ω) in series with pin 3.</p>
</div>
<div class="trouble-card">
<h4>⚡ Battery Drains Quickly</h4>
<p><strong>Cause:</strong> Normal behavior — the LM386 draws ~4mA quiescent current, and driving speakers increases this significantly.<br><strong>Fix:</strong> Use a wall adapter (7–12V DC) instead of batteries for extended listening. Add an on/off switch in series with V+.</p>
</div>
<div class="trouble-card">
<h4>🔌 Reversed Polarity Capacitor</h4>
<p><strong>Cause:</strong> Electrolytic capacitor installed backwards — the stripe side (negative) connected to positive voltage.<br><strong>Fix:</strong> Disconnect power immediately. Reverse the capacitor. A reversed electrolytic can leak, vent, or in rare cases burst. Replace if damaged.</p>
</div>
</div>
<div class="card" style="margin-top:24px;">
<h3>📊 Expected Performance</h3>
<table style="width:100%;border-collapse:collapse;margin-top:12px;">
<thead><tr><th style="padding:8px 12px;text-align:left;border-bottom:1px solid var(--border-color);color:var(--accent-blue)">Parameter</th><th style="padding:8px 12px;text-align:center;border-bottom:1px solid var(--border-color);color:var(--accent-cyan)">Value</th></tr></thead>
<tbody>
<tr><td style="padding:8px 12px;color:var(--text-secondary)">Supply Voltage</td><td style="padding:8px 12px;text-align:center;color:var(--text-primary);font-weight:600">9V DC</td></tr>
<tr><td style="padding:8px 12px;color:var(--text-secondary)">Voltage Gain (per channel)</td><td style="padding:8px 12px;text-align:center;color:var(--text-primary);font-weight:600">200× (~46 dB)</td></tr>
<tr><td style="padding:8px 12px;color:var(--text-secondary)">Output Power (per channel, at 9V)</td><td style="padding:8px 12px;text-align:center;color:var(--text-primary);font-weight:600">~30 mW into 8Ω</td></tr>
<tr><td style="padding:8px 12px;color:var(--text-secondary)">Quiescent Current (per IC)</td><td style="padding:8px 12px;text-align:center;color:var(--text-primary);font-weight:600">~4 mA</td></tr>
<tr><td style="padding:8px 12px;color:var(--text-secondary)">Frequency Response</td><td style="padding:8px 12px;text-align:center;color:var(--text-primary);font-weight:600">20 Hz – 20 kHz (−3 dB)</td></tr>
<tr><td style="padding:8px 12px;color:var(--text-secondary)">THD at 1kHz, 5mW</td><td style="padding:8px 12px;text-align:center;color:var(--text-primary);font-weight:600">< 0.7%</td></tr>
</tbody>
</table>
</div>
<div class="callout info" style="margin-top:24px;">
<span class="callout-icon">🚀</span>
<p><strong>Next steps:</strong> Once you're comfortable with this breadboard build, consider transferring the circuit to a perfboard or designing a custom PCB. You can also experiment with adding bass/treble EQ stages using additional op-amps (TL072), or cascade multiple LM386s for higher power output.</p>
</div>
</section>
</main>
<footer class="footer">
<p>Built as a learning resource · LM386 datasheet: <a href="https://www.ti.com/lit/dl/symlink/lm386.pdf" target="_blank" rel="noopener">TI LM386 Datasheet</a></p>
<p style="margin-top:4px;">Always work safely · Verify connections before applying power</p>
</footer>
<script>
'use strict';
</script>
</body>
</html>
<!-- agent-meta {"model":"qwen3.6-27b-mtp","provider":"lmstudio","persona":"composer","sessionId":"f3bb58f3-9cb6-414d-88f6-1bbc8546c6b8","tokensIn":434046,"tokensOut":48339,"tokensTotal":482385,"turns":13,"toolCalls":12,"failedToolCalls":1,"timestamp":"2026-07-30T14:19:23.949Z"} -->