Circuit
ox alpha · full
Reviews & generation details
Reviews
No human review yet. Unreviewed does not mean unsuccessful.
Generation context
Imported historical artifact. Its exact original instructions and lineage are not known.
Generation prompt · exact text unavailable
See the current prompt for reference. It may differ from the instructions used to generate this artifact.
Inspect original source 37,717 bytes · SHA-256 89a54856fc76
<!DOCTYPE html>
<html lang="en">
<head>
<meta charset="UTF-8">
<meta name="viewport" content="width=device-width, initial-scale=1.0">
<title>Stereo Audio Amplifier — Breadboard Build Guide</title>
<style>
:root{
--bg:#0d1117;
--panel:#161b22;
--panel2:#1c2330;
--border:#2b3444;
--text:#e6edf3;
--muted:#9aa7b8;
--accent:#00e5a0;
--accent2:#4da3ff;
--warn:#ffb454;
--danger:#ff6b6b;
--mono:'SFMono-Regular',Consolas,'Liberation Mono',Menlo,monospace;
}
*{box-sizing:border-box;margin:0;padding:0}
html{scroll-behavior:smooth}
body{
background:
radial-gradient(1200px 600px at 80% -10%, rgba(77,163,255,.08), transparent),
radial-gradient(900px 500px at -10% 30%, rgba(0,229,160,.06), transparent),
var(--bg);
color:var(--text);
font-family:-apple-system,BlinkMacSystemFont,'Segoe UI',Roboto,Helvetica,Arial,sans-serif;
line-height:1.65;
font-size:16.5px;
}
.wrap{max-width:960px;margin:0 auto;padding:0 20px 80px}
header.hero{
padding:64px 0 40px;
border-bottom:1px solid var(--border);
margin-bottom:48px;
}
.badge{
display:inline-block;font-family:var(--mono);font-size:.75rem;letter-spacing:.12em;
text-transform:uppercase;color:var(--accent);border:1px solid rgba(0,229,160,.35);
background:rgba(0,229,160,.07);padding:4px 12px;border-radius:999px;margin-bottom:18px;
}
h1{font-size:clamp(1.9rem,5vw,3rem);line-height:1.15;font-weight:800;letter-spacing:-.02em}
h1 .grad{background:linear-gradient(90deg,var(--accent),var(--accent2));-webkit-background-clip:text;background-clip:text;color:transparent}
.subtitle{color:var(--muted);margin-top:14px;font-size:1.1rem;max-width:44rem}
nav.toc{margin-top:28px;display:flex;flex-wrap:wrap;gap:10px}
nav.toc a{
font-size:.85rem;color:var(--text);text-decoration:none;border:1px solid var(--border);
background:var(--panel);padding:6px 14px;border-radius:999px;transition:.15s;
}
nav.toc a:hover{border-color:var(--accent);color:var(--accent)}
section{margin-bottom:56px}
h2{
display:flex;align-items:center;gap:14px;
font-size:1.55rem;font-weight:750;letter-spacing:-.01em;
margin-bottom:20px;padding-bottom:12px;border-bottom:1px solid var(--border);
}
h2 .num{
flex:none;width:38px;height:38px;border-radius:10px;display:grid;place-items:center;
font-family:var(--mono);font-size:.95rem;color:#04150f;
background:linear-gradient(135deg,var(--accent),#00b87e);
}
h3{font-size:1.13rem;margin:26px 0 10px;color:var(--accent2)}
p{margin-bottom:14px;color:#cdd6e3}
strong{color:var(--text)}
ul.plain{list-style:none;margin:0 0 16px}
ul.plain li{padding-left:26px;position:relative;margin-bottom:9px;color:#cdd6e3}
ul.plain li::before{content:"▸";position:absolute;left:4px;color:var(--accent)}
.card{
background:var(--panel);border:1px solid var(--border);border-radius:14px;
padding:24px 26px;margin:18px 0;
}
.card.warn{border-color:rgba(255,180,84,.45);background:rgba(255,180,84,.05)}
.card.danger{border-color:rgba(255,107,107,.45);background:rgba(255,107,107,.05)}
.card.tip{border-color:rgba(77,163,255,.4);background:rgba(77,163,255,.05)}
.card h4{font-size:.85rem;text-transform:uppercase;letter-spacing:.1em;margin-bottom:10px;font-family:var(--mono)}
.card.warn h4{color:var(--warn)}
.card.danger h4{color:var(--danger)}
.card.tip h4{color:var(--accent2)}
table{width:100%;border-collapse:collapse;font-size:.94rem;background:var(--panel);
border:1px solid var(--border);border-radius:12px;overflow:hidden}
th{background:var(--panel2);text-align:left;padding:12px 14px;font-family:var(--mono);
font-size:.78rem;text-transform:uppercase;letter-spacing:.08em;color:var(--accent);white-space:nowrap}
td{padding:11px 14px;border-top:1px solid var(--border);vertical-align:top;color:#cdd6e3}
tr:hover td{background:rgba(77,163,255,.04)}
td.qty{font-family:var(--mono);color:var(--accent2);white-space:nowrap}
code{font-family:var(--mono);font-size:.86em;background:rgba(77,163,255,.12);
color:#a9cdff;padding:2px 6px;border-radius:5px}
.table-scroll{overflow-x:auto;border-radius:12px}
figure{margin:26px 0;background:var(--panel);border:1px solid var(--border);
border-radius:14px;padding:20px;overflow-x:auto}
figcaption{margin-top:12px;color:var(--muted);font-size:.88rem;text-align:center;font-style:italic}
svg{display:block;margin:0 auto;max-width:100%;height:auto}
ol.steps{counter-reset:step;list-style:none}
ol.steps>li{
counter-increment:step;position:relative;padding:0 0 28px 62px;margin:0;
}
ol.steps>li::before{
content:counter(step,decimal-leading-zero);
position:absolute;left:0;top:0;width:42px;height:42px;border-radius:12px;
display:grid;place-items:center;font-family:var(--mono);font-weight:700;font-size:.95rem;
color:#04150f;background:linear-gradient(135deg,var(--accent),#00b87e);
box-shadow:0 0 0 4px rgba(0,229,160,.12);
}
ol.steps>li::after{
content:"";position:absolute;left:21px;top:46px;bottom:6px;width:2px;
background:linear-gradient(var(--border) 70%, transparent);
}
ol.steps>li:last-child::after{display:none}
ol.steps li strong.step-title{display:block;font-size:1.08rem;margin-bottom:6px}
.pin-tag{font-family:var(--mono);font-size:.82rem;background:rgba(0,229,160,.1);
color:var(--accent);padding:1px 7px;border-radius:5px;border:1px solid rgba(0,229,160,.25)}
details{background:var(--panel);border:1px solid var(--border);border-radius:12px;
margin-bottom:12px;overflow:hidden}
summary{cursor:pointer;padding:15px 20px;font-weight:600;color:var(--text);list-style:none;
display:flex;align-items:center;gap:12px}
summary::before{content:"?";flex:none;width:26px;height:26px;border-radius:8px;display:grid;place-items:center;
background:rgba(255,107,107,.15);color:var(--danger);font-family:var(--mono);font-size:.85rem}
summary::-webkit-details-marker{display:none}
details[open] summary{border-bottom:1px solid var(--border)}
details .body{padding:16px 20px 18px;color:#cdd6e3}
footer{border-top:1px solid var(--border);margin-top:64px;padding-top:24px;
color:var(--muted);font-size:.85rem;text-align:center}
@media(max-width:640px){
body{font-size:15.5px}
ol.steps>li{padding-left:54px}
.card{padding:18px}
}
</style>
</head>
<body>
<div class="wrap">
<header class="hero">
<span class="badge">DIY Electronics · Project Guide</span>
<h1>Stereo Audio Amplifier<br><span class="grad">Breadboard Build</span></h1>
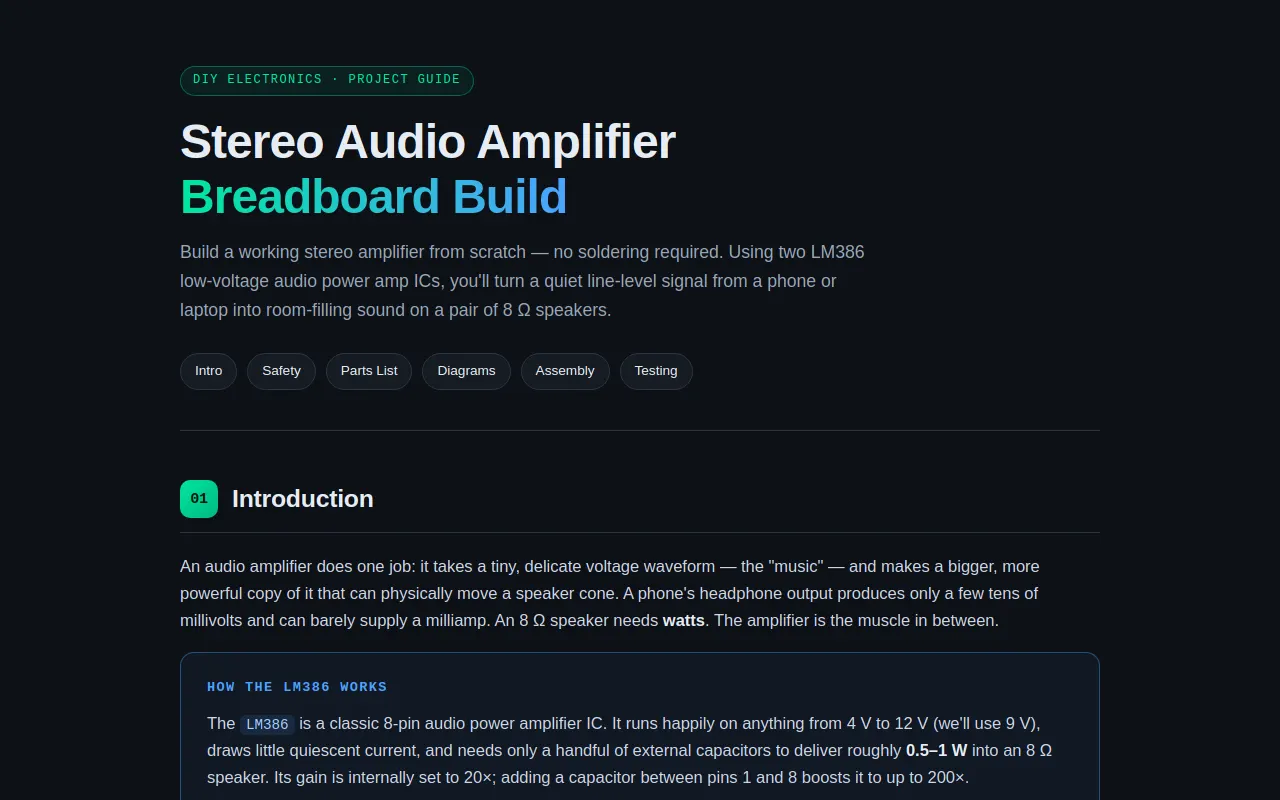
<p class="subtitle">Build a working stereo amplifier from scratch — no soldering required. Using two LM386 low-voltage audio power amp ICs, you'll turn a quiet line-level signal from a phone or laptop into room-filling sound on a pair of 8 Ω speakers.</p>
<nav class="toc">
<a href="#intro">Intro</a><a href="#safety">Safety</a><a href="#parts">Parts List</a>
<a href="#diagrams">Diagrams</a><a href="#assembly">Assembly</a><a href="#testing">Testing</a>
</nav>
</header>
<!-- ============ 1. INTRODUCTION ============ -->
<section id="intro">
<h2><span class="num">01</span>Introduction</h2>
<p>An audio amplifier does one job: it takes a tiny, delicate voltage waveform — the "music" — and makes a bigger, more powerful copy of it that can physically move a speaker cone. A phone's headphone output produces only a few tens of millivolts and can barely supply a milliamp. An 8 Ω speaker needs <strong>watts</strong>. The amplifier is the muscle in between.</p>
<div class="card tip">
<h4>How the LM386 works</h4>
<p>The <code>LM386</code> is a classic 8-pin audio power amplifier IC. It runs happily on anything from 4 V to 12 V (we'll use 9 V), draws little quiescent current, and needs only a handful of external capacitors to deliver roughly <strong>0.5–1 W</strong> into an 8 Ω speaker. Its gain is internally set to 20×; adding a capacitor between pins 1 and 8 boosts it to up to 200×.</p>
<p style="margin-bottom:0">For <strong>stereo</strong>, we simply build the circuit twice — one LM386 per channel (left & right), sharing one power source and ground. Each channel gets its own volume potentiometer (or a dual-gang pot if you have one), its own input coupling capacitor, and its own output coupling capacitor feeding its speaker.</p>
</div>
<h3>Signal chain at a glance</h3>
<ul class="plain">
<li><strong>Audio source</strong> → 3.5 mm plug carrying left/right line-level signals plus ground.</li>
<li><strong>Volume pot</strong> → voltage divider that attenuates the signal before amplification.</li>
<li><strong>Input coupling cap (10 µF)</strong> → blocks DC from the source while passing audio.</li>
<li><strong>LM386</strong> → amplifies the AC waveform ~20–200×.</li>
<li><strong>Output coupling cap (220 µF)</strong> → removes the DC bias so only audio reaches the speaker.</li>
<li><strong>Speaker</strong> → converts the amplified current into sound.</li>
</ul>
<p><strong>By the end of this guide</strong> you will have a powered breadboard stereo amp with independent volume control, clean sound at moderate volume, and a solid understanding of decoupling, coupling, and grounding practices you can reuse in every future analog project.</p>
</section>
<!-- ============ 2. SAFETY ============ -->
<section id="safety">
<h2><span class="num">02</span>Safety & Prerequisites</h2>
<p>This is a genuinely beginner-friendly project — but good habits start now. Follow these rules every time you sit down at the bench.</p>
<div class="card danger">
<h4>Critical rules</h4>
<ul class="plain" style="margin-bottom:0">
<li><strong>Battery power only (or a regulated 9 V supply).</strong> Never connect this circuit to mains electricity. The LM386 runs on 4–12 V DC.</li>
<li><strong>Respect polarity.</strong> Electrolytic capacitors and the battery are polarized. Reversed electrolytics can vent or pop. Reversed battery polarity will destroy the IC instantly.</li>
<li><strong>Power off while wiring.</strong> Only connect the battery after every connection has been double-checked.</li>
<li><strong>Disconnect to modify.</strong> Pull the battery clip before moving any wire.</li>
</ul>
</div>
<div class="card warn">
<h4>Workbench hygiene</h4>
<ul class="plain" style="margin-bottom:0">
<li>Work on a dry, uncluttered surface with good lighting.</li>
<li>Keep drinks away from the board.</li>
<li>Trim component leads short and dispose of clippings — they love to roll into sockets and cause shorts.</li>
<li>Wash hands after handling electronics; avoid touching your face while building.</li>
</ul>
</div>
<h3>Tools required</h3>
<ul class="plain">
<li><strong>Breadboard</strong> (830 tie points recommended) — no soldering iron needed for this build.</li>
<li><strong>Jumper wires</strong> — a mix of M-M and M-F; shorter lengths keep things tidy.</li>
<li><strong>Wire strippers / cutters</strong> — for trimming leads and making custom jumpers.</li>
<li><strong>Multimeter</strong> — essential. You'll use it to verify battery voltage and check for shorts before power-up.</li>
<li><strong>Audio source</strong> — phone, tablet, or laptop with a 3.5 mm headphone jack (or a USB-C/Lightning-to-3.5 mm adapter).</li>
<li><strong>Speakers</strong> — two 8 Ω speakers, 0.5 W or larger.</li>
<li><em>Optional:</em> soldering iron — only if you later want to make the design permanent on perfboard.</li>
</ul>
<h3>Component knowledge crash course</h3>
<ul class="plain">
<li><strong>IC (Integrated Circuit)</strong> — a chip containing a whole amplifier circuit. The LM386's notch/marker indicates pin 1; pins count counter-clockwise when viewed from above.</li>
<li><strong>Electrolytic capacitor</strong> — polarized, stores charge. Long lead = positive. Used here for coupling and power filtering. Values in µF.</li>
<li><strong>Potentiometer</strong> — adjustable voltage divider. We use 10 kΩ as a volume control.</li>
<li><strong>Resistor</strong> — limits current / sets gain. Non-polarized; orientation doesn't matter.</li>
</ul>
</section>
<!-- ============ 3. PARTS LIST ============ -->
<section id="parts">
<h2><span class="num">03</span>Complete Parts List</h2>
<p>All parts together typically cost under $15. Quantities below cover <strong>both channels</strong>.</p>
<div class="table-scroll">
<table>
<thead>
<tr><th>#</th><th>Component / Part Number</th><th>Qty</th><th>Purpose in Circuit</th></tr>
</thead>
<tbody>
<tr><td>1</td><td><strong>LM386N-1</strong> Low Voltage Audio Power Amplifier IC</td><td class="qty">2</td><td>One per channel — amplifies the input signal ~20× (up to 200× with gain cap)</td></tr>
<tr><td>2</td><td>Electrolytic capacitor <code>220 µF</code>, ≥16 V</td><td class="qty">2</td><td>Output coupling — blocks DC bias between IC output (pin 5) and speaker</td></tr>
<tr><td>3</td><td>Electrolytic capacitor <code>10 µF</code>, ≥16 V</td><td class="qty">2</td><td>Input coupling — blocks DC from the audio source into pin 3</td></tr>
<tr><td>4</td><td>Electrolytic capacitor <code>100 µF</code>, ≥16 V</td><td class="qty">1</td><td>Supply rail bulk filter across V+ / GND</td></tr>
<tr><td>5</td><td>Capacitor <code>0.1 µF (100 nF)</code> ceramic</td><td class="qty">1</td><td>High-frequency supply decoupling placed close to the ICs</td></tr>
<tr><td>6</td><td>Electrolytic capacitor <code>10 µF</code></td><td class="qty">2</td><td>Zobel/bypass network with series 10 Ω resistor at each output (stability)</td></tr>
<tr><td>7</td><td>Resistor <code>10 Ω</code> (brown-black-black)</td><td class="qty">2</td><td>Zobel network series resistor — tames high-frequency oscillation</td></tr>
<tr><td>8</td><td>Potentiometer <code>10 kΩ</code> linear (dual-gang ideal)</td><td class="qty">1</td><td>Volume control — divides the input signal per channel</td></tr>
<tr><td>9</td><td>3.5 mm stereo audio jack (TRS, panel or breadboard type)</td><td class="qty">1</td><td>Audio input from phone/laptop — Tip = Left, Ring = Right, Sleeve = GND</td></tr>
<tr><td>10</td><td>Speaker, <code>8 Ω</code>, 0.5 W+</td><td class="qty">2</td><td>Sound output — one per channel</td></tr>
<tr><td>11</td><td>9 V battery + snap connector <em>(or 9 V/1 A regulated DC supply, 2.1 mm barrel)</em></td><td class="qty">1</td><td>Power source for both channels</td></tr>
<tr><td>12</td><td>Breadboard, 830 tie points</td><td class="qty">1</td><td>Solderless prototyping platform</td></tr>
<tr><td>13</td><td>Jumper wire kit (M-M, assorted)</td><td class="qty">~25</td><td>All interconnects: power rails, grounds, signal paths</td></tr>
<tr><td>14</td><td>DIP-8 IC socket or careful IC handling</td><td class="qty">—</td><td>Protects LM386 legs during insertion/removal</td></tr>
</tbody>
</table>
</div>
</section>
<!-- ============ 4. DIAGRAMS ============ -->
<section id="diagrams">
<h2><span class="num">04</span>Circuit Diagrams</h2>
<h3>A. Schematic — single channel (build twice for stereo)</h3>
<figure>
<svg viewBox="0 0 900 420" xmlns="http://www.w3.org/2000/svg" role="img" aria-label="LM386 amplifier schematic, one channel">
<defs>
<marker id="arr" markerWidth="8" markerHeight="8" refX="7" refY="4" orient="auto">
<path d="M0,0 L8,4 L0,8 z" fill="#9aa7b8"/>
</marker>
</defs>
<style>
.w{stroke:#8fd8ff;stroke-width:2;fill:none}
.gnd{stroke:#8fa3b8;stroke-width:2;fill:none}
.lbl{font:13px monospace;fill:#e6edf3}
.pinlbl{font:bold 12px monospace;fill:#00e5a0}
.comp{fill:#1c2330;stroke:#4da3ff;stroke-width:1.5}
.ctext{font:12px sans-serif;fill:#cdd6e3}
.title{font:bold 16px sans-serif;fill:#e6edf3}
</style>
<text x="450" y="28" text-anchor="middle" class="title">LM386 Stereo Amplifier — Channel Schematic (Left channel shown; Right identical)</text>
<!-- Input jack -->
<circle cx="40" cy="200" r="5" fill="#ffb454"/>
<text x="40" y="185" text-anchor="middle" class="lbl">IN L</text>
<!-- Volume pot as divider -->
<line x1="45" y1="200" x2="110" y2="200" class="w"/>
<rect x="110" y="150" width="90" height="100" rx="8" class="comp"/>
<text x="155" y="140" text-anchor="middle" class="ctext">10 kΩ POT (volume)</text>
<line x1="130" y1="150" x2="130" y2="120" class="gnd"/>
<line x1="130" y1="120" x2="130" y2="105" class="gnd"/>
<line x1="118" y1="105" x2="142" y2="105" class="gnd"/><line x1="122" y1="98" x2="138" y2="98" class="gnd"/><line x1="126" y1="91" x2="134" y2="91" class="gnd"/>
<text x="152" y="96" class="ctext">to GND</text>
<!-- wiper -->
<line x1="200" y1="200" x2="250" y2="200" class="w"/>
<!-- Input coupling cap -->
<line x1="250" y1="200" x2="290" y2="200" class="w"/>
<rect x="290" y="192" width="6" height="16" fill="#00e5a0"/>
<rect x="304" y="192" width="6" height="16" fill="#00e5a0"/>
<line x1="296" y1="184" x2="296" y2="176" stroke="#00e5a0" stroke-width="2"/>
<line x1="292" y1="179" x2="300" y2="172" stroke="#00e5a0" stroke-width="2"/>
<line x1="310" y1="200" x2="350" y2="200" class="w"/>
<text x="300" y="165" text-anchor="middle" class="ctext">C1 · 10 µF</text>
<text x="300" y="230" text-anchor="middle" class="ctext">+ toward pin 3</text>
<!-- IC body -->
<rect x="350" y="130" width="170" height="140" rx="10" fill="#101720" stroke="#00e5a0" stroke-width="2"/>
<path d="M350 145 h-14 M350 175 h-14 M520 145 h14 M520 175 h14 M520 205 h14 M350 235 h-14 M520 265 h14" class="w" transform="translate(0,0)"/>
<text x="435" y="195" text-anchor="middle" style="font:bold 20px monospace;fill:#00e5a0">LM386</text>
<text x="435" y="215" text-anchor="middle" class="ctext">Gain = 20×</text>
<!-- gain pins 1-8 optional -->
<text x="366" y="150" class="pinlbl">1</text>
<text x="366" y="180" class="pinlbl">2</text>
<text x="366" y="240" class="pinlbl">3</text>
<text x="366" y="268" class="pinlbl">4</text>
<text x="498" y="150" class="pinlbl">8</text>
<text x="498" y="210" class="pinlbl">7</text>
<text x="498" y="240" class="pinlbl">6</text>
<text x="498" y="270" class="pinlbl">5</text>
<!-- Pin 3 input -->
<line x1="336" y1="233" x2="350" y2="233" class="w"/>
<!-- Pin 2 to GND -->
<line x1="336" y1="173" x2="310" y2="173" class="gnd"/>
<line x1="310" y1="173" x2="310" y2="320" class="gnd"/>
<!-- Pin 4 GND -->
<line x1="336" y1="267" x2="310" y2="267" class="gnd"/>
<line x1="310" y1="267" x2="310" y2="320" class="gnd"/>
<!-- ground symbol -->
<line x1="310" y1="320" x2="310" y2="332" class="gnd"/>
<line x1="292" y1="332" x2="328" y2="332" class="gnd"/>
<line x1="298" y1="340" x2="322" y2="340" class="gnd"/>
<line x1="304" y1="348" x2="316" y2="348" class="gnd"/>
<!-- Pin 6 V+ -->
<line x1="534" y1="203" x2="600" y2="203" class="w"/>
<line x1="600" y1="203" x2="600" y2="80" class="w"/>
<circle cx="600" cy="72" r="5" fill="#ff6b6b"/>
<text x="612" y="76" class="lbl">+9 V</text>
<!-- 100uF decoupling -->
<line x1="600" y1="120" x2="650" y2="120" class="w"/>
<rect x="650" y="112" width="6" height="16" fill="#00e5a0"/><rect x="664" y="112" width="6" height="16" fill="#00e5a0"/>
<text x="660" y="102" text-anchor="middle" class="ctext">C4 · 100 µF</text>
<line x1="670" y1="120" x2="700" y2="120" class="gnd"/>
<line x1="700" y1="120" x2="700" y2="332" class="gnd"/>
<line x1="682" y1="332" x2="718" y2="332" class="gnd"/><line x1="688" y1="340" x2="712" y2="340" class="gnd"/><line x1="694" y1="348" x2="706" y2="348" class="gnd"/>
<!-- Pin 5 output cap -->
<line x1="534" y1="267" x2="580" y2="267" class="w"/>
<rect x="580" y="259" width="6" height="16" fill="#00e5a0"/><rect x="594" y="259" width="6" height="16" fill="#00e5a0"/>
<text x="590" y="249" text-anchor="middle" class="ctext">C2 · 220 µF</text>
<line x1="600" y1="267" x2="640" y2="267" class="w"/>
<!-- Zobel: R + C to gnd -->
<line x1="640" y1="267" x2="640" y2="267" class="w"/>
<rect x="640" y="260" width="34" height="14" rx="4" class="comp"/>
<text x="657" y="252" text-anchor="middle" class="ctext">R1 10 Ω</text>
<line x1="674" y1="267" x2="700" y2="267" class="w"/>
<line x1="700" y1="267" x2="700" y2="300" class="w"/>
<rect x="693" y="300" width="6" height="16" fill="#00e5a0"/><rect x="707" y="300" width="6" height="16" fill="#00e5a0"/>
<text x="712" y="315" class="ctext">C3 10 µF→GND</text>
<!-- Speaker -->
<line x1="640" y1="267" x2="780" y2="267" class="w"/>
<rect x="780" y="245" width="52" height="44" rx="8" fill="#101720" stroke="#ffb454" stroke-width="2"/>
<circle cx="806" cy="267" r="14" fill="none" stroke="#ffb454" stroke-width="2"/>
<circle cx="806" cy="267" r="6" fill="#ffb454"/>
<text x="806" y="232" text-anchor="middle" class="ctext">Speaker 8 Ω</text>
<line x1="806" y1="289" x2="806" y2="320" class="gnd"/>
<line x1="788" y1="320" x2="824" y2="320" class="gnd"/>
<line x1="794" y1="328" x2="818" y2="328" class="gnd"/>
<line x1="800" y1="336" x2="812" y2="336" class="gnd"/>
<!-- bypass pin 7 note -->
<text x="560" y="185" class="ctext" font-style="italic">(pin 7: optional 10 µF bypass → GND)</text>
<!-- note strip -->
<text x="40" y="395" class="ctext">Right channel duplicates everything, fed by the jack's RING instead of TIP. Both channels share the same +9 V and GND rails.</text>
</svg>
<figcaption>Figure 1 — One-channel schematic. Pins shown inside the IC outline; electrolytic caps marked "+" toward the IC side where noted.</figcaption>
</figure>
<h3>B. Breadboard wiring guide (both channels)</h3>
<figure>
<svg viewBox="0 0 940 560" xmlns="http://www.w3.org/2000/svg" role="img" aria-label="Breadboard layout of stereo LM386 amplifier">
<style>
.hole{fill:#0a0e14;stroke:#2b3444;stroke-width:1}
.bb{fill:#141a24;stroke:#2b3444;stroke-width:2;rx:10}
.railP{stroke:#ff6b6b;stroke-width:3;fill:none}
.railN{stroke:#4da3ff;stroke-width:3;fill:none}
.jw{stroke:#00e5a0;stroke-width:3;fill:none;stroke-linecap:round}
.jwY{stroke:#ffb454;stroke-width:3;fill:none;stroke-linecap:round}
.jwR{stroke:#ff6b6b;stroke-width:3;fill:none;stroke-linecap:round}
.t{font:12px monospace;fill:#e6edf3}
.tt{font:bold 15px sans-serif;fill:#e6edf3}
.note{font:12px sans-serif;fill:#9aa7b8}
</style>
<text x="470" y="26" text-anchor="middle" class="tt">Breadboard Layout — Stereo LM386 Amplifier</text>
<!-- breadboard body -->
<rect x="60" y="60" width="700" height="380" rx="12" class="bb"/>
<!-- top rails -->
<line x1="80" y1="85" x2="740" y2="85" class="railP"/>
<text x="80" y="76" class="t" fill="#ff6b6b">+ RED RAIL (+9 V)</text>
<line x1="80" y1="108" x2="740" y2="108" class="railN"/>
<text x="80" y="124" class="t" fill="#4da3ff">− BLUE RAIL (GND)</text>
<!-- bottom rails -->
<line x1="80" y1="392" x2="740" y2="392" class="railP"/>
<line x1="80" y1="415" x2="740" y2="415" class="railN"/>
<!-- grid holes (simplified rows) -->
<g id="holes"></g>
<!-- ICs -->
<g transform="translate(180,190)">
<rect x="0" y="0" width="110" height="70" rx="8" fill="#101720" stroke="#00e5a0" stroke-width="2"/>
<circle cx="14" cy="14" r="4" fill="#00e5a0"/>
<text x="55" y="42" text-anchor="middle" class="t" style="font-weight:bold">IC1 LM386</text>
<text x="55" y="58" text-anchor="middle" class="note">LEFT ch</text>
</g>
<g transform="translate(480,190)">
<rect x="0" y="0" width="110" height="70" rx="8" fill="#101720" stroke="#00e5a0" stroke-width="2"/>
<circle cx="14" cy="14" r="4" fill="#00e5a0"/>
<text x="55" y="42" text-anchor="middle" class="t" style="font-weight:bold">IC2 LM386</text>
<text x="55" y="58" text-anchor="middle" class="note">RIGHT ch</text>
</g>
<!-- power jumps: battery -->
<circle cx="40" cy="85" r="6" fill="#ff6b6b"/>
<text x="40" y="68" text-anchor="middle" class="t">BAT +</text>
<circle cx="40" cy="108" r="6" fill="#4da3ff"/>
<text x="40" y="132" text-anchor="middle" class="t">BAT −</text>
<!-- rail bridges -->
<path d="M400 85 v23" class="jwR"/>
<path d="M400 392 v23" class="jwR"/>
<!-- IC1 wiring -->
<path d="M190 190 V108" class="jw"/> <!-- pin4-ish to gnd via left side -->
<path d="M280 190 V85" class="jwR"/> <!-- pin6 to + -->
<path d="M190 260 V415 H80" class="jw"/> <!-- gnd run bottom -->
<!-- caps IC1 -->
<ellipse cx="330" cy="225" rx="16" ry="22" fill="#1c2330" stroke="#ffb454" stroke-width="2"/>
<text x="330" y="262" text-anchor="middle" class="note">220µF out</text>
<path d="M290 225 H314" class="jwY"/>
<path d="M346 225 H420" class="jwY"/>
<ellipse cx="150" cy="160" rx="14" ry="18" fill="#1c2330" stroke="#ffb454" stroke-width="2"/>
<text x="112" y="158" text-anchor="end" class="note">10µF in</text>
<path d="M164 172 Q180 200 182 200" class="jwY"/>
<!-- pots -->
<g transform="translate(120,300)">
<rect x="0" y="0" width="70" height="46" rx="8" fill="#101720" stroke="#4da3ff" stroke-width="2"/>
<text x="35" y="28" text-anchor="middle" class="t">POT L</text>
</g>
<g transform="translate(430,300)">
<rect x="0" y="0" width="70" height="46" rx="8" fill="#101720" stroke="#4da3ff" stroke-width="2"/>
<text x="35" y="28" text-anchor="middle" class="t">POT R</text>
</g>
<!-- input jack -->
<g transform="translate(640,300)">
<rect x="0" y="0" width="90" height="46" rx="8" fill="#101720" stroke="#ffb454" stroke-width="2"/>
<text x="45" y="20" text-anchor="middle" class="t">JACK TRS</text>
<text x="45" y="36" text-anchor="middle" class="note">T·R·S</text>
</g>
<path d="M640 323 H560 Q540 323 535 300" class="jwY"/>
<path d="M640 335 H510 Q500 335 497 300" class="jwY"/>
<!-- speakers -->
<g transform="translate(800,140)">
<circle cx="50" cy="50" r="46" fill="#101720" stroke="#ffb454" stroke-width="3"/>
<circle cx="50" cy="50" r="18" fill="#ffb454"/>
<text x="50" y="115" text-anchor="middle" class="t">SPKR L 8Ω</text>
</g>
<g transform="translate(800,340)">
<circle cx="50" cy="50" r="46" fill="#101720" stroke="#ffb454" stroke-width="3"/>
<circle cx="50" cy="50" r="18" fill="#ffb454"/>
<text x="50" y="115" text-anchor="middle" class="t">SPKR R 8Ω</text>
</g>
<path d="M420 225 H760 Q790 225 820 200" class="jwY"/>
<path d="M590 225 H700 Q790 225 830 380" class="jwY"/>
<!-- legend -->
<g transform="translate(60,480)">
<line x1="0" y1="0" x2="34" y2="0" class="jwR"/><text x="42" y="4" class="note">+9 V power</text>
<line x1="160" y1="0" x2="194" y2="0" class="jw"/><text x="202" y="4" class="note">Ground (blue rail)</text>
<line x1="360" y1="0" x2="394" y2="0" class="jwY"/><text x="402" y="4" class="note">Audio signal</text>
<text x="560" y="4" class="note">Green dot on IC = pin 1 (notch end)</text>
</g>
</svg>
<figcaption>Figure 2 — Simplified physical layout. ICs straddle the center gap; each row of 5 holes shares a node. Keep the red/blue rails consistent along the entire board.</figcaption>
</figure>
<h3>C. LM386 pinout reference</h3>
<figure>
<svg viewBox="0 0 460 300" xmlns="http://www.w3.org/2000/svg" role="img" aria-label="LM386 DIP-8 pinout">
<style>.pl{font:bold 13px monospace}</style>
<rect x="140" y="40" width="140" height="220" rx="8" fill="#101720" stroke="#00e5a0" stroke-width="2.5"/>
<circle cx="156" cy="58" r="6" fill="none" stroke="#00e5a0" stroke-width="2"/>
<text x="210" y="155" text-anchor="middle" style="font:bold 18px monospace;fill:#00e5a0">LM386</text>
<text x="210" y="175" text-anchor="middle" class="pl" fill="#9aa7b8">DIP-8</text>
<!-- left pins -->
<g fill="#8fa3b8"><rect x="110" y="55" width="30" height="10" rx="3"/><rect x="110" y="105" width="30" height="10" rx="3"/><rect x="110" y="155" width="30" height="10" rx="3"/><rect x="110" y="205" width="30" height="10" rx="3"/></g>
<!-- right pins -->
<g fill="#8fa3b8"><rect x="280" y="55" width="30" height="10" rx="3"/><rect x="280" y="105" width="30" height="10" rx="3"/><rect x="280" y="155" width="30" height="10" rx="3"/><rect x="280" y="205" width="30" height="10" rx="3"/></g>
<text x="104" y="64" text-anchor="end" class="pl" fill="#00e5a0">1 GAIN</text>
<text x="104" y="114" text-anchor="end" class="pl" fill="#00e5a0">2 −IN</text>
<text x="104" y="164" text-anchor="end" class="pl" fill="#00e5a0">3 +IN</text>
<text x="104" y="214" text-anchor="end" class="pl" fill="#00e5a0">4 GND</text>
<text x="316" y="64" class="pl" fill="#00e5a0">GAIN 8</text>
<text x="316" y="114" class="pl" fill="#00e5a0">BYPASS 7</text>
<text x="316" y="164" class="pl" fill="#00e5a0">VS (+9V) 6</text>
<text x="316" y="214" class="pl" fill="#00e5a0">OUT 5</text>
<text x="210" y="288" text-anchor="middle" style="font:11px monospace" fill="#9aa7b8">Notch/dot marks pin 1 · count counter-clockwise</text>
</svg>
<figcaption>Figure 3 — LM386 pinout, top view.</figcaption>
</figure>
</section>
<!-- ============ 5. ASSEMBLY ============ -->
<section id="assembly">
<h2><span class="num">05</span>Step-by-Step Assembly</h2>
<p><strong>Keep the battery disconnected until Step 10.</strong> Work on the left channel first, then mirror it for the right.</p>
<ol class="steps">
<li>
<strong class="step-title">Mount the ICs</strong>
<p>Place both LM386 chips so they straddle the breadboard's center channel, notch/pin-1 dot facing the same direction (e.g., toward the top). Leave at least 4–5 empty columns between them. If legs splay outward, gently press the chip flat against the table to align them before inserting — never force it.</p>
</li>
<li>
<strong class="step-title">Wire the power rails</strong>
<p>Jumper the battery's <span class="pin-tag">+</span> lead to the red rail and <span class="pin-tag">−</span> to the blue rail. If your breadboard has split rails, add bridge jumpers mid-board so both halves are live. Connect <strong>pin 6 (V<sub>S</sub>)</strong> of each IC to the red rail and <strong>pin 4 (GND)</strong> to the blue rail.</p>
</li>
<li>
<strong class="step-title">Add supply decoupling</strong>
<p>Place the <code>100 µF</code> electrolytic across the rails (long lead to red/+). Add the <code>0.1 µF</code> ceramic directly across the rails as close to the ICs as possible — this suppresses high-frequency noise and prevents motorboating. Watch electrolytic polarity!</p>
</li>
<li>
<strong class="step-title">Ground pin 2</strong>
<p>Jumper <strong>pin 2 (−IN)</strong> of each LM386 straight to the blue GND rail. This sets the input reference. A forgotten pin-2 ground is the #1 cause of loud hum or total silence.</p>
</li>
<li>
<strong class="step-title">Install the volume potentiometers</strong>
<p>For each channel: pot terminal 1 → blue GND rail, terminal 3 → audio input from the jack, wiper (terminal 2) → the channel's input coupling capacitor. Turning the knob now sweeps the volume from silence to full.</p>
</li>
<li>
<strong class="step-title">Connect the audio input jack</strong>
<p>Jack sleeve (the big shaft segment) → blue GND rail. Tip → left pot's terminal 3. Ring → right pot's terminal 3. If your jack is breadboard-mounted, note that T/R/S pin labels vary — verify with the multimeter's continuity mode against a known plug.</p>
</li>
<li>
<strong class="step-title">Add input coupling capacitors</strong>
<p>From each pot's wiper, connect a <code>10 µF</code> electrolytic to <strong>pin 3 (+IN)</strong> of the matching IC — positive leg toward the IC. This blocks DC from your audio device while letting the music through.</p>
</li>
<li>
<strong class="step-title">Add output coupling and Zobel networks</strong>
<p>From each <strong>pin 5 (OUT)</strong>: a <code>220 µF</code> cap (positive leg at pin 5) feeds the speaker's + terminal; the speaker − goes to GND. Optionally add the Zobel network — a <code>10 Ω</code> resistor in series with a <code>10 µF</code> cap from pin 5 to GND — for extra HF stability.</p>
</li>
<li>
<strong class="step-title">Connect the speakers</strong>
<p>Attach one 8 Ω speaker per channel, keeping speaker wires away from the input jack area to avoid feedback loops. Loose speaker strands touching adjacent rows are a common short — trim carefully.</p>
</li>
<li>
<strong class="step-title">Final inspection, then power up</strong>
<p>Set your multimeter to continuity and confirm there is <em>no</em> short between the red and blue rails. Then measure battery voltage (~9 V). Connect the battery, set the pots to minimum, plug in your audio source at low volume, and slowly turn up. You should hear clean stereo sound.</p>
</li>
</ol>
</section>
<!-- ============ 6. TESTING ============ -->
<section id="testing">
<h2><span class="num">06</span>Testing & Troubleshooting</h2>
<h3>Pre-power checklist</h3>
<ul class="plain">
<li>Continuity test: red rail ↔ blue rail should read <strong>open</strong> (no beep).</li>
<li>Every IC pin lands in its own column — no legs bent underneath the chip.</li>
<li>Electrolytic polarities verified (long lead / stripe side correct).</li>
<li>Pin 2 grounded on both ICs; all grounds share the blue rail.</li>
<li>Battery voltage ≥ 8.5 V under a fresh measurement.</li>
</ul>
<details>
<summary>No sound at all</summary>
<div class="body">Check battery voltage under load (it drops fast if something shorts). Verify pin 6 has +9 V and pin 4 has 0 V using the multimeter with the battery connected. Confirm pin 2 → GND and that the input cap actually reaches pin 3. Test the source with headphones first to rule out a dead cable or adapter.</div>
</details>
<details>
<summary>Loud hum or buzz (50/60 Hz)</summary>
<div class="body">Almost always a missing or loose ground. Re-seat every GND jumper, especially the jack sleeve and pin 2/4 connections. Keep input wires short and route them away from the output/speaker wiring. Add or reposition the 0.1 µF decoupling cap closer to the ICs.</div>
</details>
<details>
<summary>Distorted or "farty" sound at high volume</summary>
<div class="body">The LM386 is clipping — expected near max output on a 9 V supply. Lower the source volume and use the pot for level. Also check that the 220 µF output cap isn't reversed and the speaker really is 8 Ω (a 4 Ω speaker doubles current demand).</div>
</details>
<details>
<summary>High-pitched squeal / whine (oscillation)</summary>
<div class="body">Classic feedback loop: output wiring too close to input wiring, or missing decoupling. Physically separate input and output sides of the board, shorten jumpers, and confirm the Zobel network (10 Ω + 10 µF) is installed. Twist long speaker leads if needed.</div>
</details>
<details>
<summary>One channel works, other doesn't</summary>
<div class="body">Great news — the fault is isolated. Compare the working and silent channels wire-by-wire. Swap the two ICs: if the fault follows the chip, the IC is damaged (usually from reversed power); if not, it's a wiring error. Check the corresponding pot and jack ring connection.</div>
</details>
<details>
<summary>Motorboating (putt-putt-putt sound)</summary>
<div class="body">Instability caused by shared supply impedance. Increase the bulk filter cap (add another 100–220 µF across the rails), improve rail distribution, and ensure the 0.1 µF ceramic sits right next to each IC's pin 6.</div>
</details>
<div class="card warn">
<h4>If something gets hot</h4>
<p style="margin-bottom:0">If any component becomes hot to the touch or you smell anything odd, disconnect the battery immediately. A hot LM386 usually means reversed power, a rail-to-rail short, or a speaker shorted to ground. Diagnose with the multimeter before re-applying power.</p>
</div>
<div class="card tip">
<h4>Level up once it works</h4>
<p style="margin-bottom:0">Add a <code>10 µF</code> cap between pins 1 and 8 of each LM386 for 200× gain (great for quiet sources), upgrade to a dual-gang pot for true stereo tracking, or transfer the proven layout onto perfboard and solder it permanently.</p>
</div>
</section>
<footer>
Stereo LM386 Breadboard Amplifier Guide · Built safely on ≤ 9 V DC · Happy building ⚡
</footer>
</div>
</body>
</html>
<!-- agent-meta {"model":"stealth/ox-alpha","provider":"openrouter","persona":"full","sessionId":"4df4a9bc-5023-4ca4-8bd7-205bc76cc1a6","tokensIn":127615,"tokensOut":12802,"tokensTotal":140417,"cost":0,"turns":6,"toolCalls":5,"failedToolCalls":0,"timestamp":"2026-08-21T19:23:28.776Z"} -->