Circuit
inkling · typescript
Reviews & generation details
Reviews
No human review yet. Unreviewed does not mean unsuccessful.
Generation context
Imported historical artifact. Its exact original instructions and lineage are not known.
Generation prompt · exact text unavailable
See the current prompt for reference. It may differ from the instructions used to generate this artifact.
Inspect original source 28,975 bytes · SHA-256 57de18124a9b
<!doctype html>
<html lang="en">
<head>
<meta charset="utf-8">
<meta name="viewport" content="width=device-width, initial-scale=1">
<title>Stereo Audio Amplifier — LM386 Breadboard Guide</title>
<style>
/* ── css: theme ── */
/* Dark Tech Theme for Amplifier Guide */
:root {
--bg: #0b0d14;
--surface: #121420;
--surface-2: #171a2a;
--surface-3: #1e2235;
--text: #e8eaf0;
--text-dim: #8a8f9e;
--accent: #00d4aa;
--accent-2: #f0a030;
--red: #e85d5d;
--border: #25283a;
--code-bg: #0d0f18;
--font-sans: 'Segoe UI', system-ui, -apple-system, sans-serif;
--font-mono: 'Fira Code', 'SF Mono', monospace;
}
* { margin:0; padding:0; box-sizing:border-box; }
html { scroll-behavior:smooth; }
body {
background: var(--bg);
color: var(--text);
font-family: var(--font-sans);
line-height: 1.6;
-webkit-font-smoothing: antialiased;
}
#app { max-width: 1100px; margin: 0 auto; padding: 2rem 1.5rem; }
header { padding: 3rem 0 2rem; border-bottom: 1px solid var(--border); margin-bottom: 2.5rem; }
.badge {
display: inline-block; padding: .25rem .7rem; border-radius: 999px;
font-size: .75rem; font-weight: 700; letter-spacing: .05em; text-transform: uppercase;
background: linear-gradient(135deg, var(--accent), #0090cc); color: var(--bg);
margin-bottom: .75rem; box-shadow: 0 0 20px rgba(0,212,170,.25);
}
h1 { font-size: 2.6rem; letter-spacing: -.03em; line-height: 1.1; margin-bottom: .5rem; }
h1 .accent { color: var(--accent); text-shadow: 0 0 30px rgba(0,212,170,.35); }
h2 { font-size: 1.5rem; margin: 3rem 0 1rem; padding-bottom: .4rem; border-bottom: 2px solid var(--border); color: var(--accent); }
h3 { font-size: 1.05rem; margin: 1.5rem 0 .5rem; color: var(--accent-2); }
p { color: var(--text-dim); margin-bottom: 1rem; }
.card {
background: var(--surface);
border: 1px solid var(--border);
border-radius: 16px;
padding: 1.5rem;
margin-bottom: 1.5rem;
box-shadow: 0 4px 30px rgba(0,0,0,.3);
}
.card h3 { margin-top: 0; }
.grid-2 {
display: grid;
grid-template-columns: repeat(auto-fit, minmax(300px, 1fr));
gap: 1.5rem;
}
.table-wrap { overflow-x: auto; }
table { width: 100%; border-collapse: collapse; font-size: .9rem; }
thead th { text-align: left; padding: .7rem .9rem; background: var(--surface-2); color: var(--accent); font-size: .75rem; text-transform: uppercase; letter-spacing: .06em; border-bottom: 2px solid var(--border); }
tbody td { padding: .7rem .9rem; border-bottom: 1px solid var(--border); color: var(--text-dim); }
tbody tr:hover td { background: rgba(0,212,170,.04); }
code.inline { background: var(--code-bg); color: var(--accent); padding: .15rem .35rem; border-radius: 4px; font-family: var(--font-mono); font-size: .9em; }
.diagram-box {
background: var(--surface-2);
border: 2px solid var(--border);
border-radius: 12px;
padding: 1rem;
margin: 1rem 0;
text-align: center;
}
.diagram-box svg { max-width: 100%; height: auto; }
.diagram-label { text-align: center; font-size: .8rem; color: var(--text-dim); margin-top: .5rem; letter-spacing: .03em; }
.steps { counter-reset: step; }
.step { display: flex; gap: 1.25rem; padding: 1rem 0; border-bottom: 1px solid var(--border); }
.step:last-child { border-bottom: none; }
.step-num {
flex-shrink: 0; width: 40px; height: 40px; border-radius: 50%;
background: linear-gradient(135deg, var(--accent), #0090cc);
color: var(--bg); font-weight: 800; font-size: 1.1rem;
display: flex; align-items: center; justify-content: center;
box-shadow: 0 0 15px rgba(0,212,170,.3);
}
.step-body h4 { margin: 0 0 .25rem; color: var(--text); }
.tips { background: linear-gradient(135deg, rgba(240,160,48,.08), rgba(240,160,48,.02)); border: 1px solid rgba(240,160,48,.25); border-radius: 10px; padding: 1rem; margin-top: 1rem; }
.tips strong { color: var(--accent-2); }
@media (max-width: 600px) { h1 { font-size: 1.8rem; } .grid-2 { grid-template-columns: 1fr; } }
</style>
</head>
<body>
<div id="app"><header>
<div class="badge">Breadboard Build Guide</div>
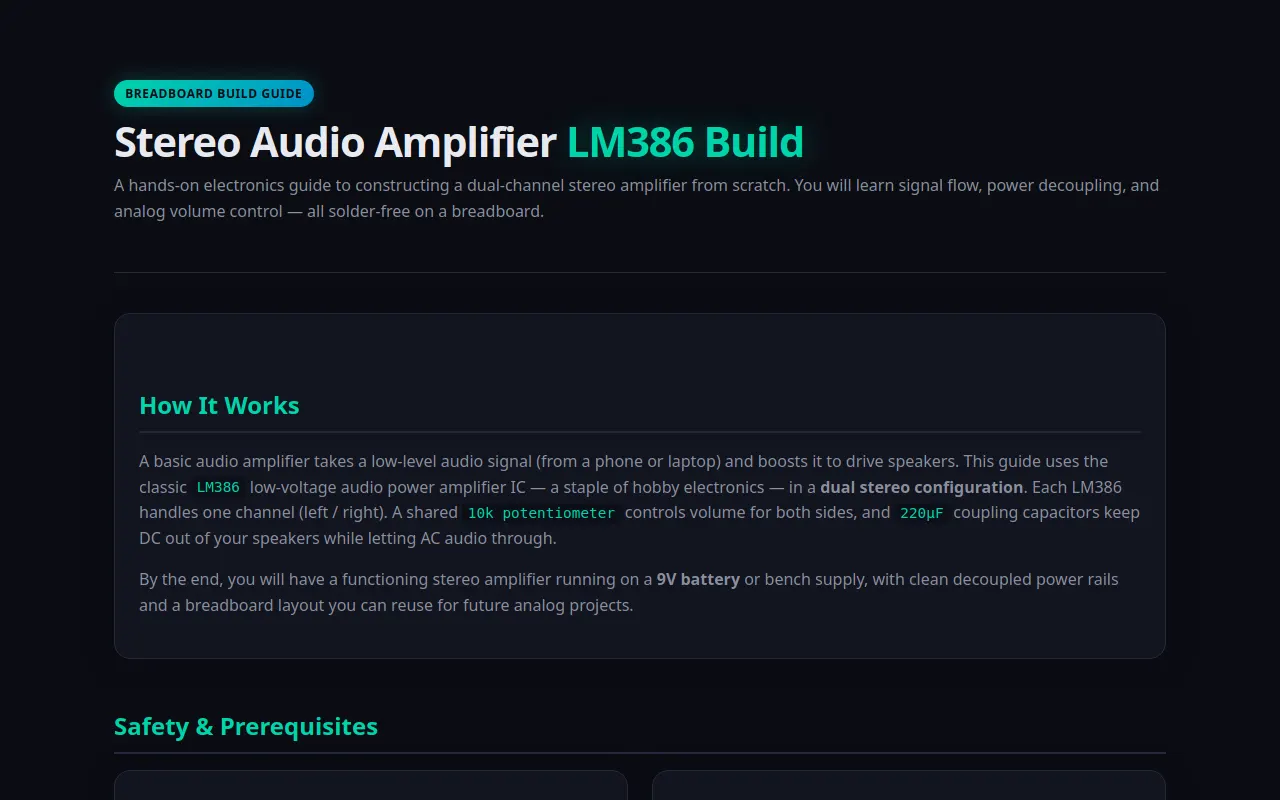
<h1>Stereo Audio Amplifier <span class="accent">LM386 Build</span></h1>
<p>A hands-on electronics guide to constructing a dual-channel stereo amplifier from scratch. You will learn signal flow, power decoupling, and analog volume control — all solder-free on a breadboard.</p>
</header>
<section class="card" aria-label="Introduction">
<h2>How It Works</h2>
<p>A basic audio amplifier takes a low-level audio signal (from a phone or laptop) and boosts it to drive speakers. This guide uses the classic <code class="inline">LM386</code> low-voltage audio power amplifier IC — a staple of hobby electronics — in a <strong>dual stereo configuration</strong>. Each LM386 handles one channel (left / right). A shared <code class="inline">10k potentiometer</code> controls volume for both sides, and <code class="inline">220µF</code> coupling capacitors keep DC out of your speakers while letting AC audio through.</p>
<p>By the end, you will have a functioning stereo amplifier running on a <strong>9V battery</strong> or bench supply, with clean decoupled power rails and a breadboard layout you can reuse for future analog projects.</p>
</section>
<section aria-label="Safety and Prerequisites">
<h2>Safety & Prerequisites</h2>
<div class="grid-2">
<div class="card">
<h3>Workbench Safety</h3>
<ul style="padding-left:1.1rem; color:var(--text-dim);">
<li>Always disconnect power before rewiring connections.</li>
<li>Keep metal tools away from powered rails.</li>
<li>Use eye protection when stripping small-gauge wire.</li>
<li>Work in a well-lit, dry area — moisture causes shorts.</li>
<li>If using a soldering iron (optional for this build), let it cool on a stand.</li>
</ul>
<div class="tips"><strong>Tip:</strong> A multimeter is your best friend. Check for shorts between VCC and GND before applying power.</div>
</div>
<div class="card">
<h3>Tools & Components</h3>
<ul style="padding-left:1.1rem; color:var(--text-dim);">
<li>Wire cutters / wire strippers</li>
<li>Digital multimeter (continuity + voltage)</li>
<li>Breadboard (half-size or full-size)</li>
<li>Jumper wires (male-to-male)</li>
<li>Audio source (3.5mm phone / laptop)</li>
<li>8-ohm speakers (or headphones with adapter)</li>
<li>9V battery with clip connector</li>
</ul>
</div>
</div>
</section>
<section aria-label="Bill of Materials">
<h2>Complete Parts List</h2>
<p>The table below lists every component, quantity, and its role in the circuit. All parts are common and inexpensive.</p>
<div class="table-wrap card">
<table>
<thead><tr><th>Component / Part Number</th><th>Qty</th><th>Purpose / Role</th></tr></thead>
<tbody>
<tr><td>LM386N-4 Low Voltage Audio Amp IC</td><td>2</td><td>Amplifies each stereo channel (L / R)</td></tr>
<tr><td>10µF Electrolytic Capacitor (16V+)</td><td>4</td><td>Input coupling and bypass (per channel)</td></tr>
<tr><td>220µF Electrolytic Capacitor (16V+)</td><td>2</td><td>Output coupling to speakers (blocks DC)</td></tr>
<tr><td>10k Linear Potentiometer (B10K)</td><td>1</td><td>Shared master volume control</td></tr>
<tr><td>8-Ohm Speaker</td><td>2</td><td>Audio output drivers (L / R)</td></tr>
<tr><td>9V Battery + Clip Connector</td><td>1</td><td>Power supply</td></tr>
<tr><td>0.1µF Ceramic Capacitor</td><td>2</td><td>Power rail decoupling (noise suppression)</td></tr>
<tr><td>Breadboard (half-size, 400 pts)</td><td>1</td><td>Prototyping platform</td></tr>
<tr><td>Male-to-Male Jumper Wires</td><td>~25</td><td>Signal, power, and ground connections</td></tr>
<tr><td>3.5mm Audio Jack (breadboard compatible)</td><td>1</td><td>Audio input source connection</td></tr>
</tbody>
</table>
</div>
</section>
<section aria-label="Circuit Diagrams">
<h2>Circuit Diagrams</h2>
<p>Below are two inline SVG views. The first is the classic <strong>schematic symbol view</strong> showing component relationships. The second is a <strong>breadboard layout guide</strong> mapping pin-to-pin wiring on a standard half-size breadboard.</p>
<h3>Schematic Symbol View</h3>
<div class="diagram-box">
<svg viewBox="0 0 720 320" xmlns="http://www.w3.org/2000/svg" aria-label="Schematic symbol diagram of LM386 stereo amplifier">
<!-- Background -->
<rect x="0" y="0" width="720" height="320" fill="#171a2a" rx="12"></rect>
<!-- Title -->
<text x="360" y="28" text-anchor="middle" font-family="Segoe UI, system-ui, sans-serif" font-size="14" fill="#00d4aa" font-weight="700">LM386 Stereo Amplifier — Symbol Schematic</text>
<!-- Power rail -->
<text x="30" y="70" font-size="11" fill="#8a8f9e" font-weight="600">VCC (9V)</text>
<line x1="30" y1="75" x2="700" y2="75" stroke="#f0a030" stroke-width="2" stroke-dasharray="6 3"></line>
<!-- GND rail -->
<text x="30" y="290" font-size="11" fill="#8a8f9e" font-weight="600">GND</text>
<line x1="30" y1="285" x2="700" y2="285" stroke="#00d4aa" stroke-width="2" stroke-dasharray="6 3"></line>
<!-- Left Channel LM386 -->
<rect x="80" y="100" width="140" height="130" fill="#1e2235" stroke="#00d4aa" stroke-width="2" rx="8"></rect>
<text x="150" y="125" text-anchor="middle" font-size="13" fill="#e8eaf0" font-weight="700">LM386 (L)</text>
<text x="150" y="142" text-anchor="middle" font-size="10" fill="#8a8f9e">Low Voltage Audio Amp</text>
<!-- Pins left -->
<line x1="80" y1="140" x2="55" y2="140" stroke="#e8eaf0" stroke-width="1.5"></line>
<text x="45" y="144" text-anchor="end" font-size="9" fill="#e8eaf0">In (+)</text>
<line x1="80" y1="160" x2="55" y2="160" stroke="#e8eaf0" stroke-width="1.5"></line>
<text x="45" y="164" text-anchor="end" font-size="9" fill="#e8eaf0">In (−)</text>
<line x1="80" y1="180" x2="55" y2="180" stroke="#e8eaf0" stroke-width="1.5"></line>
<text x="45" y="184" text-anchor="end" font-size="9" fill="#e8eaf0">GND</text>
<line x1="80" y1="200" x2="55" y2="200" stroke="#e8eaf0" stroke-width="1.5"></line>
<text x="45" y="204" text-anchor="end" font-size="9" fill="#e8eaf0">Gain (1-5)</text>
<!-- Pins right -->
<line x1="220" y1="140" x2="260" y2="140" stroke="#e8eaf0" stroke-width="1.5"></line>
<text x="268" y="144" font-size="9" fill="#e8eaf0">VCC</text>
<line x1="220" y1="160" x2="260" y2="160" stroke="#e8eaf0" stroke-width="1.5"></line>
<text x="268" y="164" font-size="9" fill="#e8eaf0">Out</text>
<line x1="220" y1="180" x2="260" y2="180" stroke="#e8eaf0" stroke-width="1.5"></line>
<text x="268" y="184" font-size="9" fill="#e8eaf0">Gain (8-200)</text>
<!-- Right Channel LM386 -->
<rect x="430" y="100" width="140" height="130" fill="#1e2235" stroke="#f0a030" stroke-width="2" rx="8"></rect>
<text x="500" y="125" text-anchor="middle" font-size="13" fill="#e8eaf0" font-weight="700">LM386 (R)</text>
<text x="500" y="142" text-anchor="middle" font-size="10" fill="#8a8f9e">Low Voltage Audio Amp</text>
<line x1="430" y1="140" x2="390" y2="140" stroke="#e8eaf0" stroke-width="1.5"></line>
<text x="382" y="144" text-anchor="end" font-size="9" fill="#e8eaf0">In (+)</text>
<line x1="430" y1="160" x2="390" y2="160" stroke="#e8eaf0" stroke-width="1.5"></line>
<text x="382" y="164" text-anchor="end" font-size="9" fill="#e8eaf0">In (−)</text>
<line x1="430" y1="180" x2="390" y2="180" stroke="#e8eaf0" stroke-width="1.5"></line>
<text x="382" y="184" text-anchor="end" font-size="9" fill="#e8eaf0">GND</text>
<line x1="570" y1="140" x2="620" y2="140" stroke="#e8eaf0" stroke-width="1.5"></line>
<text x="628" y="144" font-size="9" fill="#e8eaf0">VCC</text>
<line x1="570" y1="160" x2="620" y2="160" stroke="#e8eaf0" stroke-width="1.5"></line>
<text x="628" y="164" font-size="9" fill="#e8eaf0">Out</text>
<line x1="570" y1="180" x2="620" y2="180" stroke="#e8eaf0" stroke-width="1.5"></line>
<text x="628" y="184" font-size="9" fill="#e8eaf0">Gain (8-200)</text>
<!-- Potentiometer -->
<rect x="270" y="100" width="100" height="60" fill="#1e2235" stroke="#f0a030" stroke-width="2" rx="6"></rect>
<text x="320" y="125" text-anchor="middle" font-size="12" fill="#e8eaf0" font-weight="700">10k Pot</text>
<text x="320" y="142" text-anchor="middle" font-size="9" fill="#8a8f9e">Master Volume</text>
<line x1="270" y1="130" x2="240" y2="130" stroke="#f0a030" stroke-width="1.5"></line>
<line x1="370" y1="120" x2="390" y2="120" stroke="#e8eaf0" stroke-width="1.5"></line>
<line x1="370" y1="140" x2="390" y2="140" stroke="#e8eaf0" stroke-width="1.5"></line>
<line x1="320" y1="160" x2="320" y2="170" stroke="#f0a030" stroke-width="2"></line>
<line x1="240" y1="130" x2="150" y2="130" stroke="#e8eaf0" stroke-width="1" stroke-dasharray="3 2"></line>
<line x1="390" y1="120" x2="430" y2="120" stroke="#e8eaf0" stroke-width="1" stroke-dasharray="3 2"></line>
<line x1="390" y1="140" x2="430" y2="140" stroke="#e8eaf0" stroke-width="1" stroke-dasharray="3 2"></line>
<!-- Coupling caps -->
<rect x="50" y="240" width="70" height="30" fill="#171a2a" stroke="#00d4aa" stroke-width="1.5" rx="4"></rect>
<text x="85" y="256" text-anchor="middle" font-size="9" fill="#00d4aa" font-weight="600">220µF</text>
<text x="85" y="270" text-anchor="middle" font-size="8" fill="#8a8f9e">Coupling</text>
<line x1="120" y1="255" x2="150" y2="255" stroke="#e8eaf0" stroke-width="1.5"></line>
<rect x="580" y="240" width="70" height="30" fill="#171a2a" stroke="#f0a030" stroke-width="1.5" rx="4"></rect>
<text x="615" y="256" text-anchor="middle" font-size="9" fill="#f0a030" font-weight="600">220µF</text>
<text x="615" y="270" text-anchor="middle" font-size="8" fill="#8a8f9e">Coupling</text>
<!-- Speakers -->
<circle cx="180" cy="270" r="14" fill="#0b0d14" stroke="#00d4aa" stroke-width="2"></circle>
<text x="180" y="274" text-anchor="middle" font-size="10" fill="#00d4aa" font-weight="700">L</text>
<text x="230" y="274" font-size="10" fill="#e8eaf0">8Ω Speaker</text>
<circle cx="650" cy="270" r="14" fill="#0b0d14" stroke="#f0a030" stroke-width="2"></circle>
<text x="650" y="274" text-anchor="middle" font-size="10" fill="#f0a030" font-weight="700">R</text>
<text x="590" y="274" text-anchor="end" font-size="10" fill="#e8eaf0">8Ω Speaker</text>
</svg>
<div class="diagram-label">FIG 1 — Schematic Symbol View — LM386 Stereo Amplifier</div>
</div>
<h3>Breadboard Wiring Guide</h3>
<div class="diagram-box">
<svg viewBox="0 0 800 420" xmlns="http://www.w3.org/2000/svg" aria-label="Breadboard wiring guide for LM386 stereo amplifier">
<rect x="0" y="0" width="800" height="420" fill="#171a2a" rx="12"></rect>
<text x="400" y="28" text-anchor="middle" font-family="Segoe UI, system-ui, sans-serif" font-size="14" fill="#00d4aa" font-weight="700">Breadboard Wiring Layout — Half-Size (400 pt)</text>
<!-- Breadboard outline -->
<rect x="50" y="60" width="300" height="280" fill="#0d0f18" stroke="#25283a" stroke-width="2" rx="6"></rect>
<rect x="50" y="60" width="300" height="30" fill="#121420" stroke="#25283a" stroke-width="1"></rect>
<rect x="50" y="310" width="300" height="30" fill="#121420" stroke="#25283a" stroke-width="1"></rect>
<!-- Power rails -->
<line x1="70" y1="75" x2="330" y2="75" stroke="#f0a030" stroke-width="3" stroke-dasharray="8 4"></line>
<text x="80" y="68" font-size="9" fill="#f0a030" font-weight="700">VCC (+9V)</text>
<line x1="70" y1="325" x2="330" y2="325" stroke="#00d4aa" stroke-width="3" stroke-dasharray="8 4"></line>
<text x="80" y="318" font-size="9" fill="#00d4aa" font-weight="700">GND</text>
<!-- Columns -->
<g stroke="#25283a" stroke-width="1">
<line x1="100" y1="100" x2="100" y2="300"></line>
<line x1="140" y1="100" x2="140" y2="300"></line>
<line x1="180" y1="100" x2="180" y2="300"></line>
<line x1="220" y1="100" x2="220" y2="300"></line>
<line x1="260" y1="100" x2="260" y2="300"></line>
<line x1="300" y1="100" x2="300" y2="300"></line>
</g>
<!-- IC placement -->
<rect x="160" y="120" width="40" height="60" fill="#1e2235" stroke="#00d4aa" stroke-width="2" rx="4"></rect>
<text x="180" y="145" text-anchor="middle" font-size="9" fill="#e8eaf0" font-weight="700">LM386</text>
<text x="180" y="158" text-anchor="middle" font-size="7" fill="#8a8f9e">L-CH</text>
<line x1="160" y1="135" x2="130" y2="135" stroke="#e8eaf0" stroke-width="1"></line>
<line x1="160" y1="150" x2="130" y2="150" stroke="#e8eaf0" stroke-width="1"></line>
<line x1="200" y1="135" x2="240" y2="135" stroke="#f0a030" stroke-width="1.5"></line>
<line x1="200" y1="150" x2="240" y2="150" stroke="#f0a030" stroke-width="1.5"></line>
<line x1="180" y1="170" x2="180" y2="190" stroke="#e8eaf0" stroke-width="1"></line>
<!-- Second IC -->
<rect x="270" y="120" width="40" height="60" fill="#1e2235" stroke="#f0a030" stroke-width="2" rx="4"></rect>
<text x="290" y="145" text-anchor="middle" font-size="9" fill="#e8eaf0" font-weight="700">LM386</text>
<text x="290" y="158" text-anchor="middle" font-size="7" fill="#8a8f9e">R-CH</text>
<line x1="270" y1="135" x2="240" y2="135" stroke="#e8eaf0" stroke-width="1"></line>
<line x1="270" y1="150" x2="240" y2="150" stroke="#e8eaf0" stroke-width="1"></line>
<line x1="310" y1="135" x2="340" y2="135" stroke="#f0a030" stroke-width="1.5"></line>
<line x1="310" y1="150" x2="340" y2="150" stroke="#f0a030" stroke-width="1.5"></line>
<line x1="290" y1="170" x2="290" y2="190" stroke="#e8eaf0" stroke-width="1"></line>
<!-- Pot -->
<rect x="120" y="200" width="50" height="20" fill="#f0a03020" stroke="#f0a030" stroke-width="1.5" rx="3"></rect>
<text x="145" y="214" text-anchor="middle" font-size="7" fill="#f0a030" font-weight="700">10k Pot</text>
<line x1="120" y1="210" x2="90" y2="210" stroke="#e8eaf0" stroke-width="1.5"></line>
<line x1="170" y1="205" x2="240" y2="205" stroke="#e8eaf0" stroke-width="1" stroke-dasharray="3 2"></line>
<line x1="170" y1="215" x2="240" y2="215" stroke="#e8eaf0" stroke-width="1" stroke-dasharray="3 2"></line>
<!-- Capacitors -->
<rect x="70" y="240" width="30" height="20" fill="#171a2a" stroke="#00d4aa" stroke-width="1.5" rx="2"></rect>
<text x="85" y="254" text-anchor="middle" font-size="7" fill="#00d4aa">220µ</text>
<line x1="100" y1="250" x2="130" y2="250" stroke="#e8eaf0" stroke-width="1"></line>
<rect x="320" y="240" width="30" height="20" fill="#171a2a" stroke="#f0a030" stroke-width="1.5" rx="2"></rect>
<text x="335" y="254" text-anchor="middle" font-size="7" fill="#f0a030">220µ</text>
<line x1="350" y1="250" x2="380" y2="250" stroke="#e8eaf0" stroke-width="1"></line>
<!-- Input jack -->
<rect x="70" y="180" width="18" height="20" fill="#0b0d14" stroke="#e8eaf0" stroke-width="1.5" rx="2"></rect>
<text x="79" y="192" text-anchor="middle" font-size="6" fill="#e8eaf0">3.5</text>
<line x1="88" y1="190" x2="120" y2="190" stroke="#e8eaf0" stroke-width="1.5"></line>
<!-- Speakers labels -->
<text x="160" y="360" text-anchor="middle" font-size="11" fill="#00d4aa" font-weight="700">Left 8Ω Speaker</text>
<line x1="160" y1="330" x2="160" y2="350" stroke="#00d4aa" stroke-width="2"></line>
<text x="290" y="360" text-anchor="middle" font-size="11" fill="#f0a030" font-weight="700">Right 8Ω Speaker</text>
<line x1="290" y1="330" x2="290" y2="350" stroke="#f0a030" stroke-width="2"></line>
<!-- Wiring notes -->
<text x="400" y="390" text-anchor="middle" font-size="11" fill="#8a8f9e">Wires shown in orange = power / signal. Green dashed = ground rail.</text>
<text x="400" y="410" text-anchor="middle" font-size="9" fill="#8a8f9e">Always place decoupling caps (0.1µF) close to each LM386 VCC pin.</text>
</svg>
<div class="diagram-label">FIG 2 — Breadboard Layout Guide — Half-Size Board (400 pts)</div>
</div>
</section>
<section aria-label="Step-by-Step Assembly">
<h2>Step-by-Step Assembly</h2>
<p>Follow the numbered steps in order. Each step builds on the previous one, reducing the chance of a miswired connection.</p>
<div class="steps card">
<div class="step">
<div class="step-num">1</div>
<div class="step-body">
<h4>Place the LM386 ICs</h4>
<p>Insert both LM386 chips across the center gap of the breadboard — one for the <strong>left channel</strong> and one for the <strong>right channel</strong>. The notch or dot on the IC indicates pin 1. Orient both chips with the dot facing the left edge. This keeps pin numbering consistent for wiring.</p>
</div>
</div>
<div class="step">
<div class="step-num">2</div>
<div class="step-body">
<h4>Add Power Rails</h4>
<p>Use red jumper wires to connect the top red rail to the <strong>VCC (pin 6)</strong> of each LM386. Use black jumper wires to connect the bottom blue/black rail to <strong>GND (pin 4)</strong> of each LM386. This establishes a clean shared ground reference.</p>
</div>
</div>
<div class="step">
<div class="step-num">3</div>
<div class="step-body">
<h4>Install Decoupling Capacitors</h4>
<p>Place a <strong>0.1µF ceramic capacitor</strong> as close as possible to the VCC pin of each LM386 — across the positive and ground rails near the chip. These suppress high-frequency noise from the power supply that can cause hiss or oscillation.</p>
</div>
</div>
<div class="step">
<div class="step-num">4</div>
<div class="step-body">
<h4>Wire the Input Jacks</h4>
<p>Connect your audio source (3.5mm jack or headphone adapter) to the input side. The signal line goes through a <strong>10µF capacitor</strong> (positive leg toward the source) to <strong>pin 3</strong> (non-inverting input) of each LM386. The negative leg connects to the shared ground rail. Repeat for the right channel.</p>
</div>
</div>
<div class="step">
<div class="step-num">5</div>
<div class="step-body">
<h4>Connect the Volume Pot</h4>
<p>Insert the <strong>10k potentiometer</strong> into the breadboard. The left terminal connects to the audio input signal (before the coupling cap). The middle (wiper) connects to pin 3 of both LM386 chips through a shared line. The right terminal connects to ground. This creates a master volume control for both channels simultaneously.</p>
</div>
</div>
<div class="step">
<div class="step-num">6</div>
<div class="step-body">
<h4>Link Gain Pins</h4>
<p>Connect <strong>pin 1</strong> and <strong>pin 8</strong> on each LM386 with a short jumper wire. This sets the gain to <strong>200×</strong> — ideal for line-level input from phones. If the output is too loud or distorted, remove the jumper to drop gain to the default <strong>20×</strong>.</p>
</div>
</div>
<div class="step">
<div class="step-num">7</div>
<div class="step-body">
<h4>Wire the Speaker Outputs</h4>
<p>From <strong>pin 5</strong> (output) of each LM386, wire through a <strong>220µF capacitor</strong> (positive leg toward the chip). The negative leg connects to the positive terminal of your <strong>8Ω speaker</strong>. The speaker’s negative terminal returns to ground. Repeat for the right channel. The capacitor blocks DC offset from reaching the speaker.</p>
</div>
</div>
<div class="step">
<div class="step-num">8</div>
<div class="step-body">
<h4>Attach the Power Supply</h4>
<p>Connect the <strong>9V battery clip</strong> to the top positive rail. Double-check with a multimeter: VCC should read ~9V relative to GND, and there should be no continuity (short) between VCC and GND. Once verified, apply power briefly and listen for clean audio.</p>
</div>
</div>
</div>
</section>
<section aria-label="Testing and Troubleshooting">
<h2>Testing & Troubleshooting</h2>
<p>Before applying full power, perform a quick sanity check. Below are common failure modes and how to diagnose them.</p>
<div class="grid-2">
<div class="card">
<h3>Pre-Power Safety Checklist</h3>
<ul style="padding-left:1.1rem; color:var(--text-dim); font-size:.92rem;">
<li>✓ Multimeter shows <strong>~9V</strong> on VCC rail vs GND.</li>
<li>✓ No continuity beep between VCC and GND.</li>
<li>✓ All electrolytic capacitors have positive leg toward source.</li>
<li>✓ LM386 pin 1 / 8 jumper is secure (if using 200× gain).</li>
<li>✓ Speakers are connected through 220µF caps.</li>
<li>✓ Audio source volume is at <strong>minimum</strong> before turning on.</li>
</ul>
</div>
<div class="card">
<h3>Common Mistakes</h3>
<ul style="padding-left:1.1rem; color:var(--text-dim); font-size:.92rem;">
<li><strong>Reversed polarity on capacitors:</strong> Can cause loud pops, overheating, or capacitor venting. Always check the stripe (negative) orientation.</li>
<li><strong>Loose ground connections:</strong> A floating ground creates hum or no sound at all. Verify black jumpers are firmly seated.</li>
<li><strong>Feedback loops:</strong> If you hear a high-pitched squeal, separate input and output wires; do not run them parallel over long distances.</li>
<li><strong>Over-driving input:</strong> Start with source volume low and gradually increase. The LM386 can clip sharply above ~0.5V input.</li>
</ul>
</div>
</div>
<div class="card" style="margin-top:1.5rem;">
<h3>Quick Diagnostic Flow</h3>
<table>
<thead><tr><th>Symptom</th><th>Probable Cause</th><th>Fix</th></tr></thead>
<tbody>
<tr><td>No sound at all</td><td>Broken ground, missing VCC, open speaker wire</td><td>Check rails with multimeter; verify jumper continuity</td></tr>
<tr><td>Loud hum / buzz</td><td>Poor ground, missing decoupling cap, AC interference</td><td>Re-seat ground wires; add 0.1µF cap near VCC pin</td></tr>
<tr><td>Distorted / clipped sound</td><td>Input too hot, gain too high (200×), low battery</td><td>Reduce source volume; remove gain jumper; replace battery</td></tr>
<tr><td>One channel only</td><td>Miswired input cap, faulty LM386, open speaker</td><td>Swap left/right wires to isolate; replace chip if needed</td></tr>
</tbody>
</table>
</div>
</section>
<footer style="margin-top:3rem; padding-top:2rem; border-top:1px solid var(--border); color:var(--text-dim); font-size:.85rem;">
<p><strong>Built with analog fundamentals.</strong> This guide is intended for educational purposes. Always observe electrical safety, verify connections before applying power, and never exceed the voltage ratings of your components.</p>
<p style="margin-top:.5rem;">Design & documentation by an electronics engineer. All schematic graphics are inline SVG — no external images or dependencies.</p>
</footer>
</div>
<script>
(function () {
'use strict';
var __mods = {};
var __cache = {};
var __map = {};
function __require(id) {
if (__cache[id]) return __cache[id].exports;
var module = __cache[id] = { exports: {} };
var factory = __mods[id];
if (!factory) throw new Error("Module not found: " + id);
factory(module.exports, function (spec) {
var target = (__map[id] && __map[id][spec]) || spec;
return __require(target);
}, module);
return module.exports;
}
// ── module: src/main.ts ──
__mods["src/main.ts"] = function (exports, require, module) {
"use strict";
// Entry point. Runs after the DOM is parsed and after any classic
// <script> imports, so document queries and CDN globals are available.
// Import your other modules from here.
Object.defineProperty(exports, "__esModule", { value: true });
exports.start = start;
function start() {
// Replace this with the real startup sequence.
}
start();
};
// ── entry ──
__require("src/main.ts");
})();
</script>
</body>
</html>
<!-- agent-meta {"model":"thinkingmachines/inkling","provider":"openrouter","persona":"typescript","sessionId":"e99d76cd-b36d-42c6-b84b-0880cb185a75","tokensIn":76667,"tokensOut":10708,"tokensTotal":87375,"cost":0.060858720000000005,"turns":7,"toolCalls":6,"failedToolCalls":0,"timestamp":"2026-08-01T17:27:21.469Z"} -->